What should a winter chicken coop be like?
Winter chicken coop
You can keep chickens in the warm season in any room - even an old, flimsy barn, the main thing is to convert it for birds. But if the bird will be bred throughout the year, including the winter, care must be taken to ensure that it is comfortable and safe. The winter chicken coop differs from the summer one in many ways.
- The site for the construction of the winter site is selected on a hill. Then during the thaw, when the snow melts, water will not flow into it.
- It is always warm inside - approximately the same temperature is maintained due to heating. If there is no heating, then insulation is done - in any case, in the winter chicken coop it should be no less than +5...+10 degrees Celsius. But it is desirable that in winter the temperature in the chicken coop is +12 degrees and above, then the chickens will lay eggs without interruption.
Important!
Different breeds of chickens require their own specific conditions. Temperature and lighting are usually adjusted according to the needs of a particular breed.
- The winter chicken coop should be dry, as high humidity will quickly lead to the development of mold, and then diseases, among the birds.
- Artificial lighting is mandatory. After all, if in summer a couple of windows are enough, then in winter you cannot do without light bulbs. A short daylight hours will cause the chickens to stop laying eggs, so it’s impossible to do without additional lighting.
These are the most important criteria, according to which the premises are built. But, in addition, it should be safe and quiet inside. A quiet place for construction is selected - in the depths of the site, away from the house and roads, where it can be noisy.
What to put inside
The interior arrangement of a chicken coop in a dacha is the same as in a winter apartment. Drinkers and feeders are placed in the pen. It is better not to place feeders with handles in the middle - chickens sit on them, the droppings end up in the feed, and you have to throw them away. The best option is vessels with low sides for young birds and higher ones for adult birds. Then they stand nearby and calmly peck.
Secure ordinary thick branches - here you have a roost for chickens. More than enough for a chicken coop at the dacha
You need to make a perch inside the chicken coop. One meter goes for 5-6 chickens of small breeds, and 4-3 large ones. It is made at a height of about 50 cm. Thick branches can be used in a chicken coop at the dacha. Just secure them well.
Nests will also be needed. Old boxes in which dry hay is placed are suitable. You can knock them down from leftover boards, scraps of plywood, chipboard and other similar materials.
An approximate calculation is one nest for 2-3 hens. They will mainly lay in two or three nests, changing them periodically, but some chickens will choose empty ones for spending the night.
You can make such civil nests
They put them on the floor, if there is not enough space, they hang some on the wall, making a ladder to them. A ladder is an inclined board with thin strips nailed across it so that the paws have something to cling to. This is enough for summer apartments.
Materials for a winter chicken coop
Also check out these articles
- What is Lavrovishnya
- Varieties of cucumbers for greenhouses
- Proper fattening of pigs at home
- Plum variety Morning
Construction materials
Building a winter chicken coop is not difficult if you have all the necessary materials and space for construction. But what exactly materials might be needed? The number and type directly depend on what kind of room will be built, its design, features (type, functional), dimensions.
Important!
You cannot build a winter chicken coop from sheet iron, as it practically does not retain heat and leads to the formation of condensation on the walls.
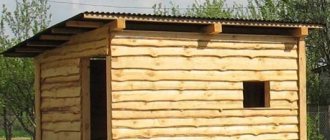
Typically, such rooms are made of wood, OSB, chipboard, plywood or similar material. They hold heat well and are easy to use. But bricks and cinder blocks are more difficult to work with. But here it all depends on the capabilities and preferences of the breeder. In addition, it is also worth purchasing basic materials immediately:
- cement, sand;
- nails, self-tapping screws, screws;
- bars and boards;
- chain-link mesh (for the enclosure);
- door and window hinges (if necessary);
- stone wool, polystyrene foam or other insulation material;
- windows or glass;
- pipe for ventilation;
- electrical cable, light bulbs, switch;
- roofing felt, slate or other roofing material;
- expanded clay (floor insulation).
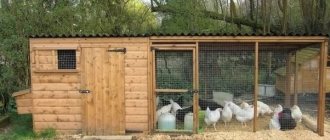
Photos of beautiful chicken coops
A little imagination and the chicken coop becomes a decoration of the site
An option for those who have a small plot: for 5-10 chickens you can easily make
Such a chicken coop is built super-quickly: boards are knocked down around the perimeter, plastic pipes are attached, partitions are cut out of OSB
This is just a house for chickens, not a barn
Takes up little space and is easy to maintain
Another option with a high mini-chicken coop
Mobile chicken coop for 5 chickens. Move at least every day
This is what happened to those who made such a chicken coop for their dacha
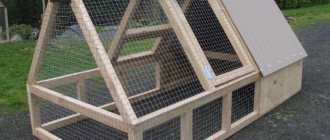
As you can see, chicken coops for summer cottages can be a decoration. There are very simple models that are made like frame greenhouses - on arcs made of plastic pipes.
Types of foundations
Pile-screw, columnar and strip foundations
Before building a winter chicken coop, a foundation is always made. In the case of such a small and simple structure, a pile, column or strip foundation is usually used.
- A pile-screw foundation is more expensive than a columnar foundation, but it can also withstand heavy loads. To build it, markings are made on the site using pegs with a stretched rope, and then piles are screwed into the corners of the building.
- A columnar foundation is usually placed on loose or sandy soil. After marking the area, holes are made around the perimeter (50x50 cm and 70 cm high) at a distance of a meter from each other. Sand is poured into the bottom of the holes, compacted, brick is laid and concrete is poured, and then posts are placed. They should rise 20-30 cm above the ground. Then the site is covered with gravel.
- Strip foundations are very popular when building a chicken coop. To build it, a trench is dug around the perimeter of the future building and formwork is made from boards. Then the concrete base is poured and this is the main drawback of the work, because working with concrete requires adherence to technology and you will have to wait a long time until the concrete hardens in order to move on to the subsequent stages of construction. So, a wooden chicken coop can be built only after 3 weeks, and a brick one - 4-5 weeks after pouring concrete.
How to build a winter chicken coop with your own hands?
We recommend reading our other articles
- Apple tree varieties for the Leningrad region
- Common diseases of turkey poults and their treatment
- White broad-breasted turkeys
- Cherry variety Fatezh
Leveling the site, drawing of the future building
Building a winter chicken coop with your own hands is not difficult, but you will have to follow certain rules, and the most important of them is maintaining the correct dimensions. The chicken coop must correspond to the number of chickens that will live in it, which means that you must first decide on the number of future birds.
Important!
You can build a winter chicken coop with your own hands without a drawing. However, experts still recommend making a drawing of the future building to make your work easier.
After determining the dimensions and purchasing materials, construction can begin.
- The first and most important thing is leveling the area. The top soil is removed at approximately 35 cm and a 10 cm cushion of gravel is made.
- Now the foundation is laid - any of those described above.
- The next stage of construction is installation of the floor. For this, a support frame is made. The bottom is lined with boards. The logs are made with a cross-section of 100x150 cm and a distance of 50 cm. The base is attached to the foundation pillars, but first a layer of roofing material is placed on them (for reliability). Expanded clay (insulation) is poured into the floor cells, and the floor is covered with boards.
Important!
To prevent floor boards from rotting for a long time, they are impregnated with a special solution.
- The walls are made of timber or OSB (can also be made of brick). In the case of timber, do not forget about the flax-jute material, which is placed between the beams so that there are no gaps. OSB is attached to a frame, which is made of vertical and horizontal beams fastened together. Such walls are sheathed on one side, then insulation (stone wool) is placed inside and only then the other side is sewn up.
- If the chicken coop is made of brick or timber, you need to insulate it from the outside with polystyrene foam, which is then fastened with a metal mesh, coated with a reinforcing mixture and covered with paint.
- During the construction of walls, openings are made for doors and windows.
- Now you need to insert windows and doors and check that they are secure and have no cracks (when closed).
- When erecting a winter chicken coop, one must not forget about ventilation. It can be made in the wall using a regular pipe.
- If necessary, heating is provided, but this is not necessary.
- The roof is constructed with a gable or single slope. Before laying the roofing material, the roof is glazed with roofing felt for waterproofing.
- Artificial light is made inside and it is very important to ensure that all wires are out of reach of chickens or moisture - they are usually placed in special plastic boxes.
- An enclosure is being built outside.
Creation of a ventilation system
When building a winter chicken coop with your own hands, do not forget about the presence of a ventilation system. This will ensure a healthy and comfortable microflora for the bird. To do this, you need to install a couple of ventilation pipes. One end should be 30-50 cm from the ceiling surface, while the second should be at ceiling level. In order to be able to regulate the intensity of ventilation, the ends of the pipes must be equipped with dampers.
Winter chicken coop for 10 chickens
Chicken coop for 10 chickens
It’s worth noting right away that a winter chicken coop for 10 chickens has a very modest size, so it won’t take up much space on the site. It is quickly built, easy to maintain and can have a wide variety of shapes.
Interesting!
There are an incredible variety of winter chicken coop designs for 10 chickens on the Internet. All you need is to find a suitable one and recreate it with your own hands, adding innovations and improvements if possible.
For 10 chickens, a house measuring 2x2 meters is needed (the methodology for building a chicken coop can be clarified above). Some chicken coops are built immediately with an aviary for walking, others - without. For 10 chickens, an aviary measuring 2x3 meters will be enough. After the chicken coop is built, it is important to equip it inside.
- A bedding 7-10 cm thick is spread on the floor.
- Perches are made from timber with a diameter of up to 6 cm. For 10 chickens, 2 meters of perches are enough. They can be made in several tiers to save space, but only with a ladder to make it easy to climb.
- Nests are installed for laying hens. They can be made in one or several tiers. A wide variety of materials are used for manufacturing (sometimes they are even made from old car tires). The size of each nest is 40x40 cm. For 10 females, only 2 nests are needed.
- Feeders and drinkers are hung on the walls or placed on the floor so that they do not interfere with the chickens, but are accessible at any time.
- In winter, incandescent lamps can be installed for additional heating.
Interior arrangement of a winter chicken coop
In addition to the main structure, the interior arrangement of the room is no less important for chickens. Ventilation, lighting and bedding options need to be considered. For greater productivity of birds, it is necessary to create comfortable conditions and install perches, nests, feeders and drinkers.
Perches
Perches are located in the far corner of the chicken coop. They are made from wooden beams: the optimal cross-section is 0.3x0.4 m.
Learn how to make your own chicken perch.
Perches made of bars are installed at a distance of about 0.3 m from each other. Each hen should have 30 cm of perch.
Nests
The number of nests is calculated depending on the number of chickens. For 10 birds, 2–3 places are usually installed.
When equipping the room, use the following calculations:
| Number of chickens, pcs. | Number of nests |
| 10 | 2–3 |
| 20 | 4–6 |
| 30 | 6–9 |
| 50 | 10–15 |
| 100 | 20–30 |
| 200 | 40–60 |
Various nest options are suitable for laying hens, which are selected depending on the preferences of the farmer:
- booths;
- with egg collectors;
- with double bottom;
- from boxes.
Nests must be located in a place protected from wind currents with minimal lighting.
Feeders and drinkers
It is recommended to place feeders and drinkers in different parts of the poultry house, but they should not be located on the walkway. Birds need to have free access to them.
Different types of containers are used for different types of feed:
- for wet food - a plastic feeder;
- for dry food - a long wooden feeder;
- for freshly cut grass - a mesh feeder.
Ventilation
Ventilation in a chicken coop can be of 3 types:
- Natural. This option is not the most reliable, but it is budget-friendly. To circulate fresh air, you can use windows and install a through pipe in the wall under the roof.
- Artificial. For this type, 2 pipes are installed. The first is located in one of the walls under the ceiling. The second is placed in the second wall, its lower end is brought above the floor, and its upper end is slightly below the ceiling. This design will allow air to circulate throughout the room.
- Automated. This option depends on the power supply and involves installing an automatic ventilation system.
Important! Proper ventilation helps control humidity. The optimal moisture level in the poultry house should be 60–70%.
Lighting the chicken coop in winter
Windows serve as a source of daylight. Due to the short daylight hours, it is also necessary to install artificial lighting.
Lamps are used for these purposes:
- energy saving;
- infrared;
- gas discharge;
- fluorescent 40-watt.
Important! It is not recommended to use incandescent lamps as they cannot fully provide the required lighting.
Daylight hours should be 11–12 hours. To automate lighting control, temporary controllers are used.
Litter
Slaked lime can serve as a base bedding. It is applied in a proportion of 1 kg per 1 sq. m of floor. The next layer is straw, hay or sawdust.
During the life of birds, sawdust is compacted. With the onset of cold weather, they are laid out in a layer of 10 cm. Then, every month, another 10 cm is added, after which, with the onset of warmth, all sawdust is removed. This type of bedding is also a method of insulation. Chickens love to rummage in sawdust, thereby keeping warm during the cold season.
Winter chicken coop for 20 chickens
Chicken coop for 20 chickens
For 20 chickens, a chicken coop measuring 3x3 meters will be enough. You shouldn’t be greedy with the amount of space, as in cramped spaces chickens may begin to show signs of cannibalism.
Perches are made at a rate of 20 cm per chicken. That is, at least 4 meters of timber with a diameter of about 6 cm is taken. They should be installed as far as possible from the entrance to the chicken coop. You can make 1 or 2 tiers.
Important!
It is advisable to use feeders and drinkers that are hung on the wall, then the food and water will not become too dirty. But they are hung no more than 15 cm from the floor.
The nests are located in the depths of the chicken coop, where it will be as comfortable as possible. To make a winter nest, large boxes, old tires, wooden boxes or something similar are used. They are filled with gravel and shell, and then soft straw to prevent the eggs from breaking. They must be strong and reliable. One nest is made for 3-5 chickens. That is, in a chicken coop for 20 chickens, only 4 nests are enough, which can be installed on top of each other (2 tiers).
Features of a chicken coop for 3 dozen chickens
Three dozen chickens will be enough if you decide to start a small household. Poultry farming is actually a profitable business, so if you want to make money from it, then you need to organize your business rationally so that your breadwinners are happy. And their place of residence is the main aspect of their productive fertility.
If you decide to build a chicken coop for 30 chickens with your own hands, then before you begin the construction process, you need to take into account some nuances and features. The construction procedure itself is not particularly complicated, but you need to be prepared at least at a basic level for this. The provided photos, drawings and videos will help you realize this idea.
So, before you build a chicken coop for 30 chickens with your own hands, you should first understand where it will be located. That is, determine exactly the place where the chicken coop will stand and remember that it should be the most optimal for your brood. All 30 chickens should feel right at home in the coop, so there are a few things to consider. First of all, it is necessary to consider how sunlight will fall on the building. Since it is necessary that there is as much light on the chicken coop as possible throughout the day, it is better to choose the appropriate place exactly where the sun's rays fall.
In addition, if you build a chicken coop for 30 chickens with your own hands on uneven ground, it can become a problem over time. Keep in mind that the ground on which the structure will be placed should not have any depressions in it. Otherwise, when it rains, moisture will collect here, and as a result, dampness will appear in the chicken coop over time. Accordingly, all 30 chickens will be more susceptible to contracting diseases such as flu, bronchitis or colds. To avoid this, choose a level place to build and keep in mind that these aspects are important, since the productivity of the chickens will depend on them, and accordingly your income from the business.
The next point to consider is the area. If you decide to build a chicken coop specifically for 30 chickens, this does not mean that it should be large in area or very spacious. You should at least take into account that such a large area will be very difficult to heat completely. Accordingly, you will be interested in the size that you need to consider if you want to build a chicken coop for 30 chickens with your own hands.
One square meter of chicken coop will be enough for three meaty chickens; if you are breeding laying hens, then four birds can easily fit into 1 “square”.
Again, it is not worth making a larger size, since the room will need to be heated. But in no case can it be less. If the space is too small, the chickens will not be able to move around the room properly. And over time, this can cause the birds to feel unwell and, as a result, become ill. That is, if you decide to build a chicken coop for 30 chickens with your own hands, you must understand that the most optimal area for construction is 7.5 by 8 square meters.
Moreover, these are not all the features. It should be understood that there should be more windows in the walls of your structure, as a result of which the openings for them must also be taken into account in advance. This will allow you to consume less electricity, which will be needed to light a chicken coop for 30 chickens, built with your own hands. Of course, such windows should be insulated before winter so that your birds do not freeze. We recommend that you position the window openings in such a way that they face the south side.
Features of chicken coops for 30 and 50 chickens
Chicken coop for 30 and 50 chickens
The number of chickens in the chicken coop is determined before the start of the winter chicken coop. After all, depending on the quantity, a certain area is created, the number of perches, nests.
- A chicken coop for 30 chickens should have an area of approximately 7.8-9 square meters. A winter chicken coop for 50 chickens has an area 1.5-2 times larger - 10-15 square meters.
- The roosts should be a total of 6 meters long for 30 hens. You can make them in 2-3 tiers of 3-2 meters each, respectively. For 50 chickens, a 10-meter-long roost beam is taken, which is divided into convenient sizes and attached to the walls.
- There are 6 nests for 30 chickens, and 10 nests for 50 chickens. But don’t forget that roosters don’t need them. So first you need to exclude roosters and then, based on the quantity received, make a certain number of nests (3-5 hens are taken per nest).
The winter chicken coop differs from the summer one only in its more compact size, insulation and small aviary. A properly built and equipped room allows you to receive eggs from hens even in the coldest months. It is for this reason that you should not save on building a winter chicken coop - the work and investments will fully pay for themselves in the first year.
Features of construction
The first thing you need to do is choose a place to build a building. It is necessary to find a sufficiently large space, since in addition to the chicken coop itself there must be a walking area. The more of this space, the better. Also consider the distance of the chicken coop for 30 chickens from the farmer’s house. It should be optimal so that there is no unpleasant odor and at the same time it is possible to regularly look after the bird.
If a location on the site has been chosen, you can proceed to planning the construction. It is important to consider the climate zone here. Residents of the north and central zone of our country need to install more windows and a chicken coop door on the south side. Sunlight is important for good performance and will help save electricity. In the south it is hot in the summer and chickens will need to hide in the shade, so most openings are placed on the north side of the barn.
When building a chicken coop for 30 chickens with your own hands, you need to pay special attention to the thermal insulation characteristics of the building. It is important that even in severe frost the temperature inside does not fall below +5 °C. For this purpose, they arrange deep bedding and think over a heating system.
Another important aspect of a 30-chicken coop is safety. To prevent predators from getting inside, a solid foundation is created.
After determining the location where to build the room, the required area is calculated. Three birds will require 1 m², so for our livestock 10 square meters will be sufficient. For example, if the length of the poultry house is 5 meters, then the width will be 2 meters. When walking, each bird will need 2 m² of free space. Based on this requirement, the walking area for 30 chickens must be at least 60 m².

