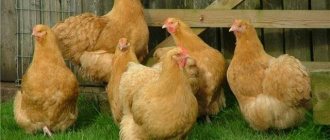
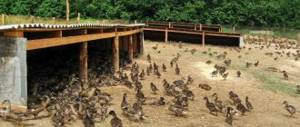
What should be a good floor in a chicken coop?
A well-equipped floor in a chicken coop guarantees comfortable conditions for its inhabitants: warmth, dryness, protection from rodents and predators that can dig under, and an acceptable condition of the litter with the frequency of cleaning that can be ensured.
For the owner, a correctly chosen floor does not present any surprises during operation: it is worth thinking about the properties and limitations of different designs in advance. Poultry requires a room temperature of at least +10 °C; only a frost-free bottom floor is acceptable under such requirements.
Hypothermia will lead to lung diseases and reduce productivity. In the worst case, the birds will freeze their paws. The type of material will affect the life of one covering before replacement, due to the difference in its thickness and the absorbency of the base. The filler should not be brought to a wet or compressed state for sanitary reasons. Easy cleaning will be ensured by a slight slope and several gutters for drainage.
Types of heated floors for poultry houses
In a wooden chicken coop on the foundation, you can make an electric heated floor. It is available in two versions: film and cable. Film heated floors are most suitable for creating floors for birds. This is due to the fact that it is laid on a rough wooden base, and a concrete screed is not provided.
Floor installation in the chicken coop
This floor heating system distributes heat evenly throughout the room. The infrared floor quickly heats the air, it is energy efficient, durable, and the infrared radiation has a positive effect on birds.
No less common is a heated floor with a cable heat source, however, to install a heated floor you will need to make a screed from a cement-sand mixture and concrete. An insulating material, a reinforced mesh for rigidity, is placed on the screed, to which the laid cable is attached. Then apply tile adhesive, a layer of screed, and a top wooden floor covering. This heated floor is labor-intensive and costs a significant amount of money.
Durability and safety
The floor must be durable. It would be sad if the chickens simply crush the floor covering. Or over time it will rot from increased moisture.
An equally important factor is the material used to make the floor. It should be easy to process. Weakly absorb moisture and retain heat.
When keeping domestic chickens, it is important to use flooring in such a way that their paws do not get stuck in it.
Otherwise, dislocations and fractures cannot be avoided. The development of leg diseases is possible: gout, arthritis.
Providing warmth and protection
Paul performs several tasks. It protects the room from the entry of cold air masses from the ground.
A strong thermal barrier between the ground and the chicken coop will create the necessary microclimate for keeping any poultry.
In any case, keeping chickens on an untreated surface is a bad idea.
Unprepared soil or any other covering may contain pests in the form of pathogenic bacteria or fungal spores. Subsequently, this can lead to the death of the entire livestock.
Therefore, a chicken coop requires a floor designed according to all the rules. The health of the birds will depend on this. As well as the quality of eggs and meat.
Other points
The floor protects the chickens from the environment and rodents.
Pathogenic microorganisms can be stored in the soil for years. Birds looking for food can simply peck them off. The floor allows you to protect the bird from such an outcome.
Rats, minks and ferrets often visit chicken coops. They can strangle a couple of chickens just for fun. The floor covering will not allow them to penetrate into the room. The article “How to get rid of rats in a chicken coop” will tell you about other methods of control.
The floor prevents the chickens from digging around the entire room. In search of food, these birds often dig the ground, thereby harming the owner. But when using flooring, this problem completely disappears.
There are benefits for humans too. It is much easier to remove manure from a properly made floor.
Which gender to choose
Soil moisture sometimes does not allow making an earthen floor. If the area allows for this type, the dirt floor will still get wet and dirty, absorbing moisture from the flooring, but it is the simplest option and can be made quickly. Concrete protects the chicken coop from undermining, rats, and predators; durable and reliable, but more expensive than others and will require insulation. The depth of groundwater is allowed no higher than 0.5 m. This is a justified choice if you plan to keep birds for a long period.
The wooden structure is the most environmentally friendly and will provide a warm floor in the poultry house, on its own or with minimal insulation.
Careful treatment against mold and fungi with products safe for poultry will be required. In waterlogged soils, a timber floor can be supported on piles or pillars, eliminating contact with the ground. For a chicken coop with a ground floor, it is not advisable to make the base of the walls from blocks; the birds can dig a hole in the ground, and the block will move.
Concrete and heated floors
It must be admitted that there is plenty of hassle and fuss with adobe floors. A simpler version of the floor for a chicken coop can be made by pouring a concrete screed. Sometimes a concrete floor is the only option, for example, if there are a lot of rats or mice, weasels or foxes in the area. In this case, they are not limited to a concrete screed and at least the basement part of the room is made of brick or casting.
As in the previous case, you need to dig a mini pit under the concrete floor in the chicken coop. First they lay sand on the bottom, then gravel, the last layer is broken brick, it can be silicate or red clay, it doesn’t matter. The thickness of the brick backfill should be at least 15-20 cm.
The brick cushion is covered with sand, and each fragment is driven into the base of the floor with a heavy hammer or sledgehammer. The work is hard, but it will require at least another day of work in the coop to knock down and level the brick bed.
Next, the screed is poured, without waterproofing and insulation; it will be replaced by a layer of broken brick. For the screed, prepare a regular 1:4 batch using M400 or M300 cement, the main thing is that the consistency of the first batch is liquid enough to spill over the entire surface.
The second step is to plan the surface without beacons, using the usual plastering rule. If desired, you can form a slight slope and drainage. This is useful when you have to wash and disinfect the floor with a jet from a portable high-pressure car wash.
Heated floor for chickens in a chicken coop
In areas where the climatic conditions are harsh and the winters are snowy and cold, chicken coop owners strive to properly insulate them so that the chickens live on dry litter and do not stop laying eggs. For this, household owners build foundations, use wooden coverings, and special devices. Today, they also have access to heated floors on a wooden covering or foundation screed.
It works more efficiently than an infrared heater, which does not cope well with its tasks.
Attention! There is a lot of fluff and feathers in the chicken coop, which constantly pollute the air and can catch fire at any moment, damaging the heating elements.
When installing a heated floor, this problem does not arise - the heating elements do not come into contact with the feather or bedding - it is impossible to spoil the system.
Features of wooden floors
This floor can be considered the best covering in a poultry house: it is warm and eliminates the use of bedding materials. When deciding to install such a floor, it is worth considering the presence of a foundation where the boards will be laid. So, for work you need to acquire the following materials:
- boards having a thickness of 25 cm;
- bars (section – 100x100 mm);
- nails;
- cement;
- bricks;
- hammer;
- saw.
The boards should be placed in such a way that a slight slope is formed, this will make cleaning the room easier.
Step-by-step instructions:
- Beam logs are laid parallel to each other on top of the foundation.
- The space between them is filled with expanded clay (if desired).
- The boards are laid perpendicular to the bars so that the joints fall on the middle part of the log.
- Fasten the logs to the boards with nails.
- Treating wood with a solution that has moisture-repellent properties.
- Lime mortar is applied to the wood flooring to protect the floor from pests.
Important point. After laying the wooden flooring, you need to remove all elements that could cause injury to birds (nails, sharp edges, knots, etc.).
Wooden floor
Before choosing a wooden floor for a chicken coop, it is worth getting acquainted with the positive and negative sides of this option. They can be found in the following table.
| pros | Minuses |
| Environmental friendliness of materials | An ideal environment for the spread of fungi and harmful microorganisms, which leads to deterioration of the sanitary condition of the poultry house |
| Easy and quick to install | Easy flammability of materials |
| If a breakdown occurs, you can easily replace the damaged part | Improper wood processing leads to injuries in chickens |
| It is possible to use different insulation options | Fragility of materials |
| No need to use bedding |
Advantages of using heated floors
The main advantages of this method of heating a poultry house:
- uniform heating of the wooden covering and bedding;
- fire safety;
- air heating rate in the chicken coop;
- the coating heats up to no more than 45 degrees;
- constant temperature is maintained;
- the litter is protected from increased humidity;
When installing heated floors, chickens live in comfort
- chickens do not become overcooled and do not walk on wet litter, which means they are less likely to become infected with infections and viruses.
Chicken coop bedding on the floor is a prerequisite for keeping
Regardless of the materials used in the coop, the floor covering is called bedding. This is relevant for floor keeping of poultry in special premises. Litter materials perform several functions simultaneously:
- absorb moisture;
- eliminate unpleasant odors;
- facilitate the process of cleaning and caring for poultry;
- provide additional protection during the cold season;
- prevents the development of diseases.
Advice! Before arranging the bedding layer, you should treat the floor with fluffed lime at the rate of 0.5 - 0.7 kg per 1 square meter. meter.
In winter, the floors are insulated with a thicker layer, this will protect the livestock from freezing. The main condition is that the litter should always be fresh and dry. Excessive dampness can cause diseases and insect pests.
For prevention, surfaces are treated with disinfectants. For safety reasons, it is advisable to use the services of specialists or use traditional methods, which will not affect the health of birds and people.
Chicken coop litter is divided into 3 types: thin, thick, non-replaceable (fermentation). The material can be used in several ways:
- with periodic replacement (after contamination, it is removed and replaced with a new one);
- with periodic layering (adding);
- deep permanent litter (does not change for 1-3 years);
- deep litter (preserved for the entire growing or fattening period).
The overall physical condition of the bird, egg production and productivity depend on the quality and purity of the bedding material. If the livestock has the opportunity to walk in the open air in warm weather, and the chicken coop is used only as a place to sleep, the bedding is made to a minimum thickness, up to 3 cm. In dry, hot weather, bedding is not practiced at all; bird droppings are simply removed after 2-3 days.
Sawdust bedding
Do-it-yourself floor insulation in a poultry house
Everyone knows that with the onset of cold weather, chickens stop laying eggs. This is the period from November to March. Therefore, it is better to make the floor in the chicken coop warm, with a constant temperature.
- A warm floor is similar in structure to a multi-layer cake, where the first layer on the foundation or sub-base is considered to be insulating material. The building material polystyrene foam is used in this role. It is laid end-to-end on a concrete base, starting from the wall, heading towards the exit.
Infrared Film Flooring
- To stiffen the floor, waterproofing materials are laid on the cable and covered with reinforcing mesh. It is laid out on wooden plates 1 cm thick so that the concrete solution forms a layer of at least 1.5 cm.
- After reinforcement, they begin to finish screeding the heated floor, which they built with their own hands. Concrete for this is prepared from sand (4 parts) and cement (1 part). They fill the entire floor area so that all the work can be done at once, without interruptions. The floor sets in a couple of days.
Temperature regulator
- To regulate the thermal regime, a temperature sensor is used. For the life of birds, +10 degrees, which is set on the thermostat, is enough.
After deciding to make a heated covering in the chicken coop with your own hands, pay attention to the materials used. They are different, and which heated floor is better is up to the household owner to decide, taking into account all the pros, cons and possibilities. If you follow all installation rules and requirements, you will get an excellent result.
Warm floor in a chicken coop:
Insulation
Warm floors can be made in several ways:
- build the lower floor using the principles of frame house construction as a basis;
- by arranging heating using pipes and media circulation (warm floor system);
- using USHP (insulated Swedish plate).
The most expensive second option is a heated floor with pipes and coolant. Its device is only suitable for large farms engaged in poultry farming on an ongoing basis and located in regions with harsh climatic conditions.
First they decide how to make a floor in the chicken coop so that it can be easily cleaned. The best option is a surface that can be easily washed under water pressure. It can be made using concrete, linoleum, porcelain stoneware.
Frame heated floor
To install such a floor, you will need the following materials and tools:
- boards for installing logs with a section of 20/40 or smaller;
- OSB sheets and/or moisture-resistant plywood with a thickness of at least 6 mm (can be replaced with planed floorboards);
- wood screws;
- slabs of mineral wool (glass wool, stone, basalt) or polystyrene foam;
- screwdriver or drill;
- wood hacksaw;
- roulette;
- construction bubble level at least 80 cm long.
What to make the floor of the chicken coop from is chosen based on the strength and thermal conductivity of the materials. Their hygroscopicity is also taken into account. For regions with a humid maritime climate and high groundwater levels, it is not recommended to use mineral wool as insulation due to its high degree of hygroscopicity.
If there is no other way out, it is necessary to ensure ventilation of the lower floor using a columnar foundation. It is important to treat all lumber with an antiseptic.
System installation
With the arrival of frost, in the period November-March, chickens do not want to lay eggs. Therefore, as mentioned earlier, you need to provide a constant, comfortable existence for the birds.
- First, prepare the rough surface by first clearing it of debris.
- Installation of thermal insulation. As a consumable, you can take a roll with a reflective surface. Or spend a little more and buy sheets of polystyrene foam. Perhaps the best representative of this material is penoplex. The slabs are laid on the base, towards the exit, starting from the far walls. Installing foam sheets is very quick and convenient. The slabs fit end to end tightly enough to avoid using foam. Unless you have to foam around the edges of the walls.
- Further actions will depend on what type of heating you choose: film or cable. Let's look at both.
Film.
After the thermal insulation is laid, lay down the infrared film in strips.
- Terminals are attached to the film, then the strips are connected. Places of cuts and connections with terminals are insulated with bitumen tape.
- Next, a thermostat is installed, thanks to which you can regulate the temperature.
- We connect the infrared floor to the thermostat.
- We connect the thermostat to the network and test the system for functionality.
- We collect floor coverings. You can use plywood, linoleum, boards as raw materials.
- The finishing touch will be to cover the floors with straw, which will warm up and ensure constant dryness in the chicken coop.
If it so happens that it is not possible to mount the IR film on the floor, you can always attach it to the ceiling and walls. This type of heating is environmentally friendly and cost-effective. If something in the description is not entirely clear to you, I advise you to watch the video instructions.
Cable.
The cable system must be mounted on concrete. Therefore, if it is not there initially, you will have to fill it in. Alternatively, the solution can be replaced with tile adhesive.
- Insulation. As with film, you will need a layer of insulation.
- Next is a layer of reinforced mesh. It is needed to fix the cable, as well as for better adhesion of the future layer of solution.
- We lay the cable. Keep the pitch between turns approximately 10 cm.
- We insert the temperature sensor into the corrugation and place it in the center of the chicken coop.
- We check the system for functionality.
- Pour in the mixture.
- We line the flooring with wood and cover it with straw.
Necessary materials
To install a floor on the ground, you need to stock up on small crushed stone, waterproofing material (roofing felt, roofing felt, bitumen), nails with a wide head, and clay to compact the top layer. Tools: shovel, hammer, rammer or log with handles, level.
For a concrete floor, the same thing, except for clay, and also: wooden planks as formwork, if needed, film, ordinary nails, cement, sand, water. Insulation, mesh for reinforcement, expanded clay instead of crushed stone - optional. Tools include a leveling bar and a reinforcement rod to compact the concrete. A concrete mixer can be replaced by a mixer attachment on a hammer drill; you will need a large bucket.
Wood floors require a thick base. If the chicken coop has already been built and there are no beams at the bottom, you can make a “floating” floor, i.e. independent from the main concrete block, on its own piles or columns. 4 column piles around the perimeter of the building are sufficient, if there are no more than two meters between them, to a depth of 0.8 m, with a diameter of 0.6 m.
You can take the lightest screw piles. Next you will need: 200x200 timber for the strapping, 200x100 timber for the joists, a 20 mm board of a convenient width (10–30 cm), staples, nails, wire, metal mesh, screws, hammer. Insulation of your choice.
Preparing for pouring
Ordinary cement is used to fill the floor. Initially, a recess up to 50 centimeters high is dug.
Broken bricks and other construction debris are placed at the bottom. Then everything is covered with sand. Brick is laid on top again. And so on up to a height of 30-35 centimeters.
Then they start pouring the floor.
Manufacturing algorithm
The earthen floor along the ground is kept from washing away from the outside by laying roofing felt in ditches near the wall 0.5 m deep, followed by backfilling. The upper edge of the roofing material, 10–20 cm, is fixed to the wall with nails, the lower edge remains in the ditch away from the wall, and the backfill is compacted. Inside, the soil is removed to a depth of 20–30 cm, sifted, and mixed with gravel.
Manufacturing Guide
Laying the floor in a chicken coop consists of preparatory and basic work. The preparatory stage contains the following steps:
- Choice of flooring material;
- Choice of insulation;
- Creating a project drawing;
- Preparing tools.
Insulation is selected depending on the material. The floor can be completely laid during the construction of the chicken coop, and if it is already built, then you can only replace or modify the upper part of the floor covering.
Dirt floor
This floor is usually made in a chicken coop without a foundation, when the walls are mounted on four supporting beams dug into the ground at the corners.
To make an earthen floor you will need:
- Pieces of roofing felt;
- Fine gravel;
- Shovel;
- Nails with a wide head;
- Hammer.
Ruberoid is necessary for partial waterproofing of the floor from the walls. The chicken coop will not be completely protected, but the roofing material will save you from erosion of the underground floor by storm water. Instead, you can use linoleum or any other moisture-proof flexible material.
Procedure for laying a dirt floor:
- Dig a ditch around the perimeter of the building, close to the wall, 0.3-0.5 m deep;
- Place pieces of roofing felt around the perimeter of the outside walls so that the lower part of the piece is in the ditch and the upper part overlaps the wall;
- Attach the tops of the pieces of roofing felt to the wall with nails;
- Fill the ditch with roofing felt and compact it;
- Level the ground inside the chicken coop, remove debris and weeds;
- Pour gravel and mix it with the outer layer of soil;
- Level the surface and compact it;
- Add bedding.
It will not be possible to perfectly level an earthen floor, but approximate leveling is necessary for the stability of nests, drinking bowls, etc.
When burying roofing felt in the ground, it is important to remember that it should bend in the direction away from the chicken coop. There should be 10-20 cm of roofing material on the wall.
When changing the litter, you need to remove and replace part of the top layer of the floor, as it becomes saturated with chicken excretions. To get rid of an unpleasant odor when using deep litter on an earthen floor, in the spring you should pour out a bucket of sifted ash 5-6 square meters. m of chicken coop floor.
Wooden floor
A quality wood floor should be installed during the coop construction phase . For such a floor, a foundation, columnar or strip, is required. A strip foundation will cost much more than a column foundation, and is more suitable for massive capital buildings; its use for a chicken coop is inappropriate.
The columnar foundation is made as follows:
- Along the perimeter of the building, holes are dug with a diameter of 0.6 m and a depth of 0.5-0.8 m;
- In each hole you need to lay a foundation pillar, made of bricks stacked in a square column, or from cement mortar;
- Leave for two days for complete setting;
- Bury the gaps between the ground and the pillars.
The distance between the pits should be no more than 1.5-2 meters so that the supporting beams do not bend.
You need to start laying the floor on the foundation by preparing materials and tools. The builder will need:
- Wooden beam with a section of 200 by 200 mm for support;
- Beam with a section of 200 by 100 mm for logs;
- Board 20 mm thick and 10-30 mm wide for covering;
- Insulation;
- Nails and hammer;
- Metal mesh;
- Wire;
- Self-tapping screws and screwdriver;
- Metal staples.
Mineral wool, polystyrene foam or dried straw bundles can be used as insulation. The mesh is necessary to maintain the insulation, since the wooden floor will be located at some elevation from the ground due to the foundation pillars. The elevation creates additional thermal insulation in the cold winter, and in the summer it protects from rainwater from below.
Installation of the floor covering is done as follows:
- A support beam is installed on the foundation pillars along the perimeter and fastened at the corners with staples on self-tapping screws;
- A base of metal mesh is installed on the supporting beam, which is secured with bent nails along the perimeter.
- A 200x100 beam is installed along the perimeter and attached with brackets to the supporting beams so that part of the beams protrudes into the space of the chicken coop for attaching the logs;
- Inside, 200x100 beams are laid edgewise on the mesh as lags every 0.5 m;
- The logs are nailed to the supporting beam with long nails (120 mm), driven in at a slight angle;
- Next, you need to cover all wooden parts with a hydrophobic coating and let them dry;
- Insulation is placed on the mesh in the space between the joists and pressed against the mesh with wire;
- The top covering boards are tightly nailed to the joists;
- The floor surface should also be treated with a hydrophobic mixture and allowed to dry, then covered with a lime solution to protect against parasites.
- If the chicken coop is being built as a whole, then before the sixth step you should pause the process to build the walls, after which it will be more convenient to lay insulation and top boards.
It is recommended to put poison for rats in the underground space where the insulation is located so that they do not make holes for themselves there. If there are an abundance of rats in the area, it is recommended to make the lower part of the underground not from mesh, but from thick boards treated with a moisture-proof solution. If pieces of insulation fit too loosely into the space between the joists, you can fill the free space with tufts of dried straw.
A hydrophobic solution for wood is sold in hardware stores; drying oil or varnish can be used instead. The floor should be treated with a hydrophobic solution simultaneously with the wooden walls, after which the bedding can be laid.
When using a wooden floor, it is important to periodically check the corners and joints with the wall for rats making holes. When changing the bedding, it is advisable to re-lime the floor.
Types of flooring
Flooring can be summer (light) and winter, increased thickness. The backfill layer also depends on the choice of base - more is laid on concrete than on wood and earth. Fermentation bacterial litter will speed up the processing of manure into compost; you will need to clean it up less often - such litter is laid in a thick layer.
Processes in the lower compressed parts occur with the release of heat. The content of ammonia and hydrogen sulfide in the air decreases, and the suffocating smell goes away. Litter change and disinfection can be carried out once a year, at the end of summer.
Thick litter - 50 cm, medium - 30 cm, summer - depending on how often it will be changed, it is only important to cover a solid base to protect the paws when digging. Shallow, medium bedding is cleaned 4–5 times a year. The litter is loosened and fresh material is added with the addition of superphosphate, 400 g per m2. Pallets can be installed under the perches.
Widely used for filling bedding:
- sawdust;
- shavings;
- straw and hay;
- river sand;
- needles (spruce branches);
- moss, moss peat;
- sunflower husk (husk).
The wood shavings should not be the smallest, otherwise the layer will quickly cake; when there are no large ones, you can mix them with other materials. Do not place shavings in their pure form - a laying hen may eat them, they will clog the crop and will not survive without emergency help. This type of bedding has many advantages: it absorbs moisture well and dries quickly (if birds loosen it, you can add grain for this); convenient to clean; When the birds are frolicking, the shavings help clean the plumage. A mixture with hay and straw is warmer than with shavings.
Shavings. Large chips will not absorb moisture well on their own and must be mixed with other fillers. Pine shavings and large pine needles may have sharp edges.
Straw and hay are used in a mixture with other fillers to insulate the bedding. Separately, they can quickly turn sour. Instead of a bacterial preparation, when installing fermented bedding, you can lay layers of fresh grass mixed with straw.
River sand of large fractions can be a backfill and a dry bath; birds will dig it and peck it. To prevent the litter from becoming dusty, you can mix it with hay.
Coniferous litter in a chicken coop, consisting of spruce branches, for example, is a controversial thing. Volatile substances that give pine needles a pleasant aroma can be dangerous in high concentrations. As a vitamin supplement, pine needles have a limit: 7 g per head, and are given in crushed form so as not to injure the bird. How many needles a particular chicken will peck from the litter and what will happen to its crop after that needs to be checked. It is recommended to carefully prepare this material until the coniferous-resinous aroma disappears, and to carry out the preparation from November to March.
Moss and peat will become a soft, hygroscopic covering with good thermal insulation properties.
Sunflower husks absorb moisture well, but the flooring needs to be thicker; birds can burrow into the husks.
Types of bedding
All bedding for chicken coops is divided into two groups:
- Deep (more than 10 cm thick);
- Shallow.
Deep litter is made from hay, straw, or chopped sunflower and corn stalks. A rare change of such litter promotes the occurrence of organic processes in the lower layers, as a result of which heat is generated, which can serve as a good source of heat in winter.
Special fermented bedding formulations are sold at farmers' markets. Fermented litter produces a significant amount of heat and allows you to maintain the required temperature in the coop in winter without additional heating. Such bedding is replaced every 2-3 years. A poultry farmer can make warm bedding himself by layering hay or straw with damp grass in several layers. Once replaced, the used fermented litter can be used as fertilizer.
Shallow litter may consist of:
- Sawdust;
- Struzhek;
- Sunflower husks;
- Moss peat;
- Chopped straw.
Sawdust accumulates moisture, crumples and rots from below, so it is better not to use it in its pure form, but to mix it with wood shavings and a small amount of hay.
Sunflower husks are easy to clean and absorb moisture well, but in such bedding chickens usually dig holes up to the floor. Therefore, it should not be used in a chicken coop with a concrete or dirt floor.
Peat moss is an excellent bedding for wooden and concrete floors, as it absorbs moisture well, absorbs unpleasant odors and serves as an excellent thermal insulation material.
Chopped straw is used in shallow bedding as a structure-diluting additive.
The influence of gender on the health of chickens
Errors in arranging floors in a chicken coop will lead to many problems: the spread of parasites, colds, inflammatory diseases and frostbite, contact with rodents, decreased productivity, etc.
Compacted floors are very important in winter. The process of decomposition of organic matter provides enough heat on wooden or soil bases, but on concrete one, even large, layer of litter may not be enough. In cold climates, additional insulation may be needed. The floor must be properly laid and the surface of the flooring must be kept dry.
Violation of the humidity regime, wetting of the flooring, flooding, contributes to the proliferation of feather parasites. Linoleum (PVC coating) is often used to insulate the floor itself from moisture in the underlayment, but this material is not environmentally friendly. Another use of flooring is to lay it in the ground instead of roofing felt for waterproofing.
Disinfection of floors in the chicken coop
Sanitation in the chicken coop is carried out to prevent infectious diseases and control parasites periodically and, if an infection is detected, unscheduled.
An effective method is wet complete processing in the absence of birds. The disinfectant solution is applied to surfaces by spray or aerosol. In the presence of birds, surface treatment will be of lower quality due to a weaker concentration of drugs and agents. Otherwise, disinfection poses a danger to the chickens themselves.
It is recommended to treat the birds with veterinary medications to prevent the chicken coop from becoming infected again. Dry methods: adding ash when installing an earthen floor and painting hidden wooden structures with slaked lime. The floor covering changes completely during sanitization. Moreover, both slaked lime and wood ash are added in small quantities to the diet of laying hens, that is, they are not dangerous, but only if they are properly prepared and kept for a long time.
Slaked lime is used when painting wooden structures to protect them from rot, mold and insects. It should be remembered that quicklime is dangerous. Wood ash is included in combined ash-sand or ash-sulfur dry baths to combat the beetle.
Why is it important to insulate flooring?
It is not advisable for chickens to use a room with a cold floor. It is necessary to insulate the floor in the chicken coop as soon as the foundation of the building is erected. Let's find out why.
A chicken has a body temperature of about 42 degrees. An unheated floor in winter will, at best, have a temperature of 2-3 degrees. As a result, the chickens’ body becomes hypothermic. This leads to a weakening of the bird's immunity. Subsequently, the bird falls ill and dies.
A warm floor is necessary if chickens are kept using the floor method. In other cases it doesn't matter.
When determining what is best to make a warm floor from, you can highlight wood. It is easy to insulate, and even easier to apply.
Two methods of insulation
Let's look at how to insulate the floor in a chicken coop. There are two options: temporary and cardinal.
In the first case, some kind of bedding is used. In the second, the “warm floor” system is used.
Using bedding made from various materials
Often, to insulate the floor, bedding made from materials of various origins is used. This is the so-called passive heating. When chickens warm up the base underneath them using body heat.
Common bedding materials: straw, hay, sawdust, wood chips, fluff.
The best and cheapest option is to use straw and sawdust. They are easy to change. And they keep the temperature perfectly.
In winter, the bedding is applied in a thick, dense layer, made by hand. It is not recommended to compact it. The bird will do it on its own.
In summer, the litter is laid in a thin layer. Only for nest formation. And making cleaning easier.
You can also lay a special substrate with a bacterial composition.
Which film to choose
The scope of infrared film is expanding every year, new generations are being produced, suitable for the most unexpected solutions. Almost any film can be attached to walls and ceilings. Vertical, horizontal, local. All that remains is to choose a manufacturer you trust. And take into account some features: for example, if you have a very humid room, choose a film with a moisture-proof coating. Practice shows that for an ideal result it is not necessary to buy the most expensive and “promoted” infrared film. In our case, we can be content with the cheapest South Korean film (Lavita LH, RexVa Xica, Q-Term); it is fully justified in its work.
Types of Electric Chicken Coop Floors
Since the air temperature in the room is very important for chickens, the main task of heating is to make them feel comfortable in their house. Installing underfloor heating in your chicken coop has numerous benefits, including:
- the litter that covers the floor in the chicken coop is constantly warmed up, which avoids moisture;
- creates the ability to set the exact temperature in the room;
- young animals are constantly in comfortable conditions without drafts and hypothermia;
- guarantee of electrical safety and moisture protection.
Heating of the chicken coop with a heated floor is carried out using an electric heated floor, which is offered in two types:
- cable;
- film
Cable heated floor for chicken coop
The biggest disadvantage of cable heated floors is that a concrete screed is required for its installation. That is, such a warm floor resembles a multi-layer cake:
- the first layer of concrete screed makes the floor perfectly flat;
- then a layer of insulation is laid;
- after – reinforced mesh (gives maximum rigidity);
- then – cable, cable mats for electric heated floors;
- a layer of screed (can be replaced with a layer of tile adhesive);
- finishing floor covering.
Such a “sandwich” of a cable heated floor is somewhat irrational, since its arrangement requires a lot of time, a lot of effort is expended, and the height of the room can be significantly reduced by laying a concrete screed.
Optimal heated floor for a chicken coop
The most optimal heated floors in a chicken coop are film floors that do not need to be laid in a screed. To lay a film-type heated floor, it is enough to level the subfloor, which can be achieved by laying boards and a thicker layer of insulation, which will smooth out all existing surface unevenness.
In addition, heating the chicken coop with a film-type heated floor provides numerous advantages:
- positive effect on the chicken’s body due to the emitted infrared radiation;
- has high energy efficiency (saves energy several times more than other types of electric floors);
- ensures uniform heating of the room due to graphic spraying;
- has the ability to quickly warm up a room and maintain it for a long time;
- due to the use of a cloudy polymer in the manufacture, thermal deformation of the floor during operation is excluded;
- the risk of failure due to sparks is eliminated or minimized.
The floor with installed IR film consists of the following layers:
- rough floor;
- insulation;
- film heated floor;
- the floor covering, which in chicken coops is most often made of wood, however, the covering can also be made of any other material, eventually sprinkled with sawdust.
To regulate the temperature in the room, it is necessary to install a thermostat, with the help of which a comfortable temperature will be constantly maintained in the chicken coop. You can select a thermostat suitable for the selected “warm floor” system in the chicken coop in the “Thermoregulators” section.
If you don’t know how to solve the issue of creating the optimal temperature in a chicken coop, contact our company’s managers for a free consultation: highly qualified specialists are ready to solve even the most complex problems of installing any type of heated floor.
By contacting our managers, you can always get answers to all questions regarding the installation of heated floors in any, even the most non-standard room.
Infrared heating of the chicken coop
They decided to make the infrared heating of the chicken coop not with lamps, but with a film for heated floors. Why carbon film for underfloor heating and not a cable system? Because:
- small room volume
- easy installation
- low heating inertia (soft warm-up)
- energy savings of 30%
The last argument was especially convincing because the infrared film was to become a constant source of heat in our chicken coop in the winter.
Film material still has many advantages; if anyone is interested, look and consult with suppliers.
First you need to figure out how many meters of film to buy. The calculation must be made based on the fact that the film heating device will be located on the ceiling and will be open, unlike those heated floor structures that are used in residential premises:
- for the chicken coop we choose a film with a power of 100 W/m2. Maximum 150 W/m2.
- on the surface of a film with a power of 100 W/m2 the heating temperature is = 45 degrees, and with a power of 150 W/m2 - 60 degrees.
- for comfortable heating above the perch, half the power is enough so that the temperature on the surface of the film is not 45 degrees, but only 22 degrees (with a film power of 100 W/m2). Therefore, the distance between the film on the ceiling and the chickens on the roost should be at least 1 m. If it is less, then the chickens on the roost will be too hot from the infrared radiation and they will begin to look for other places to spend the night.
- if you take a more powerful film, then it will need to be placed on the opposite side of the roost so as not to “fry” the chickens alive.
One of the online calculators calculated the area of the required film for a chicken coop to be 3 m2:
According to online calculations, it turned out that for a chicken coop with an area of 3 m2, you need to purchase a film measuring 1.6 m2.
Based on some adjustments to this calculation, we purchased a film 1 m wide and also 1 m long (1 m2): since we have no heat loss on the floor coverings (laminate, ceramic tiles), the heat transfer from the film will be directly directed into the air space of the chicken coop, we take smaller films sizes.