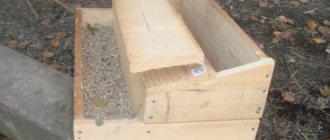
This article will talk about how to make nests for chickens. They are installed in small and large poultry houses, in certain places. This way the hens feel comfortable and do not have access to the eggs. Therefore, it is possible to avoid their pecking. There are several types of nesting structures. Some are done in a hurry. Others require a more serious approach. When arranging nests, you need to follow important assembly and care rules.
What you need to know about nests
What function do they perform?
All professionally built chicken coops are equipped with perches, which are described in the article “How to Build Chicken Perches.”
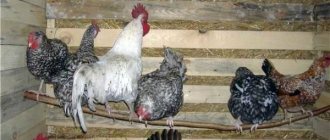
The second equally important element of any poultry house is nests for laying hens. Chickens sit in them to lay eggs.
There the laying hen is calm and comfortable without prying eyes. It’s convenient for the bird because it doesn’t have to look for a place of solitude.
The advantage for the farmer is that the eggs will be in one place and the shell will remain clean.
The arrangement of nests is also necessary for chickens to prevent them from pecking eggs. Laying hens simply will not have access to them. The eggs are rolled into a special box and lie there until the farmer comes to collect them.
Main rules
When building a nest for laying hens with your own hands, you need to take into account several requirements.
Nesting boxes are installed in a dark, warm place so that the chicken is comfortable. Sawdust or straw is placed at the bottom. The first option is preferable because it will be difficult for the bird to scatter the sawdust.
Do not place deep litter. Otherwise, the testicles will roll onto the floor and break. The bottom is made of mesh so that the flooring is ventilated and remains dry longer.
Additionally
The number of nests depends on the number of livestock. One is enough for 4-5 laying hens. Accordingly, for 10 chickens there are at least 2 nesting boxes. And for 20 birds - 5.
It is not recommended to build chicken nests in a draft or near the entrance to the room. There is high humidity and coolness there. The chicken may catch a cold and will lay fewer eggs. A fatal outcome cannot be ruled out.
You cannot install nesting boxes near uninsulated walls. They won't last long. And in winter, the hens will be cold during laying.
The structure should not have protruding bolts or jagged sharp corners. They can injure the hen.
Recommended Settings
Let's figure out how to correctly calculate the size of a nest from scrap materials. The parameters are selected taking into account the breed of bird. The chicken must be comfortable, otherwise she will never learn to lay in the right place.
For egg-laying hens, the width of the nest should be 30 centimeters, depth and height - 40 centimeters.
Representatives of meat and egg breeds have larger dimensions. Therefore, the size of the nests increases - 35/45/50 centimeters, respectively.
The height of the threshold is made at least 5 centimeters. It is also necessary to install a shelf for take-off, located approximately 10 centimeters from the door.
If a roof is proposed, it is installed at an angle of 45 degrees. The chickens will not be able to sit on it because their legs will slide off. This means they won’t be contaminated with droppings.
Rules for arranging a nest for laying hens with your own hands
Laying hens must be trained from the very beginning of laying eggs to lay eggs in the nest that you build for them in the chicken coop. But in order for the bird to get used to it as quickly as possible, the following conditions must be observed:
- For the nest in the chicken coop, you need to choose the darkest place.
- The place where the bird should lay eggs must not only be constantly dry, but also always warm. This can be achieved if the bedding is made of straw or sawdust, which chickens can hardly push out of their nest. But you just have to make sure that the flooring is a few centimeters below the sides of the nest itself, otherwise the eggs will roll out of it.
- To keep it dry, ventilation holes must be made in its bottom.
- Chicken houses should not be placed at the very entrance to the chicken coop; it is usually dark and cool there and the bird can get sick.
- You should not attach them to the wall, because in the cold season the bird will freeze there and its productivity will decrease.
- Carefully examine the nest for laying hens so that it is not only comfortable, but also free of nails and other sharp objects. Otherwise, the wounded bird will not be able to lay eggs.
- It is worth remembering that one nest can be designed for 5 laying hens. Make sure there are enough nests for all birds.
Single nesting box in the form of a booth
Features and required tools
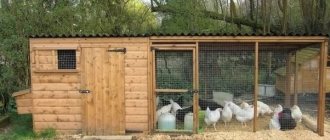
The easiest way is to make a nest box. The advantage is the minimum required skills and time for arrangement. Even a beginner can handle it. The design is compact, so it can be placed even in a small poultry house.
But you need to take into account the main disadvantage - the lack of a box into which the eggs will roll.
As a result, it may turn out that chickens peck eggs. But this drawback does not make the booth less popular.
To build a nest with your own hands, you will need a wooden sheet 1-2 centimeters thick, 4-5 wooden beams. And also a screwdriver, several screws, sandpaper.
Step-by-step instruction
Carefully sand the sheet of wood until it is smooth and free of nicks.
Cut out four squares measuring 35 by 35 centimeters. They will become the walls of the future nesting site.
One square will become the entrance to the nest. Therefore, you need to cut a circle in it according to the size of the laying hen. And adapt the threshold to it.
Now prepare 4 sticks. Their height should be the same as the wall blank.
Make a box from the resulting materials, connecting them with self-tapping screws. You can use nails, but self-tapping screws will hold the structure more securely. Check that they are not sticking out.
The chicken nest is almost ready. It remains to cut two blanks from a wooden sheet - the floor and the ceiling. They are fastened to the walls.
The last step is to check the nest box for sharp corners and jagged edges.
Design with egg collector
Advantages
Nests with egg collectors are comfortable and safe. They have another name - trap.
This design is more difficult to make than the previous version. But it has an undeniable advantage - laying hens do not have access to eggs. Therefore they remain intact.
How else to cope with this problem is described in the article “Chickens peck their eggs: why and what to do.”
Let's look at how to make a nest with an egg collector for laying hens with your own hands. The drawing will help you take into account all the nuances in advance.
Preparation
The main difference between this nest is the sloping bottom. It looks like a slide along which the egg falls into the box. Otherwise, the construction algorithm is the same as that of the booth.
To build such a nest for chickens with your own hands, you need to take wooden sheets and beams, a screwdriver, and self-tapping screws. You will also need soft fabric for the second bottom so that the eggs roll down and remain intact.
Felt is best. You can take insulated linoleum, but it must be placed inside out.
Where to begin
First you need to assemble the base of the future nest. Cut side walls measuring 65 by 90 centimeters from a wooden sheet.
You will also need a front wall - 65 by 4 centimeters. There should be an entrance for laying hens at a height of about 30 centimeters. Secure the side and front walls with beams.
Cut the ceiling and floor from a wooden sheet measuring 40 by 90 centimeters. And connect them to the walls.
Make a pallet from the boards, cover it with felt or linoleum on the wrong side. Install the lintel and fasten it to the side walls.
Final stages
The next stage is cutting out a blank for the floor-slope measuring 40 by 95 centimeters. It is installed at an angle of about 15 degrees.
Place straw on the bottom and secure the slope on top.
Cut a sheet measuring 45 by 40 centimeters - the backdrop. It is made shorter so that a gap appears. The eggs will roll down through it.
Attach the wall to the structure. And curtain the resulting gap with a soft cloth.
Now all that remains is to build the egg box. Any wooden container suitable for the size of the building will do.
Straw is placed in it to prevent the eggs from breaking.
Nest for laying hens with egg collector drawing. Making a nest with an egg collector for laying hens
When equipping a poultry house in his own backyard, every zealous owner of a personal subsidiary farm tries to come up with something of his own, to improve other people’s ideas and developments. A chicken nest with a built-in egg collector is one of these “improvements”, the idea was taken from the design of cages for keeping laying hens.
- During egg laying, most birds try to find a secluded corner, to prepare a comfortable soft place for the eggs, because in the future future offspring will hatch from them. Chickens in this regard are no exception; nothing avian is alien to them (except for flight), so they also like to fly in secluded, cozy corners, away from yard noise and other poultry. By making special nests and installing them in the “right” place, the poultry farmer is guaranteed to save himself from many troubles associated with the loss of eggs from pecking and their improper quality.
Drawing of a simple nest made of planks and plywood
A nest with a built-in egg collector is made of dry pine planks with a cross-section of 30x50 mm and plywood; you will also need self-tapping screws and a piece of soft fleecy material, for example a piece of linoleum with a felt base. The main difference between this device and similar ones without devices for collecting eggs is the inclined bottom, approximately at an angle of 10 degrees.
We twist the frame of the structure from the slats (according to the drawing); the number of cells in the battery can be arbitrary, depending on the number of laying hens in the herd. We cover the frame with plywood and lay linoleum on the bottom. A soft lining is necessary for comfortable placement of the hen. Nests with a rigid wooden or mesh base may be boycotted by hens.
It is recommended to install the finished nest battery in the least lit corner of the barn and make a convenient platform from the floor so that the bird can easily get into the nest.
Option with inclined trays
An interesting solution with removable metal trays, lined with soft fleecy fabric on the inside. The main advantage of this design is the ease of maintenance of the nests and ease of cleaning from contamination by droppings and debris.
Designs with fleecy rugs
An interesting solution using special plastic mats with large pile. Rugs to some extent replace bedding for chickens; they are more willing to use such nests.
In one of the English-language forums, the author of the topic talked about the successful experience of using artificial turf as mats for nest boxes. The big advantage of such bases is the uniformity of the coating, which does not prevent eggs from rolling into the receiving tray of the egg collector.
Nest with hen interlock
This type of nest is recommended for use by poultry farmers engaged in breeding work on their farm. Thanks to the interesting design features, a chicken that has entered such a nest will no longer be able to leave it on its own. The poultry farmer will know exactly which egg comes from which hen.
Regardless of the design features of the nests, all of these devices are extremely easy to manufacture and can be assembled at home. To build them, you do not need specialized tools and special devices; a hacksaw, hammer and screwdriver are enough.
Good, comfortable nesting boxes are a joy for laying hens, and therefore beneficial for their owners.
Single structure with double bottom
Advantages and required materials
According to the drawings of do-it-yourself nests for laying hens with a double bottom, they also exclude access to eggs.
This nest has a sloping bottom. And in the central part there is a gap. The eggs fall through it into a retractable tray.
To equip the structure you will need: plywood, sandpaper, fasteners, screwdrivers, hammer, insulation material.
Step-by-step instruction
The first step is to arrange a nest like a booth, according to the instructions described above. Then they make the bottom at an angle of 5 degrees towards the back of the structure.
If this step is performed correctly, a gap will appear through which the chicken eggs pass.
Build a pallet and nail felt to it. Or any other dense soft fabric. The pallet is made 15 centimeters longer than the depth of the structure. In this case, the farmer will be able to collect eggs without hindrance.
Attach the bar, otherwise the testicles will fall to the ground and break. The pallet is attached to the building at an angle of 5 degrees.
If you urgently need a nest
There are times when there is no time to build nests according to a multi-step scheme. And the laying hens have already begun laying eggs.
To avoid having to look for eggs all over the room, build a nesting box quickly.
Take a spacious wooden or plastic box. Place deep bedding in it and cover it with a curtain to make the chicken cozy. The chicken nest is ready.
Such structures are usually used temporarily until the farmer can build a more permanent structure. But sometimes hens get used to it and constantly lay eggs in such nests.
If there are no cases of eggs pecking, such an imitation nest can be left for a long time.
Single nesting box made of metal
Making a metal structure is more difficult and takes longer. But it has a longer service life than wooden nests.
You will need metal pipes, galvanized steel sheets, metal mesh, an angle grinder, screws, and a drill.
To begin, mark the steel sheets and cut out blanks for the nest. The bottom is made of metal mesh. It can be cut from old style beds. If this is not possible, weave a wire mesh.
Connect the walls and bottom at an angle of 10 degrees. Install the roof.
Now you need to cut a box for collecting eggs from steel sheets. Cover it with felt and attach it to the main structure.
Do-it-yourself nests for chickens with an egg collector. How to make a nest with an egg collector with your own hands
For construction you will need a certain set of materials and tools. In addition, depending on the material (metal or wood), the construction technology will differ.
Wooden
Let's consider the process of manufacturing a structure with an egg container.
Before you begin construction, you need to prepare:
- boards;
- a wooden block for the handle of the container;
- material for upholstering the tray (for example, polystyrene foam) and bedding (sawdust is preferable, but hay or straw can be used);
- staple gun;
- scissors;
- construction knife;
- fasteners;
- varnish and foam rubber for wood processing;
- perforator;
- curtain fabric.
Nest for chickens with egg collector:
The manufacturing process includes the following steps:
- Complete the drawing, taking into account the free space in the poultry house and the purpose of the chickens - for meat and egg breeds the parameters are usually a little larger. Overall dimensions must be at least 30x30x30 cm (depth can vary up to 40 cm).
- Treat the prepared boards with varnish using a foam sponge (for greater strength and moisture resistance).
- Connect all the parts together in the form of a box, making sure that the fastening elements do not protrude from the walls and cannot injure the bird.
- Make the floor at a 40° angle.
- Attach the tray to the front of the nest and line the inside with foam for softness.
- Attach a block of wood to the side of the tray lid as a handle.
- Cover the gap between the nest and the egg compartment with a fabric curtain.
Important! The structure should not be mounted directly on the wall; in winter the nest will cool down very quickly. In addition, such a design is unreliable. You need to use special stands - scaffolding.
Metal
This model requires more time and money, but it will also last longer.
To complete the work you will need:
- stainless steel sheets;
- metal pipes with a cross section of 3 cm;
- net;
- metal grinder;
- drill;
- fasteners;
- soft material for the tray.
The construction order is as follows:
- A drawing is drawn up and markings are made on metal sheets.
- The walls, roof and tray elements are cut out.
- The bottom is made of mesh.
- The walls and bottom are connected, and then the roof.
- A compartment for eggs is attached to the back wall, which is lined with soft material.
Important! The roof for any nest must be made at an angle. A straight roof will be the object of gatherings for laying hens and will soon take on an unusable appearance.
How to secure a finished nest
Nest boxes for laying are attached so that chickens can calmly go inside and lay eggs. Self-made structures are installed in the chicken coop in two ways: mounted on stands or hung on the wall.
Let's look at the first method step by step:
- Nail a 30/4/2 cm board to the wall. This is the base to which you will need to attach the nest.
- Attach another board at a 45 degree angle. The resulting angle should diverge towards the bottom.
- There should be a minimum of 45 centimeters between the ends of the boards.
- Now step back 50 centimeters and attach two more boards in the same way. But the planks must connect at the top.
- If everything is done correctly, you will have a compartment. Insert the socket into it and nail it to the plank.
There is a simple option for installing nests for chickens - attaching them directly to the wall. But in this case, it is necessary to insulate the back of the nesting box, otherwise the chickens will freeze in winter.
How to make hanging nest boxes
What are the advantages
If the chicken coop is small, the best option would be to install hanging nests outside.
You will be able to save space. But at the same time, give the chickens a separate area for laying. There is another advantage - you do not need to open the poultry house to collect the eggs.
But the suspended structure must be insulated. Otherwise, the chickens will freeze and catch a cold.
First stages of assembly
First, measure the chicken coop and make a drawing so as not to make mistakes when constructing the structure. Build the side walls of the future structure from beams and cover one side with plywood.
The next step is collecting the bottom. The dimensions of the frame and walls must be the same. Plywood is attached from below, and insulation is laid on it. It is recommended to use polystyrene foam. This material lasts longer. And insects do not appear in it.
After insulation, the top of the bottom is sheathed.
Then you need to secure the walls with the bottom. The sheathed side is placed inside the structure. The back wall is attached to the poultry house with bolts. Holes for fastening are pre-drilled in it.
How to finish
To quickly remove the testicles, doors are made in the front wall. They also need to be insulated.
The next step is the roof. The walls of the structure are connected by planks. Plywood is attached inside. Foil, insulation and roof covering are laid on it.
Partitions are installed inside.
At the last stage, the resulting nesting box is attached to the chicken coop. First, it is applied to the bars fixed to the walls of the room to make marks. Then fastening is done using bolts.
Hanging nests are attached only to a wooden chicken coop.
"Family" nest
There are common “family” nests with egg collectors - peculiar cells. The main advantage is that several chickens lay eggs in one structure at once.
You can install one long drawer and divide it with partitions. Or make a nest in several tiers.
The structural parameters depend on the size of the chicken coop. But each chicken must be allocated at least 100 square centimeters.
In “family” buildings, egg trays, drinking bowls, and feeders are installed. Step-by-step instructions for this and other structures are described in the article “How to make a cage for laying hens with your own hands.”
Types of nests and their features
Different types of nests differ in design features, manufacturing method and certain advantages. To choose the best option, you should familiarize yourself with all offers. The following varieties exist:
- Perches in boxes. The chicken houses look like a box with an entrance opening. A space is created inside for birds to retire and lay eggs. By installing such a structure, it is easy to train chickens to lay eggs in nests by closing them inside for a while.
- Nests made from scrap materials. This option is suitable for novice poultry farmers who have not had time to properly equip the chicken coop. This is also the optimal solution for small numbers and temporary breeding of birds. The main requirement is that all available materials must be intact and clean.
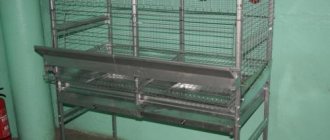
- Nests with egg collector. Eggs are collected from special trays, and laying hens interact with the eggs for a short amount of time. When making it yourself, a funnel-shaped hole is made in the central part of the perch.
See also
3 best methods for determining whether a domestic chicken is laying eggs or notRead
We train laying hens
Chickens are shy by nature. Therefore, at first they will be wary of the new structure. It is impossible to say with certainty how long it will take for the hen to get used to the nest.
First you need to try locking the chicken in the nest for a couple of nights. Sometimes this is enough. If the hen still refuses the new place, place the laid egg there.
It may be worth moving the structure to another, more comfortable place in the chicken coop. Or simply give the hen more time to get used to the new nesting area.
How to equip it with your own hands - drawing
It is optimal to install such devices in a quiet, darkened corner of the chicken coop or on some elevation, away from the main routes. Comfortable dimensions of a nest for a laying hen should take into account the basic dimensions of the birds; for convenience, the nest is made without the front and top parts. In order to equip the nest with an egg collector, it is enough to make a slightly inclined floor level so that the laid egg rolls into the back wall . There it is necessary to equip a special compartment for storing eggs. It should be lined with a soft material that acts as a shock absorber. To ensure that the curia does not have access to the egg collector, it is better to close its entrance with a sheet of felt or linoleum, which will automatically open under the weight of the egg.
