If you have birds on your farm, you may need nests for them. Their quality determines how many eggs will be laid. To ensure the most comfortable conditions, nests are constructed with your own hands. Below we will reveal the main question on this topic: how to make a nest?
How to make a nest?
Prerequisites for creating nests
The most favorable time for mating and hatching eggs is summer and the first autumn months. During this period, most birds find it easier to bear heavy loads.
bird's Nest
Of course, offspring can also be produced in winter. But this issue should be approached responsibly. Birds' diets should contain many beneficial minerals and vitamins. Thanks to modern technology, this opportunity is now available to everyone.
Making nesting boxes for ducks
The nest must meet the following criteria:
- the place is always dry;
- you need a thick bedding so that the eggs always remain intact;
- location – as far from the passage as possible;
- dim light and minimal sounds.
duck nest
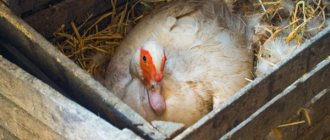
If the poultry farmer ignores the recommendations given, the duck will not like the proposed environment. Then the bird will go looking for a cozy place away from home. To prevent this from happening, you need to choose the right room and build nests. Ideally, they are under a roof, which creates a feeling of protection for the duck. Make a threshold at the bottom, thanks to it the masonry will not roll out.
Wooden duck nest
Wood is the most preferred material for building a nest.
Step-by-step construction instructions
Necessary materials:
- plywood sheets;
Plywood sheet for making nests - six wooden slats;
- self-tapping screws;
- hacksaw;
- pencil and ruler.
Sequencing:
Step 1. Cut two rectangular pieces from a plywood sheet, size 40x40 centimeters.
Step 2. On one side at a height of 9 centimeters, make a hole as a hole, size - 17x17 centimeters.
The hole in the nest can be round
Step 3. Prepare a couple more parts, one side wall should be 40 centimeters, and the second – 50.
Step 4: Build the ceiling.
Step 5. Create a frame structure from slats.
Step 6. Fasten all the parts, after which the nest will be ready.
It is not recommended to use iron to arrange the bottom.
Place the finished house on a plank floor and place deep bedding underneath. It needs to be updated regularly to prevent harmful bacteria from accumulating on the testicles. Birds lay eggs mainly in the morning, so the straw should be changed in the evening.
Video - How to make a nest for ducks
What to prepare for the master class
Before you make a nest with your own hands, you need to take care of the materials and tools. Among them:
- Flexible rods of different lengths;
- Plastic disposable plate;
- Threads;
- Scissors;
- Glue;
- Decor (leaves, beads, stones, fluff, feathers, bird figurine).
The branches must be flexible, so it is worth narrowing the field for their search and choosing only birch, willow, willow, lemongrass, raspberry or grapevine twigs.
Training ducks to the nest
After the nest is ready, you need to train the duck to lay eggs only in it. This is not difficult to do, just follow the tips below:
- Place a chalk or plaster egg in the box. The bird will see him and instantly realize where to fly.
- If the duck is stubborn, then lock it in a barn for a couple of days.
- Birds should not be allowed to see their eggs being taken from them. They will get scared and then training will become much more difficult than before.
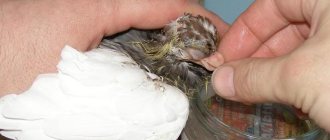
How to put a duck on eggs? Finding and preparing a hen
How to plant a duck on eggs is a question that arises among many farmers. How to create a nest and place a duck on it? How to choose a suitable hen? You will learn all this in this article.
Designer design (decoration and finishing) of the nest
So, the base of the artificial nest is ready. Professionals advise: for a small decorative nest, quail eggs will work wonderfully, in which you need to make a neat hole in the center and blow out all the contents.
Birds spend the whole day searching for scraps or pieces to make their nest cozy and secure. Of course, it won’t be very difficult for a person to do this much faster, but don’t rush and you will get great pleasure from searching for delightful objects in the forest, in nature and in the area of your home.
Making nesting boxes for geese
Geese love spacious nests. To build them yourself, car tires, old boxes or baskets are suitable.
Main features of nests for geese:
- Big sizes. On average, their height is 0.6 meters. But the given figure is approximate, because it does not take into account the size and breed of the goose.
- The structure is installed on the ground in a dark place, because birds do not like bright light. Nests need to be separated if there are two or three females inside.
Hidden from prying eyes, a goose's nest
- 30 days before the start of the breeding season, you need to take care of preparing the site. Birds must have time to adapt to it.
Sequencing
Now let's look at several options for how to arrange a nest. The first one is from a box. You will need the following materials and tools:
- lining;
- fasteners;
- hammer, hacksaw and tape measure;
- litter;
- plywood.
Prices for popular models of jigsaws
Jigsaw
The first way to create a nest
Step 1. Saw the lining into identical blocks, one wall should be 0.5 meters, and the second - 0.6.
Sawing lining
Step 2. Take 4 bars, nail slats to them at a distance of 4 centimeters.
Marking
Step 3. Place plywood on the bottom to keep the goose and eggs warm;
Ready nest
Step 4. Treat the entire structure with a special solution.
The second way to create a nest
The second way is to weave from willow branches. For this you will need:
- willow branches of varying thickness;
- knife;
- awl;
- spacer ring.
Sequencing:
Step 1. First you need to weave a cross. Take several twigs, one of them is the shortest. Use a knife to cut 3 rods in the middle and thread others through them. Attach another twig to the side of the cross.
Weaving a nest for a goose
Step 2. Braid the crosses. This should be done crosswise. Each turn should be pressed tightly together. The diameter of the cross should be 70 centimeters.
Step 3: Prepare the sides. To do this, insert the side rods, their tips should be pointed. To get an interesting pattern and unusual design, experiment with shades.
Step 4. Braid the edges, bend the rays and gather the ends of the twigs on the side above the device, then tie them in the center with wire.
Weaving a nest for a goose, part 2
Step 5. Place the spacer ring inside the product and secure it to the sides.
Step 6. Hang the ends of the fixed rods on the outside.
Step 7. At a height of twenty centimeters, untie the tied rays and braid the edges of the basket on either side.
Step 8. Wrap the first rib with the second, bend the third by 5 centimeters and trim.
Step 9. Braid the last rod and cut off the remaining ends with a knife.
Another option for a ready-made wicker nest for a goose
Making a nest with your own hands from
Before you start work, you need to decide on the size of the craft - will it be a large composition for decorating a landscape design or a miniature souvenir for a holiday. Ideas for creativity can be viewed on the thematic site. It is necessary to stock up in advance on materials for the base, decoration of the craft, and tools for its manufacture. By following simple instructions, everyone can build a beautiful composition with their own hands.
Related article: How to crochet a curtain: popular techniques for beginners (+50 photos)
Branches and twigs
Option #1
This master class is about weaving a nest from branches. To do this, you will need the most flexible twigs, such as those of birch, willow, willow, and grapevine. On sale you can find decorative sticks of various sizes that resemble brushwood. It is enough to go for a walk and collect small twigs - they should not be dry or brittle.
How to make a nest from branches:
- The flexible rod is rolled into a circle.
- A jumper should form in the center of the circle.
- The ribs of the nest are attached to the jumper with twine or wire.
- Then you need to form an odd number of edges in a circle.
- Flexible rods are woven between the ribs and secured with wire.
- They decorate the composition with down, feathers, sisal, pebbles - the souvenir is ready.
At first, the souvenir will turn out to be incomplete, with large holes. After weaving the frame, you can add additional twigs and dry grass to fill the gaps.
In the video: a nest made of birch branches.
Option No. 2
The option of creating a topiary nest using hard branches is more complex and requires special care. But the finished composition is well suited for decorating an interior or garden.
Completing of the work:
- You need to take a thick cable and free it from the cores.
- Pull strong wire into the winding for rigidity.
- Give the blanks an arbitrary shape of the stems.
- Bend the edges of the wire into the shape of hooks to secure.
- Wrap the prepared elements with bright green yarn.
- Seal the hole in the flower pot with regular tape.
- Make a thick mixture of building plaster and fill the pots.
- Place the wire stems into the plaster until the mixture hardens.
- Decorate the base of the composition with decorative flowers and leaves.
Now you can move on to forming the bird’s nest itself from dry tree branches or decorative sticks:
- It is necessary to inflate a balloon with a diameter of about 15 cm.
- Use tape to tighten the tail, giving it a round shape.
- Connect three branches into a triangle with hot glue.
- Attach to the ball, gradually add new branches.
- When the nest is formed, the ball can be deflated and removed.
- Attach the craft to the main composition and decorate.
If you can’t form a frame from twigs or branches, you can use a plastic plate for the base, attaching ribs to it for weaving the craft. When attaching branches to the ball, you need to carefully use the glue gun so that the ball does not burst.
You can add a few feathers to the middle of the nest, hang the craft on the main composition and plant decorative birds. This topiary looks attractive and unusual.
Hay or grass
The easiest way to make a bird's nest is to use hay, straw or grass. This is the best material, simple and pliable to work with. A small souvenir is suitable as an Easter decoration - you can place painted eggs in the prepared craft.
Related article: Beautiful Easter baskets made of paper and cardboard (3 MK)
How to make a decorative nest with your own hands from hay (grass) using a cardboard base:
- Lay out the hay in a flagellum 80 cm long.
- Wrap a strong thread around the flagellum in a spiral.
- Cut a circle with a diameter of 11 cm from cardboard.
- Spread the edge of the circle halfway with hot glue.
- Apply a hay rope in a circle and press.
- Coat the second half of the base, add hay.
- Form a nest from the rope in a spiral, smearing the edges with hay.
To ensure that the craft retains the shape of the bird’s nest, the hay is expanded upward in a circle. The bottom of the souvenir is lined with down, feather grass, sisal, and hay. The souvenir can be decorated with beautiful feathers and small spruce branches. In the same way, you can make an interesting craft from grass in 20 minutes.
You can choose green material to make the souvenir look natural, although imagination is appropriate in design work.
In the video: a bird's nest made of dry grass with your own hands.
Thread and yarn
Beautiful compositions in the form of bird's nests are made from cotton threads. They are quite thin, come in different colors and shades, and easily fit on the base - a balloon.
How to make a nest from threads:
- Inflate a balloon of any diameter - according to the size of the souvenir.
- Pull a thread into a thick needle and pierce a tube of PVA glue.
- Pull out the needle and wrap the ball with thread soaked in glue.
- You need to wrap a wide part of the ball, approximately to the middle.
- Leave the craft to dry for a day, remove the ball.
It's even easier to make a bird's nest from a skein of twisted yarn and a plastic base. The threads need to be well fluffed, glued to the plastic bottom and formed into a nest, decorated at your discretion with bright decor, down, and feathers.
You can decorate a delicate souvenir with artificial feathers, twigs, flowers, or place eggs, birds or other animals inside.
In the video: a decorative ball-nest made of twine with your own hands.
Cardboard and paper
In a short time it’s easy to make a beautiful craft from scrap materials - paper and cardboard. A plastic plate is used under the base and glue is used to secure it.
Making a paper nest:
- Kraft paper and thick cardboard are cut into thin strips 10 cm long and 1 cm wide.
- Turn the container upside down and wrap the plate in cling film.
- Each strip is smeared with glue and applied to the base with one edge in a chaotic manner - there should be free ends left.
- After drying, the plate is removed, the film is removed and the souvenir is decorated with colorful decorative elements.
Related article: Foam stone - garden and wall design
If desired, you can put birds in the nest, put quail eggs without contents, or make paper filling.
In the video: a basket for Easter eggs in the form of a paper nest.
Hatching nests
One laying hen occupies a place for about an hour and a half. If the goose does not leave when a person appears, but puts out its wings threateningly, then the time has come to prepare its nest for incubation. Before laying the eggs, the nest should be carefully prepared - cleaned with special solutions and soft straw laid on the bottom. Hay is not recommended for this purpose.
Goose nest
Usually you get up to 10 eggs. During brooding, the female should have fresh food and water nearby. The goose leaves the nest very rarely. So that people don’t forget about her, she sometimes screams loudly. After short and short walks, she quickly returns back.
These birds are not afraid of the cold. However, eggs can become hypothermic. Because of this, nests must be placed in heated rooms in winter.
Experts do not recommend changing nests. The female may end up looking for a place to hatch her eggs herself. This is fraught with loss of offspring. If you planted several geese nearby, you need to make small curtains so that they do not see each other. Otherwise, they will become nervous, which will negatively affect the quality of the eggs.
Instructions
How to start making a nest for storks? To do this, you need to put together a wooden cross to which the base will be fixed. A bicycle wheel, a wooden platform or a metal grate is attached to the crosspiece - a nesting box is installed on them.
How to make a nest from branches? You need to lay the vine in a circle, intertwining the twigs with each other. For reliability, the branches are fixed in several places with twine or wire. At the base the nest should be slightly narrower; towards the top it is widened.
On a note! Try to use waterproof elements to create a nest. If you fix the branches with twine, over time it will become deformed from rain and wind. Wire is used instead of twine.
If you have an old wide basket on the farm, it can be used as a base. New branches are fixed on the sides, creating an imitation of a real bird's nest. The inside of the basket is lined with cut twigs, moss, and grass.
Also, the base can be an old plastic or metal basin, which is decorated on the sides with branches. The twigs and twigs are intertwined and tied together so that they do not fall apart.
When the nesting box is ready, you can fix a decorative figurine of a stork in it. The bird's beak should be turned towards the house: then this figurine will bring family happiness and prosperity.
A decorative nest for the garden can be the beginning of creative experiments in landscape design. This is such an exciting activity that many summer residents get a taste for it and decorate their garden on an ongoing basis.
For Easter, you can make small nests and place paints there; you can decorate the interior of your apartment with nests. Such decorative nests with Easter cakes and eggs will be an excellent gift for family and friends on Easter.
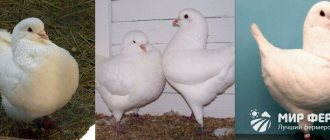
Making nesting boxes for pigeons
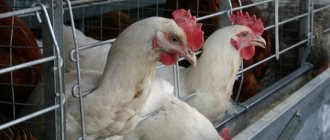
In order for pigeons to live well, comfortable conditions should be created for them. If the room is empty, the birds will not like it. Therefore, the following requirements must be met:
- The spaciousness and freshness of the building. If the cage has an unpleasant smell and is cramped, then the female will definitely not want to live there, much less lay eggs.
Pigeon nest
- Provide good ventilation.
- Install a large window.
Types of pigeon nests
For pigeons, nests are usually made in two versions. Let's look at each of them in detail.
Wooden pigeon nest
Wooden nest for pigeons
Wooden structures are not difficult to make, since the material is affordable and completely environmentally friendly. To work you will need:
- fine metal mesh;
- wooden blocks;
- hammer and nails;
- hacksaw;
- tape measure and pencil;
- sandpaper.
First, take sandpaper and sand the bars so that there are no burrs on them. After this, make the necessary markings and cut the boards. Next, you can fasten the structure and make the bottom from the mesh.
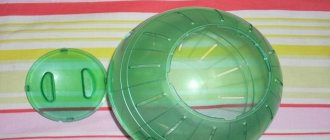
Styrofoam nest
This material is not affected by temperature changes and has a long service life. In addition, thanks to the foam, the nest is comfortable and warm.
Required:
- high density foam;
- PVA glue;
- metal pan;
- knife;
- parchment;
- construction bandage.
Foam nest for pigeon
To make a nest, you need to do the following work:
Step 1 . Measure the dimensions of the nests on a sheet of foam.
Step 2 . Cut rectangular pieces with a knife.
Step 3 . Cover the surface of the foam with parchment.
Step 4 . Heat the pan, place it on the parchment, press down and get a smooth hole.
Step 5 . To prevent the material from collapsing, treat all workpieces with glue and apply a construction bandage.
Perches for pigeons
We must not forget that pigeons need somewhere to sit and rest. We will need the following materials and tools:
- a board 150 mm wide and 20 mm thick;
- plywood sheet;
- nails, hammer and hacksaw.
Perches for pigeons
We make a roost like this:
Step 1 . First, the blanks are cut out. The first should be 180, and the second 200 millimeters. They are connected in such a way that it turns out to be 90 degrees.
Step 2 . Next, make a piece in the shape of a triangle from a piece of plywood.
Step 3 . Drill a hole to secure the perch to the wall.
Birds will thank you for such places to sit.
Prices for pigeon nests
Nest for pigeons Ø23 cm
How to make a bird's nest with your own hands
I'll show you how to make a nest for our feathered friends to raise their babies. This is a simple open-fronted nesting house for small to medium sized birds such as thrushes, wrens and flycatchers. Some birds that were once widespread are disappearing due to habitat loss and climate change, and gardens provide a valuable refuge. Wild birds are very interesting and every effort should be made to attract them to the garden and help them breed by creating artificial bird nests.
Making a bird nest will give you additional pest control benefits. Birds, especially during the breeding season, will stalk and eat many garden pests. It is much better to encourage the natural balance of wildlife in your garden than to disrupt the ecosystem by spraying pesticides...
Step 1: Tools and materials to make your own nest
You will need a saw, a hammer, some 30mm nails, wood glue, a tape measure, a marker and a piece of wood about 3 feet (1 meter), 6″ (150 mm) wide and 1/2″ (12 mm) thick. Drills are needed to drill holes for mounting, but are not vital.
I used a piece of unplaned wood that had been collecting dust in the back of my shed for years. If you buy new, use regular wood. It won't last as long as treated wood, but treated wood may later cause harm to the birds you are trying to help. This bird nest took me just over an hour to create, which included both design and a little effort, so you can make several in one day.
Step 2: Measuring and Cutting
Mark the tree and look at the details you need. Note the single miter cut, which gives a slight angle to allow rain to roll off the roof. Remember this detail so you know exactly how to make a bird's nest with your own hands.
If you are using different widths or thicknesses of wood you must adjust the measurements. If you cut the sides first, which is quite easy to do, you will need to change the required width and length of the lid. The length of the lid will be the width plus twice the thickness. The length of the base will be the width minus two thicknesses.
I give measurements in natural and metric units, although you don't need to be so precise, even if you are going to give the birds a luxurious and safe home, much safer than some of the places they will find to nest.
Step 3: Assembling the Bird's Nest
Drive the nails into the pieces so that they just come out on the other side. This will make it much easier for you to assemble the bird nest later. Use PVA wood glue for extra strength. Apply a thin bead of glue along the edge just before driving the nails into place.
Firstly, attach one of the sides to the back and then install on the base. Secure all parts with nails. Then install the front panel, not forgetting to apply glue along the contour. Apply more glue and carefully align the other side and press. Add nails where you see fit.
Step 4: Completion
Finally, place the nest box on the bench, add glue and press down the lid. Add glue to the gap where the cover meets the backplate to keep rain out. Also rub a little glue into the ends of the bird's nest at the top so that the water is not absorbed as easily.
Drill a couple of holes in the top and bottom of the back plate so that you can attach the box to the tree branch. If you don't have a drill, you should cut two pairs of notches on the sides, level with the holes.
Safe wood preservatives can be applied, and you can use one of these if you wish, but never use conventional preservatives such as creosote. Never treat from the inside.
You could paint the outside of the bird's nest, but I prefer a natural look, as even new wood ages quickly. So, I told you how to make a nest with your own hands, and now you need to hang the bird’s nest correctly.
Step 5: Location, location, location
Use thick wire to tie the bird's nest to a strong vertical branch or tree trunk. If the tree is still young, the wire will cut into the trunk as the trunk thickens, so the nest must be re-tied next year. The bird's nest should also be removed every fall to prepare it for the following spring.
Where you place the bird nest will determine how successfully it will be populated. Different birds have different preferences, but in general the placement requirements are: At least 8 feet off the ground to be safe from predators. Not too close to a food source, or other area where birds congregate. Partial shade, and definitely not in full sun. Partially hidden by greenery, but with a clear flight path to it.
If you live in a city and don't have a suitable tree, place the box under your home's eaves. Urban birds need even more help as they have a very limited range. And you know how to make a nest with your own hands, so help them.
Making nesting boxes for quails
Any poultry farmer knows that chickens and other birds lay eggs in nests. But we know the least information about quails. This knowledge gap needs to be corrected. In captivity, boxes are used as quail nests. True, they do not rush in them as vigorously as chickens. These birds like to lay eggs at ground level.
Quail nest
An excellent bedding would be shavings or hay. However, female quails are unpretentious - they can lay eggs in an ordinary sandbox. This behavior is quite common for them: quails fly free anywhere when the time comes.
Based on this, it is recommended to make cages with a slatted floor, where there will be a slight slope. Otherwise, they may accidentally crush all the eggs.
Is it possible to buy a nest yourself?
Now we know how to make a nest with our own hands, but there is another question: can we just buy it? Of course you can, but you don’t know how this nest was made and whether it is as strong as it seems at first glance.
Making nesting boxes for guinea fowl
The guinea fowl is a free and capricious creature. The bird does not like to sit in a cage. Therefore, there is no point in arranging nests for them. Females refuse artificial incubators and build nests where they consider it practical. Most often this is dense grass or bushes.
Guinea fowl are distinguished by their cohesion. The whole team prefers to rush in one place. To minimize egg loss, birds should be kept indoors until noon. Afterwards you can let him go outside for a walk.
Guinea fowl nesting area
Guinea fowl prefer to lay eggs in the warm season. To increase the number of offspring, leave several eggs in the nest. Otherwise, the bird will think that the nest is ruined and will go to look for a more secluded place. Guinea fowl become very shy while hatching eggs. It is not uncommon for them to abandon the roost long before the chicks hatch. If this happens, you can place a chicken on the egg.
Cozy nest
In kindergarten with children you can also make a simple craft “Nest with chicks”
Necessary materials for the craft:
- disposable paper plate;
- set of colored cardboard;
- scissors;
- brown gouache;
- brush;
- PVA glue;
- plastic eyes.
Before you start making crafts, remind your children about safety precautions when working with scissors.
Application progress:
- Cut a paper plate in half.
- Paint half of the plate with light brown paint.
- Cut out 3 ovals of different colors (red, blue, orange) from cardboard.
- Glue eyes and triangular beaks on top of the ovals.
- Glue the bird blanks to the back of the plate.
- You can stick strips of beige paper on top of half the plate. To create the impression of a real nest, the strips should be glued in a random order.
The nest with chicks is ready! While doing the work, tell the children about how birds lay eggs, how they feed their offspring, how they protect the chicks from the cold and predators. Kids will be interested to learn about the peculiarities of life of migratory and wintering birds.
How to make a pheasant nest
Pheasants need a free environment. Nests for these birds should be made in closed enclosures. First, a layer of peat is placed in the nest, with a little turf and hay on top. The nest is made in the shape of a small depression, sizes - from 130 to 250 depending on the size of the bird. In the future, the female will finish building her nest herself.
When keeping pheasants, a number of conditions must be taken into account:
- be sure to provide shelter: females will be able to provide shelter both from annoying males and from bad weather;
- build several poultry houses if you are planning mass breeding;
- pheasants need vegetation, so sow the ground in the enclosure with millet, rapeseed, etc.;
An aviary seeded with lush grass
- To prevent birds from getting hurt, the nets are made of soft metals.
Since nests are made very simply, let’s focus on the construction of the enclosure itself. For this you need:
- planks;
- Rabitz;
- for the roof of the house - corrugated sheeting;
- hammer with nails;
- dye;
- for the base of the enclosure - posts.
Pheasant nest
Sequencing:
Step 1 . First you should put the pillars, they will become the basis of the bird room. For such a task, iron, wood or concrete are used. It's great if you can install concrete pillars, they will last a long time.
Step 2 . Afterwards the area needs to be marked. Cement is poured into the holes dug for the base and posts are installed.
Step 3 . Next comes the difficult stage of stretching the mesh. Even for experienced craftsmen, this process takes a lot of time and effort. Use nails to secure the mesh.
Step 4 . What is missing from the enclosure? That's right, roofs! If it is built from slate, it is recommended to initially install wooden rafters.
Video - Aviary for pheasants from a greenhouse
How to make a nest correctly
So, let's get down to the most important part of our story - manufacturing. To make this beautiful miracle of nature, you first need to create the form itself.
Usually the shape is made using plates. It is necessary to wrap the stems of various natural sources around the plate. For example, you can use vines, grass, straw and much more.
However, the material must be strong enough. Such materials can be easily found in forested areas, so it is easy to find.
You need to place various algae or straw on top. Algae gives the nest a more beautiful appearance, which makes it possible to enjoy a good nest from a visual point of view.
And again, you can’t live without reliability. You'll have to secure it all with glue, otherwise everything could collapse in an instant. A decorative nest for the garden should not only be beneficial to nature, but also pleasing to the human eye.
Our last steps will be to secure the beam. It needs to be bent in the shape of the letter U. After which you need to tie the ends with thread or wire. Don't forget to take a photo of the twig nest
How to make a nest for turkeys
Turkeys love silence, darkness and warmth. If the room meets these requirements, then the bird feels completely safe. In addition, in the absence of drafts, the turkey will not get sick, and the eggs will be of high quality. Straw, branches (can be replaced with earth) and hay are laid on the floor.
There are many types of nests themselves. Let's consider three main ones:
- From boxes. A regular vegetable one will do for this. It will be better if it is made of wood. The box should be washed, thoroughly disinfected and dried. Place a bedding on the bottom and surround it with a fabric screen.
Nest made from turkey boxes
- Made from bricks. Make a soft layer on the surface where you plan to place the nest. A regular padded jacket, for example, is perfect. Bricks are laid on top in 1 row. Moreover, you need to leave free space to place the eggs.
- With retractable egg collector. They look like a nest-box; its bottom is made of several parts. There should be a gap between them. The egg should pass through the hole freely. A collection box should be installed under the bottom.
Nest with egg collector for turkeys
Keeping turkeys
Keeping turkeys is profitable and interesting! Read about what a room for turkeys should be like, how to organize a walk for the bird and how to feed it.
Step-by-step instruction
Then you can get down to business. Step-by-step instructions on how to make a nest from branches are as follows:
Twist one twig into a tight ring, leaving a small hole in the center. Take an odd number of other branches (preferably more than five) and secure them to the ring with a rope.
Start circular weaving according to the basket principle: first pass the twig under the jumper, then over it. Secure the ends of the branches with twine, and after finishing, continue weaving from where you stopped.
Fill the missing spaces with branches, grass, feathers or down.
Place decorated eggs or bird figurines in the formed bed.
There is another option for making a nest:
Break the branches into small sticks two to five centimeters long.
Inflate the balloon and tie it tightly. Coat the ball with a generous layer of glue.
Place broken branches on the surface in a chaotic manner, repeating the shape of the nest. Deflate the balloon and release the fake.
Supplement the product with rods and other decorative elements as desired.
Kitchen interior in a country houseAdvantages of facade glazing
- Dwarf conifers: types and benefits
Rules for caring for nests
Want lots of healthy chickens? Then take proper care of your eggs! To do this, use the tips below:
- change the bedding every evening;
- collect eggs more often in cold weather, otherwise they will freeze;
- store them in a dry place free of foreign strong odors;
Ideal conditions for birds - clean the nests themselves regularly so that microbes do not infect the eggs and undermine the health of the birds themselves;
- nests should be comfortable and free for all birds;
- In order not to disturb the hens, you need to make noise insulation.