User manual
We suggest that you read the instructions for using the incubator, which includes a detailed description of all processes.
Preparatory process
Before laying, it is recommended to carry out preparatory work, which consists of the following processes:
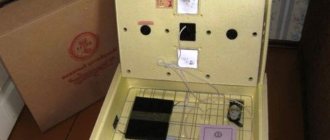
Initially, an inspection is carried out and the equipment is checked. A grate is placed on the bottom
It is important that the smooth side faces up. A device for rotation is installed on the body. The body is covered with a lid. Connect the device to the network. Set the thermostat to medium temperature. The incubator will heat up for about half an hour, after reaching the set level the indicator will begin to blink. Connect to thermostat.
The owners of the incubator do not have a question about how to increase the humidity, since the device has a water container, which allows it to independently regulate this indicator.
Video: preparing the incubator for laying eggs
Laying eggs
Eggs are placed only after pouring warm water and reaching a temperature of 37.7ºC. You can use a regular thermometer to check the temperature. Only fresh, uncontaminated eggs are selected for laying; washing them is strictly prohibited.
They should be medium in size, the shell should only be smooth and matte in color. Eggs that will be subsequently placed in an incubator can be stored for no more than 10 days at a temperature of not lower than 10ºC.
Otherwise, all incubation qualities will decrease. To make it easier to control when turning over, it is recommended to mark the shell with a soft pencil; these can be ordinary numbers. After all the manipulations, the eggs are placed next to each other on their sides.
Incubation rules
On average, if all recommendations are followed, chicks appear 21 days after laying.
To achieve success in this, it is important to adhere to the following rules:
- Constantly monitor the temperature inside the incubator.
- Do not forget to add water after disconnecting the device from the power supply.
- Make sure that the turning device does not malfunction and the revolution occurs at the specified time. In the first 5 days, it is recommended to carry out these manipulations every 3 hours. Then no more than 2 times a day.
- Starting from day 5, it is recommended to ventilate the incubator. To prevent the eggs from overheating.
- Swap eggs, performing these actions using a roll, so as not to damage the tissue of the embryo.
- Two days before the chicks hatch, it is prohibited to carry out a coup.
- Throughout the entire period, egg development is monitored twice. This can be done using a regular lamp. The first on the 7th day, and the second on the 13th day.
- If the light goes out, the incubator is moved to a warm room and covered with thick material.
- After the appearance of the first chicks, the temperature is reduced by 0.5 ºС.
- After finishing hatching the eggs, wash the apparatus well.
Chicks hatching
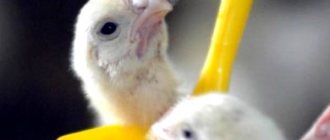
After the chicks are born, they are not removed from the incubator until they are completely dry.
At this time, it is important to conduct an inspection to identify unhealthy chickens and not waste time and money on their further maintenance. Suitable young animals are selected according to the following indicators:
- Umbilical cord. Ideally, it should be closed and without traces of blood.
- Pooh. Yellow in color, soft to the touch and shiny in appearance.
- Beak. Strong without anomalies.
- Eyes. No cloudy spots with shine.
- Wings. Tightly pressed to the body.
- The chick must be mobile and respond to surrounding sounds.
Important! The time of the initial examination depends on the subsequent direction of the chickens: for egg hens it is 6 hours after birth, and for meat hens it is 10 hours
Incubator Layer Bi-2 for 77 and 104 eggs
Laying hen Bi-2 is an analogue of Bi-1 for its intended purpose. This incubator is also aimed at chicken eggs, but with the installation of nets it can also be used for other species (geese, quail, ducks, etc.). Grates can also be used to increase capacity.
READ ALSO: Top 10 weeds whose benefits no one knows
The body is made of special plastic, which is durable and lightweight. Technical characteristics and dimensions are somewhat different from Bi-1.
Laying hen Bi-2 can accommodate a larger number of eggs.
Technical characteristics of Laying hens Bi-2
The incubator of this model has dimensions of 60 by 30 by 65 cm. Its weight based on the egg capacity ranges from 2-6 kg. The device is powered by electricity. The permissible network voltage is 220V with a frequency of 50Hz. The permissible voltage error is no more than 10% of the norm.
The unit consumes 20W. With such power, it is capable of maintaining temperatures from 33 to 43C with an accuracy of ± 0.2C. Inside the incubator, the permissible temperature spread from the corners to the center is no more than 1C.
The advantage of Laying Bi-2 is the presence of enhanced protection against electric shock (class 2) and penetration of excess water (IPX4).
The incubator of this model has dimensions of 60 by 30 by 65 cm.
Modifications
Bi-2 is available in versions with digital and analogue thermoregulation. The automatic regulator itself stabilizes the temperature inside the incubator by periodically turning the heating element on and off. The analogue option involves manual adjustment with a special relay.
Turning eggs can occur in different assemblies using different methods:
- manually;
- automatically – the cell is turned over according to a configured timer without human intervention using an automatic rotation device;
- mechanically - the nets are turned over with a special lever.
Power can be supplied either from the mains only, or from the mains and a 12V battery. Battery types come with automatic and manual switching of the electricity source.
Turning over in Layer Bi-2 occurs in three ways.
What does an incubator consist of?
The main components of the Nesushka Bi-2 incubator are a body with a heating element inside and a lid on top. It has a clear glass viewing window, a temperature controller, light bulbs or a small electronic display for activity signals.
There are gratings and mesh installed inside, and a turning device (optional). A power cord is included for power supply.
How to use Layer Bi-2
The process of use is fully consistent with Bi-1. The prepared eggs are placed in a preheated incubator, the desired temperature and operating mode are set. The lid is closed and left for 19-21 days with regular monitoring. In automatic mode, the grate should move smoothly with revolutions once an hour.
The operating principle of Layer Bi-1 and Bi-2 is the same.
What are the advantages of automatic and manual modes?
We recommend reading our other articles
- Pickled plums
- What is the best way to feed goslings from birth?
- Spider mites on cucumbers
- Description of the eggplant variety Black Beauty
Layer incubators have automatic, semi-automatic and manual operating modes. Not all models have such a variety, but if you look, you can find it. What are the features of each of these modes?
The automatic incubator is equipped with a digital display
- The automatic incubator is equipped with a digital display and special buttons so that you can set the egg turning time, the desired temperature, and humidity, which the machine remembers. Thus, the breeder only needs to enter the required indicators once, and then the incubator does everything itself.
- The semi-automatic mode allows you to set the time for turning the eggs, but as for temperature and humidity, they need to be adjusted all the time.
- Manual mode does not allow you to leave for a long time. The breeder must constantly turn the eggs manually and monitor all indicators in the incubator. On the other hand, the system is under complete human control and the result largely depends on the actions of the breeder, and not the machine, which can significantly increase the hatchability of birds.
These are the features of different models of Layer incubator; the choice, of course, depends on the capabilities and preferences of the breeder. The most expensive models are fully automated, the cheapest ones are manual.
My review of the laying incubator.
I have a conflicting opinion about this incubator, in general the incubator is not bad and is quite enough for home use, it has automatic egg turning, there are models with the possibility of backup power from a battery, which is very important. But the case is flimsy and not very convenient; if opened frequently, the foam can burst. Here the manufacturer can understand that if you make a more durable case from plastic or metal, the cost of the product will increase significantly, and the incubator is designed for the average buyer.
It’s up to you to buy the “Nasedka” incubator or not; I won’t give any advice, I just provided general information and reviews from the owners of the incubator.
Video review from the owner of the hen incubator.
If you have experience using an incubator, please leave your feedback about the Laying Incubator in the comments for our readers.
1300518.09.20197 min.
Artificial incubation of eggs is an important process when breeding chickens, and for some breeds it is generally the only way to replenish the flock population. The latter applies to broiler chicken breeds. For this purpose, purchased incubators or self-assembled devices are used. Among the factory models, the most popular is the Layer device from a domestic manufacturer, which has become widespread due to its low price and high quality of work. In addition, the device is small in size, which is convenient for small farms. In the article we will look at the features of the device, the pros and cons of this incubator.
—>
Preparing for Incubation
If you are new to poultry farming and have never dealt with incubators before, then you need to carefully study the operating instructions for the Layer device. After which you can begin the process of preparing for incubation, which involves adjusting the temperature regulator, as well as selecting and laying eggs.
Adjusting the thermostat
Adjusting the temperature controller takes place in several stages. For this procedure it is necessary to use a medical thermometer. First make sure that your thermometer shows plausible data (you can take several of them and compare using your body temperature as an example). Then place the thermometer at the bottom of the autoincubator in a position from which its indicators will be ideally viewed.
Next, you need to turn on the autoincubator to a 220 V network and set the temperature regulator sensor to the desired value (it is preferable to set the incubation temperature, which is +37.7 ° C). Wait 15-25 minutes until the indicator on the device flashes, after which you need to check the thermometer readings. If the difference between the set and received temperatures is more than 0.5 °C, then it is necessary to adjust the temperature regime using the thermostat knob.
Did you know? Industrial production of autoincubators in the USSR began in 1928.
After the auto-incubator has reached the desired temperature, replace the medical thermometer with the one that comes with the device. Compare the readings, and if there is a difference in them, then take it into account in further procedures.
Egg selection
It is necessary to collect eggs for incubation as often as possible. If they are not immediately put into storage, there is a risk of hypothermia (in winter, spring, autumn) or overheating (in summer). Freshly collected eggs are stored in a specially equipped place at an air temperature of +8 ... + 12 ° C and humidity - 75-80%. The storage location should be free of drafts and regular or temporary lighting.
Eggs can be stored for no more than 7 days before incubation. Duck and goose eggs can be stored in optimal conditions for about 8-10 days
It is important to understand that long-term pre-incubation storage leads to harmful microorganisms beginning to penetrate into the eggs.
Read about the intricacies of incubating chickens, goslings, turkey poults, ducks, turkey fowl, guinea fowl, and quails.
When selecting eggs, ensure the correct shape and condition of the shell. Incubation material suitable for hatching young animals must have a smooth, uniform shell of medium thickness and density.
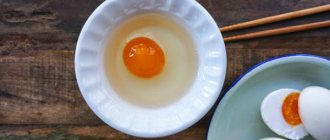
A more detailed analysis of eggs for incubation can be done using an ovoscope. Using it, it is necessary to select eggs that have an air chamber of normal size. In addition, they must have a yolk that does not stick to the shell, with a smooth outline.
Laying eggs
Under no circumstances should you carry out shell disinfection procedures before adding incubation material. Such procedures will cause the antibacterial or other drug to leak through the shell and into the egg. And this will lead to the fact that the offspring may never hatch.
Important! If there is a regular temperature difference in the room of up to ± 10 ° C, then expect temperature changes in the incubator of up to ± 1-2 ° C. Eggs that are prepared for laying must be marked on both sides with the symbols “O” and “X”
This will help you control the rollovers and avoid getting confused. After laying the incubation material, insert the thermometer and close the incubator lid
Eggs that are prepared for laying must be marked on both sides with the symbols “O” and “X”. This will help you control the rollovers and avoid getting confused. After laying the incubation material, a thermometer is inserted and the incubator lid is closed.
Technical characteristics of the household incubator BI1 BI2 Laying hen
General characteristics for all models of laying hen incubators:
- Power supply from 220V network.
- Power consumption 30-60 W depending on the model.
- The operating range of the thermostat is +33°С+43°С.
- The heating element is incandescent lamps or heating elements.
Laying incubators for 36 and 63 eggs are intended exclusively for domestic use. There is no need to talk about any farming, much less industrial use. Therefore, in the simplest configurations, nothing except an analog temperature controller is supplied.
Important! The owner of such a BI1 incubator must be prepared for the fact that round-the-clock monitoring of temperature and moisture in the incubator will fall on his shoulders. And at the same time, regular, up to eight times a day, turning of incubated eggs.
Such a device is only suitable for young children in a zoo corner. The right decision would be to purchase an incubator that comes with:
- Digital thermostat, because its error does not exceed ±0.2°C. The analogue one has ±1°C, and such an error can very often cause the death of embryos.
- Hygrometer. Allows you to control the humidity in the incubator, which also increases the percentage of hatched chicks. This device only monitors and does not regulate the humidity level in the incubation chamber.
- Mechanism for automatically turning eggs after a specified period of time. It is necessary to turn the eggs regularly, otherwise the embryo may stick to the inner film of the egg. In this case, the chick will not develop and will not hatch.
- Additional output for connecting 12V autonomous power supply. A very useful option, especially where power outages occur.
With this configuration, the cost of a BI1 household incubator will be only 30 percent more expensive than stock. But this money more than pays off when using the device.
BI2 incubators for 77 and 104 eggs are technically more equipped devices. Although they remain formally household items, they can already be found in small farms as spare ones. And for beginning farmers, BI2 is often the first incubator. Here, a digital thermostat, for example, is installed not as an option, but as a basic feature. The line of models even includes a complete set - “BI2 incubator is 100% automatic.”
Note! Everything in this incubator is automated, right down to programming temperature changes depending on the incubation period, and an alarm system, thanks to which the poultry farmer will immediately be aware if something in the incubation compartment has gone wrong.
Technical description of the incubator
The device is available in two versions: Bi-1 and Bi-2, differing in capacity. At the customer's request, the incubator can be equipped with a thermostat with a battery and manual or automatic switches.
The models have the following characteristics:
- Temperature range: from 30 to 45°,
- Error in determining temperature: less than 0.5°,
- Warming up for the first time takes 1.5 hours,
- The egg turning timer is set to 1-8 hours.
The incubation apparatus operates from a regular electrical network. When the voltage fluctuates +/- 10%, it is recommended to use a stabilizer. The incubator is equipped with a battery that allows you to maintain the set temperature in the absence of electricity for up to 20 hours. The standard package includes a digital automatic control unit required for:
- Maintaining humidity levels and temperature conditions,
- Turning eggs at a specified time interval,
- Switching to 12 W battery operation
- Calculating the incubation period of eggs,
- Water level control,
- Internal lighting.
The capacity of such units depends on the type of eggs being laid. So, in an incubator for 52 chicken eggs, you can put 36 turkey eggs or 36 duck eggs. This volume is more than enough for home poultry breeding.
Before placing eggs in the incubator, they must be checked with an ovoscope for fertilization, and make sure that the shell is clean and undamaged. Not only the health of the brood, but also the serviceability of the machine depends on this.
Contamination can lead to the rapid development of mold and mildew inside the cooking chamber.
Setting the temperature
In the Layer incubator, the temperature difference inside the incubation compartment is no more than a degree. For greater accuracy of operation of the device, it is not recommended to place it next to other electrical devices.
Automatic control of the incubation process is carried out using digital thermostats. They are equipped with memory, a temperature sensor and additional terminals necessary for connection to the battery. When laying eggs, you need to take into account that it takes time to completely warm up the chamber: when the containers are completely filled, about 3-3.5 hours.
Temperature and humidity depend on the type of bird. For chicken eggs, the first 11 days are set at 37.9°, from 12 to 20 - 37.2°, from the 21st day - 37°. For ducks: from 1 to 7 days - 38°, from 8 to 25 - 37.8°, from 26 days before hatching - 37.5°. For geese: 1-2 days - 38°, 3-4 days - 37.8°, 5-10 days - 37.6°, from 11 to 27 - 37.5° and from 27 until the chicks appear - 37.3 °. The temperature increases or decreases gradually, by 0.1° every 10 minutes.
Humidity setting
It takes 4 to 10 hours to achieve the target humidity of 80%. It is not recommended to open the lid of the device during warming up. To maintain a given moisture level, the Nesushka incubator is equipped with baths. The liquid level must be higher than the sensor if a humidity of 60% or more is required.
Indicators depend on the type of bird and the incubation period. For chicken eggs:
- 1-11 days: 66%,
- 12-17 days: 53%,
- 18-19 days: 47%,
- 20 days to hatching: 66%.
For goose eggs:
- 1-9 days: 70%,
- 10-27 days: 60%,
- 28 and before hatching: 90%.
- 1-7 days: 70%,
- 8-25 day:60%,
- from 26 days until the chicks hatch: 90%.
Features should also be taken into account:
- Adding cold water lowers the temperature by 2-3°, and it takes 2 to 4 hours to stabilize it.
- Adding water at a temperature above 40°, the humidity level rises to 85%, normalizes after 3.5-4.5 hours,
- The optimal temperature for pouring is from 33 to 35°.
Setting the temperature in the laying hen incubator
The analog thermostat is adjusted using a knob, you just need to select the required temperature value, it’s extremely simple, but we’ll look at how to set the temperature on a digital thermostat.
When you turn on the incubator to the network, the temperature value inside the incubator is displayed on the digital display of the thermostat; to set the required temperature value, you need to press the first (left) button and hold it for 2 - 3 seconds, after which the display panel will begin to flash, now we have entered the setup mode .
The second and third buttons can increase and decrease the temperature value.
Now press the left or right button several times until the digital value of the desired temperature appears on the display, for example 37.8°C.
Then press the left button, now the value of the egg turning frequency interval will appear on the display (by default, the turning is carried out every hour), there is no need to change anything here, press the left button again and the temperature value in the incubator at the moment will appear on the display. When the incubator warms up, the temperature you set will appear on the display, which will be constantly maintained by the thermostat.
- Chinese automatic incubator: instructions, reviews
The detailed process of setting the temperature is shown in this video.
How to use?
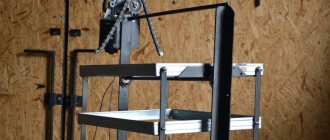
Before starting work, remove the equipment from the packaging and check its integrity and completeness. If everything is fine, they begin assembly. It is necessary to install a rotating device in the device and correctly connect the control unit, which should not cause difficulties. Among other things, the device comes with instructions, which contain step-by-step diagrams and tips on how to assemble the device for artificial hatching of young animals.
Before you start laying eggs, you need to thoroughly test the electronics for proper functioning.
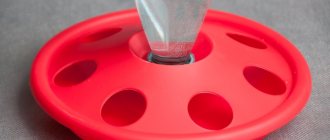
Fill the baths with water. The liquid temperature should be approximately +38°C.
Turn on the device and set the appropriate temperature level. It wouldn’t hurt to place another thermometer inside to be able to compare the readings and find out the accuracy of the operation of the electrothermal relay. After a certain time, the internal area of the incubator warms up to the required temperature, the temperature controller must turn off the heating elements. At the same time, a click should be heard, and the indicator lamp on the screen should go out.
Let the device run idle for at least three hours. During this period of time, it is necessary to observe the activity of the electrothermal relay (heating elements must be occasionally connected and disconnected, the temperature on the screen must vary within the permitted standards)
If the device is equipped with automatic tray rotation, you must pay attention to connecting and disconnecting the drive.
If during the test run no malfunctions in the operation of the incubator are detected, you can start laying eggs for incubation. When there are not too many eggs, they need to be stacked sideways
If you use BI-1 without a rotating device, it is highly recommended to put a pencil mark on one side of each egg (for example, plus) - this way you can control which eggs have already been turned over and which ones have not. In BI-2 incubators with an electric drive, for maximum capacity, eggs should be installed in a vertical position, with the blunt side up. Once the eggs are placed on the tray, you need to close the lid well and start the incubator. If everything is done correctly and corrected, set and configured, in the near future the temperature in the apparatus chamber will return to normal, from this moment we can consider that the incubation procedure has begun. As a rule, it will take 19–21 days to hatch chicks.
It is necessary to take eggs from a healthy bird over 1.5 years old. The egg should be medium in size, regular in shape, without cracks or growths on the shell. It is worth noting that the storage time of eggs directly affects the percentage of hatchlings.
To learn how to use the Laying Incubator, see the following video.
Incubator structure
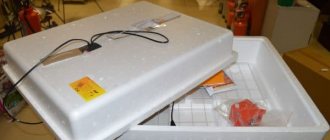
The instructions for the Nesushka incubator describe in detail the operating principle, diagrams and internal structure. The body of the device is made of thick and durable pressed foam. The material helps maintain a high internal temperature. The outside of the housing can be painted or sheathed in plastic.
Pros of polystyrene foam: lightness. Disadvantages - fragility and the need to clean and disinfect after each incubation cycle. The removable top cover allows you to lay eggs in the Layer incubator without damaging the shell.
There are special protrusions inside the device for installing a removable tray. At the bottom there is a movable grill that facilitates the process of cleaning the inner chamber after hatching the chicks. The grill is removable and can be adjusted according to the size of the eggs.
All models of the Layer incubator have automatic tray reversal with the ability to switch to manual control.
Eggs are heated using incandescent lamps. For natural ventilation, there are several holes at the bottom and top of the case, which can be closed with plugs if necessary.
Modifications: automatic and manual mode
The BI 1 incubator is designed for hatching chicks of chickens, ducks, geese and quails. Suitable for eggs of pheasants, pigeons and parrots.
The body of the device is made of foam plastic, which makes the structure lightweight and provides thermal insulation. The device is equipped with a glass viewing window, at the bottom - a container with cells for water, an evaporator and a sensor, a thermometer. The latter, depending on the model, can be:
- analog, the temperature on which is adjusted manually by turning the knob clockwise to increase and counterclockwise to decrease.
- digital, typical for automatic models.
This allows you to make operating settings, save them and automatically maintain the specified temperature and humidity parameters.
Device models differ in the way the eggs are turned:
- manual,
- auto,
- semi-automatic.
They also have different capacities. The minimum size is for 36 eggs, and the maximum is for 104
Please note that if necessary, the device can operate for about 20 hours on battery power, which should be prudently purchased in advance
Each household appliance comes with clear instructions and a warranty card.
Household incubator laying hen BI 1
There are two versions of the BI-1 model, which differ in the capacity of the incubation material:
- BI-1-36 (for 36 eggs),
- BI-1-63 (for 63 pieces).
The body of these models is made of durable foam. Heating in BI-1-36 is carried out by incandescent lamps, in BI-1-63 - by special heating elements. There is a thermostat to control the temperature. The eggs are turned over automatically. A 12 W battery can operate for about 20 hours. For normal operation of the incubator, you need to monitor the temperature and humidity inside.
Incubator laying hen BI 2
The main difference between the household incubators “Nesushka” BI-1 and “Nesushka” BI-2 is their size. Model BI-2 is designed for a larger amount of incubation material. Like BI-1, BI-2 also has two types:
- BI-2-77 is designed for 77 eggs,
- BI-2A has a capacity of 104 pieces.
BI-2-77 is one of the best models in its segment. The device is equipped with a powerful thermostat that maintains the same temperature throughout the incubator. Permissible errors are noted in the instructions; the average can be 0.1 degrees. For large duck and small quail eggs, you can purchase special grilles. The foam housing has a window through which all the embedded material is visible. The incubator consumes 40 W.
In addition to this, you can:
BI-2A combines a favorable price and digital devices. The model has a standard body with a viewing window, and additional grilles included. The device is equipped with a digital thermostat and a psychrometer. There is a type of the same model without these sensors. The device consumes up to 60 W.
Types and their characteristics
One of the main advantages of the Laying Incubator is the ability to choose the appropriate volume for hatching eggs. For small farms, compact models with limited functionality are suitable, and for large poultry farmers, devices with increased space and full automation are produced. Below is an overview of all current incubator models.
BI-1 for 36 eggs
The smallest incubator in terms of capacity, ideal for private farms. Available in three versions:
- with manual thermostat and automatic rotation;
- similar equipment with backup battery;
- with digital thermostat, automatic rotation and power supply.
Flexible configuration allows the device to be used by both beginners and experienced poultry farmers. It is possible to use a manual turning mode, which allows you to lay up to 50 eggs.
BI-1 for 63 eggs
The average model provides the ability to lay 63 chicken eggs, which is optimal for home use. When the automatic rotator is turned off, the capacity increases to 90 pieces. Sold in a wide range of configurations, analogue or digital thermostat. A number of incubation models have a battery backup option.
BI-2M for 77 eggs
This model can hold 77 medium-sized chicken eggs, which is very suitable for raising broiler breeds. The automatic rotation function is provided at the request of the buyer. When it is turned off, the size increases to 100 eggs. Depending on the modification, there is a manual or digital thermoregulation mode and the ability to use backup power.
You can read about ovoscoping chicken eggs before placing them in the incubator here.
BI-2 for 104 eggs
The largest capacity for the laying hen incubator. Available in several versions, all have an automatic rotation function, which simplifies control over the bookmark. When it is turned off, the capacity increases to 140 pieces. Depending on the configuration, there is analogue or digital control. All automated models are sold with a battery backup only.
The manufacturer offers such a wide selection of device configurations that, if necessary, you can purchase additional grilles, another battery and a hygrometer.
Norms and standards
The level of air humidity in the incubator is an important condition for the proper development of the embryo in the egg. Together with the correct temperature regime, the percentage of water in the air ensures the correct incubation regime
Experts have proven that for each individual stage of incubation the indicator will change.
What humidity should be in the incubator when breeding poultry at home?
Every owner must remember three basic rules:
- at the beginning of the incubation period, humidity should be higher;
- in the middle phase of the term it is reduced;
- In the last few days the temperature has been rising again.
In the first 6 days after the eggs are placed in the incubator, it is important to set the humidity level to an average level. The most optimal indicator is 50-65%
It promotes the development of the embryo in the egg and accelerates its growth process.
But, if you use such humidity in the second half of the incubation period, you can lose the entire brood. Chicks will die both before and after hatching, since their bodies are poorly formed. Constant high air humidity reduces the weight of the egg itself, which limits the supply of necessary substances to the embryo.
Scientists have proven that a constant high level of water in the air during incubation increases chick mortality by 15-20%. Therefore, after the first week, the moisture level is reduced to 50-55%. This regimen is used from 7 to 16 days.
The reduced temperature at the second stage promotes the accumulation of dry substances by the embryo. At elevated rates the process becomes impossible
Therefore, in order for the chick to grow correctly, it is important to give it the opportunity to receive the necessary vitamins and minerals.
From day 17, experts recommend raising the humidity to 70%. This mode promotes the hatching of the chick from the egg. If you leave the previous level, this threatens to compact the shell under the shell. Accordingly, it will be difficult for the bird to get out of the egg; there is a risk of losing about 10-15% of the eggs.
You can often find other opinions. For example, it is widely believed that high humidity is necessary for the entire incubation period. This solution leads to the fact that the moisture from the egg evaporates too quickly at the first stage, increasing the air bubble. As a result, the bird does not receive the necessary substances, as well as space for development.
Low moisture levels are no less dangerous. First of all, this affects the duration of incubation itself, which is significantly delayed. Also, chicks hatch too weak and about 15% of them die in the first days of life.
Therefore, it is important to follow the parameters. Also, minimum and maximum humidity levels have been established, violation of which threatens loss of output:
- lower limit at 43%;
- the upper limit is 82%.
Even an hour of the egg remaining outside these boundaries can cause the death of the embryo.
Incubator User's Guide
When laying eggs for the first time, you should not neglect the recommendations set out in the instructions for the laying hen incubator. First of all, you need to choose a quiet room with a constant room temperature. The incubator needs to be installed on a table or bedside table. There should also be a place for a battery, a container of water and oats. Direct sunlight should not penetrate into the room.
Preparing the device for switching on consists of the following steps:
- inspecting the case for integrity and checking the availability of components according to the instructions;
- the grille is lowered into the body with the smooth side up;
- the coupling unit is inserted;
- the cover is installed;
- The device is plugged in; when the temperature reaches the set point, the indicator will flash;
- Turn off the power to the incubator, connect the 12 V thermostat and wait for the indicator to blink.
Selecting and laying eggs is the most important operation.
Before laying eggs and during incubation, it is necessary to monitor the development of the embryo. Eggs are selected fresh, stored in a cool room, and checked for the presence of a fertilized embryo before laying.
To control revolutions, it is important to make marks on the shell with a simple soft pencil. They will help determine whether all eggs are changing position
If the process proceeds without deviations, then control through the device will show how the embryo gradually develops.
In this case, you need to remember that two days before the end of incubation it is necessary to turn off the turning and the last days the chickens should begin to peck in silence. The embryo may freeze and stop developing if there is a sudden sharp knock in the room.
The manufacturer of the Nesushka incubator gave it a service life of at least 10 years with a one-year warranty. However, the long service life can be significantly reduced if the device is stored in a sunny location. Ultraviolet rays decompose polystyrene foam.
After each cycle, the inner chamber must be thoroughly washed with soapy water. Do not use household chemicals, only laundry or baby soap. Afterwards the box needs to be dried. If this is not done on time, mold will settle in the incubator and it will be difficult to get rid of it.
The easiest way to master the laying hen automatic incubator. The mode is maintained automatically, without human intervention, and the effectiveness reaches 80%.
Advantages and disadvantages of the Laying Chicken incubator
The device of this series compares favorably with its analogues due to its low price and long service life. The manufacturer guarantees uninterrupted operation for 10 years. Users of the Nesushka incubator note the following advantages:
- price-quality ratio;
- lightness and compact design;
- possibility of automated control of the incubation process;
- Great variety of configurations.
Despite the large number of positive aspects, the device also has disadvantages:
- difficulty in washing and disinfection, inability to use ultraviolet light;
- fragility of the structure, the possibility of leakage in the chamber at the bottom of the incubator;
- frequent failures of the electronic system, so you have to switch the device to completely manual mode;
- the need to rotate eggs, since heating is uneven.
You can read about the “Ideal Hen” incubator here.
The incubator of this series can be found everywhere in specialized stores or you can buy a used version. However, it is difficult to find a fresh and well-functioning incubator on the secondary market.
Instructions
Strict adherence to incubation instructions allows you to obtain a 100% hatch with high-quality eggs. In the future, a small loss of chicks of the Phoenix and Bielefelder breeds, as well as other breeds, is allowed, which is the norm. An instruction manual is included with each device. The equipment of the device and its functionality should be checked upon purchase.
Preparing for work
this link
If the air humidity in the room with the incubator is high, then it is enough to pour water only into 2 recesses that are located in the bottom. They must be chosen correctly: they must be equally distant from the heaters and located symmetrically. When the humidity is low, you need to pour water into all the depressions at the bottom.
After filling the containers with water, a plastic grid-mat is installed. Next, a mesh is placed to turn the eggs and connected to a device for movement. Next, the entire structure is covered with a lid and plugged into an outlet. The turning device comes into action after 5 seconds and moves the grate. Then it goes into a waiting state for 4 hours.
The thermostat that hangs from the lid must be straightened. After the eggs are laid, he can touch the one located below him. However, to obtain accurate data on the temperature in the incubator, you will need to place a thermometer on the eggs in the morning and evening. Overheating eggs poses a serious danger. Immediately before laying them, it is necessary to warm up the incubator. It is also necessary to adjust the sensor readings so that the inside temperature is 38.2 ° C. During the first week of incubation, the eggs should be at this temperature.
When removing the cover, the thermostat must be turned off so that the heating element does not rupture due to a sharp temperature change.
Laying eggs
To incubate quail eggs of the Pharaoh, English Black and other breeds, eggs are laid no older than 10 days. Ideally, they should not be older than 5 days. Eggs sold in stores are not suitable for incubation, since they are usually not fertilized.
Material for incubation is selected that is homogeneous and without damage to the shell. When viewed on an ovoscope, all defects are immediately visible. The air chamber, medium in size, should be located at the blunt end of the egg. They cannot be washed, as this will wash away the natural protective film. This material will tell you about the Wyandotte chicken breed.
In order to control the revolution, they write a date on one side of the shell with a pencil or simply put a mark. The incubation material is laid upward with this sign. Next, after turning, you need to check that all the eggs are shifted sideways by 90 degrees.
Reviews
“In principle, the incubator is not bad, light, compact, the electronics work well, you can connect it to a battery in case of power outages, but there are also disadvantages. First of all, this is the polyester body itself, although it is an excellent heat insulator, but it is problematic to properly disinfect it after hatching; uneven heating over the area of the incubator, although the difference is small, has an impact on the hatchability percentage.” “The incubator is budget, for 63 eggs, mechanical egg turning. Lightweight, foam. But I note that setting the desired temperature is extremely difficult. The thermostat must be purchased separately.” Reviews site
“In principle, there is nothing complicated about the incubator itself; you can assemble and connect it correctly using the instructions that come with it. The process of hatching chicks, what temperature is needed, etc. is also described in detail there. Be sure to read the instructions!” Reviews site
The laying incubator is good for home use. Suitable for both breeding chicks for your own farm and for sale. The most popular models are those with large capacity. Among the main advantages, the first place is the affordable price , then the simplicity of the device and ease of use .
Humidity and temperature during incubation
To get high hatchability, you need to know what temperature should be in the incubator for chicken eggs. The correct microclimate determines the quality of incubation. Even the smallest deviations in temperature and humidity can lead to death or disrupt the development of chicks.
The temperature in the incubator for chicken eggs has a maximum value of 27-43 degrees. Hypothermia or overheating of eggs is tolerated without harm only for a short time - for a few minutes. The optimal incubation temperature for chicken eggs is from 37 to 40 degrees.
The maximum temperature at which an embryo can develop is from 27 to 43. C. If it is low, development is slow, the hatching period is extended, and at a very low temperature the embryo develops incorrectly and soon dies.
It is also important to take into account the method of heating the incubator - if the heat source is from above, temperatures up to 40 degrees are allowed (near the top of the incubator). If the sources are located on all sides, the optimal temperature in the incubator is no more than 38.5 C
The temperature maintained in the incubator must be stable. Hypothermia and overheating of eggs provokes the development of diseases in chicks and also inhibits their development. The same applies to humidity. Its maximum indicators are 45-82%. But it's better not to approach them.
Temperature and humidity table for incubator:
| Days | Temperature | Wet bulb temperature | Humidity, % | Number of revolutions | Ventilation |
| 1-7 | 37,8-38 | 31-32 | 50-55 | every hour | No |
| 8-14 | 37,8-38 | 31-32 | 45-50 | 5-6 times a day | No |
| 15-18 | 37,8 | 28-29 | 50 | 4-5 times a day | 2 times a day, 15-20 minutes |
| 19-21 | 37,4-37,5 | 27-28 | 65-70 | No | No |
Chick hatching periods
First, you need to know what day the chicks hatch. After pipping, they need to be moved to pre-prepared brooders. The incubation time of chicken eggs is 20-22 days after laying. Sometimes this period can increase by 1-2 days, for example, at low temperatures in the chamber. But there is no point in waiting longer than the 25th day.
Before laying, you can make marks on the shell with a marker - this will make it clearer whether the trays are upside down or not.
Incubation of chicken eggs at home is conventionally divided into four periods. They differ in the required microclimate conditions in the chamber
It is important to maintain the required temperature in the egg incubator throughout the entire period.
- Incubation of chicken eggs: incubation mode in the first days. The incubation period of chicken eggs lasts 5-6 days after laying. The temperature is set at 38 ° C, humidity – 60-70%. It is recommended to turn the eggs every 3-4 hours. You can do a longer interval - but at least 2 times a day. If the egg incubator is not equipped with automatic turning, it is better not to be lazy. Under natural conditions, the hen turns them over almost every hour. On the 4th day you need to set the temperature to 37.5 ° C and the humidity to 55%.
- Incubation of chicken eggs: incubation mode in the second period – 7-11 days. The humidity in the incubator should be reduced to 35-46%, temperature - 37.5-37.7 degrees. At this time, the chick's skeleton begins to form.
- The third period is 12-20 days. Temperature – 37.3-37.5 degrees, humidity in the incubator 70-80%. The final stage of chick formation. On days 15-16, it is advisable to check the correct development of the embryos using an ovoscope. To increase humidity, eggs can be sprayed with water. From the 18th day it is necessary to increase ventilation - you can turn on the fans to maximum. You also need to ventilate the chicken incubator twice a day - open it for 10-15 minutes.
- Incubation of chicken eggs: incubation mode in the fourth period. The chicks are pecked and hatched in the incubator. You need to wait until all the chickens hatch and dry out. Before this, the chamber cannot be opened - all the chicks must be taken at the same time.
Development of a chicken embryo by day
Typically, the chick hatching process is completed within 24 hours. At this point, incubation of eggs at home is considered complete. The main indicators of healthy chicks are activity, reaction to sounds, and a neat appearance. A slight fading of the down and a slight increase in the belly are allowed.
If, in general, the chicks from the incubator appear healthy and strong, you should not cull them. It is best to get rid of weak individuals immediately - the likelihood of their full development is very low.
Chicken eggs can be placed in the incubator in vertical and horizontal positions - this does not affect hatchability.
Viewing with an ovoscope during incubation
The hatching of chicks in the incubator should be controlled by scanning the embryos on an ovoscope at different stages of incubation. Because from the first day you can see changes and control the development process.
Usually, the first candling is done on the 7th day from laying. At this time, you can already see the network of blood vessels. If the development is good, they will be evenly distributed, a little worse if the vessels are concentrated in the center. If the embryo looks more like a spot, it is discarded.
Ovoscoping can be done before biting, on the 19th-20th day. The embryo should not be visible, and in size it occupies 2/3 of the volume of the egg.
It is also worth watching how the chickens hatch in the incubator. If the chick emerges quickly and breaks off large pieces of the shell, it is healthy and strong, but if not, it is most likely a weak individual.
Raising chickens
After the chicks hatch, the device is switched to rearing mode. A small box is placed at the bottom, or covered with newspapers, and bowls of water and food are placed.
The incubator automatically maintains the temperature at 30-32° with the backlight always on.
Chicks and ducklings can stay in the incubation chamber for up to two weeks, larger chicks for a maximum of 10 days, and quail chicks for up to three weeks.