Where to begin
It is a set of sequentially performed operations. The quality of the fur will depend on the careful and correct execution of all stages.
- The preparatory stage is conservation.
- Soaking (soaking).
- Fleshment.
- Degreasing.
- Pickling.
- Curing and neutralization.
- Tanning.
- Zhirovka.
- Drying and kneading.
You can get high-quality meat and skin only by following the rules of slaughter. The process may be unpleasant in theory, but is not so difficult in practice. No breeder who wants to sell rabbit products can do without it. In this article you will learn how to kill a rabbit.
Experienced farmers advise not to neglect these points, since they directly affect the profitability of the business.
Dressing
This process is carried out in different ways. The technology for processing rabbit skins provides the following:
- pickling – treatment with a salty and acidic solution;
- fermentation - using a mixture of flour and yeast; practically never used in the house.
Pickling is a universal method. The solution makes the fibers more elastic. Take 60 g of acetic or lactic acid and 30 g of salt. They are dissolved in a liter of water. 1 kg of skins requires 3 liters of liquid. Depending on the thickness, the raw material is left in the solution for 8-24 hours, stirring occasionally.
To determine readiness, remove the skin, fold it in four and press on the fold. When the product is straightened, a white stripe will appear.
The skins are squeezed out, turned right side out and stacked. A load is placed on top. The products should remain like this for 24-40 hours. To remove the remaining acidic solution, after curing, the raw materials are placed in a soda solution.
How to remove the skin correctly?
In this matter, you cannot do without preliminary skills. It is quite difficult for beginners to produce raw materials correctly. But then everything happens quickly and without accidental damage to the skins. The skin removed from the animal with a “stocking” allows you to “mount” it on a special device - a straightener or blank and perform the necessary manipulations with it yourself.
| Step | Description |
| 1 | Using a sharp knife, cuts are made around the circumference of the hind legs near the hock joints. Then the skin is cut along the inside of the leg and perineum. The result is an arched stripe. The tail is cut off. |
| 2 | Now you need to trim the ears, tail and front legs to the wrist. Grab the skin along the thighs and pull it towards you. Then carefully remove it from the front legs and head, so that it is easy to do this by cutting the areas around the eyes, nostrils and mouth. |
| 3 | When the skin is removed to the front paws, there are two scenarios. The first suggests sticking your fingers inside the limbs, breaking the joints and separating the meat from the skin there. The second method is easier - just chop off the front legs or make circular cuts similar to the hind legs. On the thighs, it may be necessary to slightly cut the ligaments that hold the flesh and skin together. |
| 4 | The stocking is pulled to the back of the head and separated from the rest of the head with a circular cut. If you need to remove the canvas, including the muzzle, make cuts around the eyes, mouth, and nose. The ears are amputated. Pull the skin to the end, helping with your fingers under it. |
Step-by-step skinning of a rabbit
It is important not to overtighten or tear the skin.
Skinning
Animals bred for their skins are grown to 8-9 months (or 3.5-5 kg of live weight). Slaughter is carried out in the cold season - from November to March, when the fur is thickest and there is no seasonal shedding. To maintain integrity and maximum size, the skin is most often removed with a “pipe” or “stocking,” which eliminates the need to make an incision along the belly.
Here are detailed step-by-step instructions for sanding a carcass after slaughter:
- Inspect the fur and, if dirty, remove all debris.
- Hang the carcass upside down using a rope. Spread your paws to the sides.
- Make circular cuts below the hocks and “connect” them in the anal area.
- Begin to remove the skin from the hind legs, pulling with one hand and using a knife to remove the meat and remaining fat with the other.
- In the genital area, cut the skin. It is important not to damage internal organs.
- With both hands, pull the skin down with a sharp movement.
- Cut off the front legs (this is more convenient for inexperienced rabbit breeders) and continue turning the skin through them. If desired, these limbs can be left and, by pulling the skin to the wrist joint, cut off from the inside.
- Cut off the head and continue removing it further, or, if the head remains, continue turning it inside out, making cuts near the eyes, ears, mouth and nose.
The photo shows a schematic representation of the sequence of actions when removing the skin.
After removing all the skin, it is recommended to further clean the raw material from any remaining muscle tissue, fat and tendons. To do this, the canvas is stretched onto a special “A-shaped” frame or straightener and very carefully scraped with a knife, holding the blade at an angle of 90 degrees to the surface.
The process of cleaning the inner surface from residual fatty deposits and muscle tissue
Then the skins are usually dried by hanging in a dry, clean, well-ventilated room at an air temperature of +20...30 ℃. The canvases should not touch each other - the minimum distance between them is 10 cm. After this, the skins can be stored in breathable bags in a cool, not humid place.
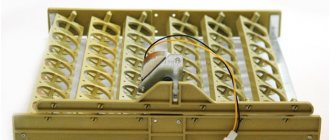
Tools for processing rabbit skins
Before you start dressing rabbit skins, you need to make sure that you have all the necessary tools at hand, namely:
- blanks - for drawing skins;
- wooden stick - to stir the skins;
- sharp knife;
- spacious containers and bowls;
- nails;
- latex gloves;
- Some specialists use scissors (regular and with curved edges), as well as brushes with bristles of different hardness, for tanning hides.
Required Tools
To make rabbit skins yourself, you need to acquire the necessary equipment for the work. It can be changed in each individual case.
Rabbit breeders who have extensive experience in dressing skins know that no special equipment is required, but they recommend having the following basic set:
- A reservoir of clean water or direct access to a water supply (1 skin will require up to 10 liters of liquid).
- About 15 kg of salt.
- Approximately 2 liters of concentrated sulfuric acid.
- Up to 1 kg of caustic soda.
- Formalin.
- Chromium alum.
- 1-1.5 liters of battery acid (or saturated sulfuric acid).
- Laundry soap.
- Washing powder for hand washing (the most common, without additives).
- Ammonia solution.
- Tongs for working with hides.
- Wooden stirring rod.
- Sharp knives.
- Large tanks with a volume of more than 100 liters.
- Nails.
- Rubber gloves are dense, not sterile.
In addition to the specified set, it is advisable to acquire the tools shown in the figure:
Dressing is impossible without the use of chemicals. Therefore, you only need to work with gloves. And when working with saturated acid, you need to remember that it is poured into water, and not vice versa.
How to tan rabbit skin at home?
Dressing rabbit skins at home is a labor-intensive process that includes three stages:
1) Preparation, when the skins need to be soaked, washed, skinned and degreased.
2) Direct dressing, when the skins are pickled, fermented, tanned and fattened.
3) The final stage is finishing, when the skins are dried, and the skin surface of the material and the pile are also taken care of.
All stages are extremely important. Skipping or shortening their duration is definitely not recommended. Durable, high-quality fabrics can only be obtained by following all the technology
Stages of dressing
Preparatory
Dried rabbit skin is processed at home by soaking (professionals use the term “soaking”) to restore the elasticity of the fabric. Then fleshing and degreasing occurs.
Soak
You will have to spend at least 12 hours soaking the raw materials. If during this period the fabric has not regained its original appearance and has not become elastic again, the fluid should be replaced and the procedure continued. Soaking very dry material can take several days, with the solution being replaced every 12 hours.
The skins should float freely in the container. For 1 kg of product, 3 liters of liquid are used. The following ingredients are added to the water to improve soaking:
Flesh
After soaking, the fabric is thoroughly rinsed, pulled onto a blank like a wooden cylinder with the inner layer (layer of subcutaneous tissue) outward, wiped dry and begin to remove the remaining fat, fibers and films. This process is called fleshing. It also helps loosen the skin, which makes subsequent processing of raw materials with chemicals more effective. To even out the layer of flesh and not expose the hair follicles, the procedure is performed with the back of a knife or a special iron brush, observing the correct direction - from the back to the belly, from the tail to the sides and head.
A professional furrier shares his experience in carrying out fleshing in the following video:
Degreasing
To completely rid the skin of fat, it is washed in solutions of washing powder, shampoo or soap. For a liter of liquid take:
- 4 g powder;
- 20 g crushed laundry soap;
- 25 g of shampoo.
Upon completion of the procedure, the raw materials are rinsed and hung for ventilation to a state of moderate humidity.
Basic
To properly tan a rabbit skin, you must strictly adhere to a certain procedure.
At the initial stage of pickling, pickling or pickling (you can get by with pickling only or do both procedures sequentially), which increases the strength of the material. For them, solutions are usually prepared in a volume similar to soaking: 3 liters per 1 kg of raw materials (some experts recommend a ratio of 7:1).
Pickling
The pickling process involves soaking raw materials in salty-acidic mixtures:
- Acetic acid - prepare a 3% vinegar solution by mixing 330 ml of table vinegar (9%) and 670 ml of warm water (temperature 30...35 ℃). Then add regular rock salt at the rate of 30-40 g per 1 liter of liquid.
- Sulfuric acid - for its preparation use battery or concentrated sulfuric acid (5 ml) and salt (50 g), diluting them in 1 liter of water.
In this case, it is very important to determine the moment when you need to remove the canvas. There are several verification methods:
- “drying” - the skin is taken out of the solution, folded in four in the groin area with the flesh facing up, squeezed with your fingers at the fold and run along it with a fingernail. There should be a white mark (“drying residue”) left on the material, which disappears after at least 10 seconds;
- “pinch” - when the hairs from the wool begin to be pulled out without effort.
After pickling, the skins are rinsed well, and in cases of using strong acids, they are additionally neutralized with alkali. The easiest way is to use regular baking soda (10-15 g per 1 liter of water). The canvases are placed in a container with the solution for 20-60 minutes.
Pickling
Fermentation is also a rather long but effective procedure, significantly increasing the strength of the raw material. For the starter, prepare a special mixture consisting of rye or oatmeal flour (200 g), yeast (7 g), salt (20-30 g), baking soda (0.5 g) and 1 liter of water. All dry ingredients are mixed and poured with hot water - a jelly-like consistency is obtained. After the liquid has cooled, the canvas is immersed in it with the inside out. Fermentation lasts for about three days until a bready aroma appears from the mixture and a white coating appears on the canvases.
Step-by-step instructions for dressing rabbit skins
The process of preparing rabbit skins includes several specific steps that must be performed in strict sequence.
Modern farmers more often use warm water with chemicals. At the same time, a short soak is done even for fresh skins, so that the skin is easier to clean and the fabric becomes more elastic.
Step 1. Soak
The procedure is performed as follows. Taken:
- Water – 1 liter of water;
- Borax – 30 g;
- Salt – 50 g;
- Carbolic acid – 2 g.
All ingredients are thoroughly mixed and the solution is poured into a large enamel container. Raw materials are placed there, which must be pressed with something heavy so that they are completely covered with water. The solution along with the placed skin must be mixed. Soaking at home is done for 3-4 days. You can shorten the procedure in some cases to 6 hours.
The solution is poured into a sufficiently capacious stainless steel container, glass or enamel container. After placing the skins in the solution, place a heavy object on them so that they do not float and are covered with water by at least two centimeters. During the soaking process, stir the skins from time to time to ensure they are treated more evenly with the solution.
Soaking result
At the end, you need to rinse the solution with clean water and let it drain.
Step 2. Flesh
During this procedure, the remaining fat, subcutaneous muscles and moisture are removed from the flesh. In addition, the underside of the rabbit skin is planed until the thickness of the skin is uniform. Next, the flesh is broken down with the blunt side of a knife blade. Afterwards, the skin is degreased in a powder solution. For 1 liter of water, take 4 g of washing powder.
This is how the top layer of flesh comes off
Take a steel knife or an iron brush, moving from the tail to the head and from the ridge to the belly, scrape off the fat and film.
Step 3. Degreasing
Salt is added to all solutions necessary for tanning leather. If there is no salt, the skin will absorb a lot of fresh water and become glassy. Further processing will become impossible, since subsequent chemical solutions will not be able to penetrate inside. This phenomenon is called gluttony.
First, 5 g of washing powder is dissolved in a liter of water. The raw materials are washed until the rabbit flesh acquires a uniform white tint. She should also start to squeak on her fingers. After this, the product is transferred to clean water.
Step 4. Pickling and pickling
You can make rabbit fur using fermentation; this is a classic way of dressing; the material becomes especially strong. When pickling, you must remember that the prepared solution based on mineral acids (sulfuric and hydrochloric) can partially change the color of the hair.
| Pickling | Pickling |
| Prepare a mixture of oatmeal or rye flour and a liter of hot water in an enamel bowl. Mix the mixture well and add 7 g of yeast, half a kilogram of baking soda, 30 g of salt. Cool the solution and place the skins in it, skin side up. Leave them for two days, but do not forget to periodically stir the skins with the solution. | This procedure is necessary to give the skin greater strength. Taken:
The raw materials are immersed in the prepared solution with the inside out and mixed. Readiness is determined at the fold where a light strip appears, which should not disappear within five seconds. |
All solutions are prepared at the rate of 3000 ml per 1000 g of skins, as for soaking.
Step 5: Tanning
Thanks to tanning, the rabbit skin will shrink less, the skin will become stronger and more resistant to water, and the fur will gain additional elasticity. You should not use oak broth for tanning - it makes the rabbit skins coarser. The best choice is bark from willow trees or willow trees.
| Chrome | Tannid |
| 7 g of chromium alum per 1 liter of hot water. Keep the skins for 1 day. | Fill the container with oak or willow bark and branches. Do not compact. Boil for 30 minutes over low heat. Add 50 g of water per 1 liter of water. Cool. Keep the canvas for 1 to 4 days. |
Tanning in progress
This procedure is carried out to give the skin strength and resistance to moisture, and the fur - elasticity. The bark of willow or willow is used for this process. A solution is made from 1 liter of decoction, to which 40 g of salt is added. The liquid can stain the fur, so it is applied only to the flesh. Next, the raw material must be left for a day and dried, periodically stretching the skin. After it dries, it is advisable to sand the top of the leather to soften it.
Step 6. Fattening and drying
For this stage of processing rabbit skins, fish oil, lard, castor oil, cream and pharmaceutical glycerin are suitable. The selected product is applied to the flesh with tampons. After this, the raw material is rolled up inside with fur and set aside for a couple of hours. Then the products are kneaded and carefully combed.
Final drying
Afterwards the skins are straightened and left outside in the shade. Rabbit flesh needs to be processed:
- Rub with chalk.
- Sand with fine-grit sandpaper.
- Clean off excess chalk.
- Comb with a brush.
The flesh can be rubbed with powder or chalk
The resulting skins can be stored for a very long time. It is better to do this in cotton or linen bags (cellophane is not suitable).
If the color of the fur is even, it is left as is, in its original form. Otherwise it is pre-painted
TANNING HIDS.
It is necessary to give the raw material strength, durability, and wearability, including in conditions of high humidity. Tanned skins are not afraid of getting wet, are tear-resistant and do not crumble.
Dissolve table salt in 12 liters of warm (35-40°C) water at the rate of 40 grams per liter. Chrome alum - 10 grams per liter, that is, only 120 grams, first pour a small amount of boiling water, up to half a liter, and dissolve in it. After this, pour the alum solution into the main container. The skins are tanned with the flesh facing out, so after they are removed from the press they turn inside out. Make sure there are no folds, otherwise there will be untanned areas. The whole process takes from 12 to 24 hours. During this time, do not forget to stir the skins every 2-3 hours. The end of tanning can be determined by a knife cut of any extreme section of one of the skins. On the cut under a magnifying glass you should see a change in color (yellowish tint) throughout the entire thickness. Then we take the skins out of the solution, squeeze them out, and stack them again under the press. The time for such ripening can be from 12 to 24 hours.
If you wish, you can try using folk remedies. Oak and willow bark (their small branches), and horse sorrel can be used as tannins. In this case, the process will take up to 4 days. In addition, oak bark can change the color of the material. If this doesn’t bother you, then prepare the solution like this: fill the bowl with oak or willow bark, without compacting it, fill it to the top with water and boil for half an hour, strain at the end. A decoction of sorrel is prepared in the same way. You need 4 times less of it. Then the two decoctions are mixed. You can even do without sorrel, but then the tanning will take longer. Salt is required, 50 grams per liter of broth. Before tanning, do not forget to cool the broth to 25° C.
Classification of rabbit skins
Finished canvases are divided into 4 grades:
| Variety | Characteristics |
| First |
|
| Second |
|
| Third |
|
| Fourth |
|
Tools and materials for dressing
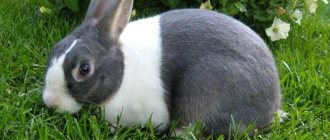
An animal is slaughtered for fur when its weight ranges from 3.5 to 4 kg. The most favorable time for slaughter is the end of autumn: the molting is over, the fur of all breeds of animals becomes thick and soft.
To produce high-quality animal fur, you need to prepare in advance:
- sharp cutting knife,
- dull knife for fleshing,
- drying rule,
- processing chemicals.
You can purchase a drying system or make it yourself from slats or a strong branch. The shape of the rule resembles a fork.
Recommendations for processing rabbit fur material
- When pickling, the moment when you can stop the process is determined by folding the skin in four. If there is a dryer left at the bend site (a white mark), you can proceed to the next stage of making it yourself.
- Tanning with oak bark is not carried out when work is carried out with light fur. It will turn yellowish.
- The solutions used for processing are taken at the rate of 3 liters per medium-sized workpiece.
- When preparing rabbit skins with your own hands, individuals under 3 years of age are slaughtered (the older the rabbit, the worse the quality of the skins).
- It is necessary to ensure that the workpieces are completely immersed in the solution. Cargo is used for these purposes.
Alternative finishing options
Fermented milk method
In this case, the cleaned and defatted pieces must be steamed, rubbed with large crystals of table salt and stored for three days, with the fur coats folded inside out. After this, the salt must be shaken off, and the skins must be soaked for three days in sour milk, with the inside out. To process a medium-sized skin, you will need approximately a liter of sour milk.
This method, which allows you to quickly repair a rabbit skin, is distinguished by its simplicity, accessibility and high quality of the finished product.
Fresh-dry
The skins should be stretched on straightening boards with the inside outward so that the sides of the skin are located along the edges of the structure. During dressing, the skin must be stretched in length so that the width is three times smaller. Nails or rope can be used to ensure that the raw material is evenly stretched. To prevent insects from breeding in the fur, it is necessary to treat it with sawdust soaked in gasoline.
Drying the skins
It’s rare that anyone starts dressing a rabbit skin immediately after skinning. Usually they try to collect more raw materials in order to work with them in bulk.
Until the moment of dressing, the skin can be preserved by drying it on a special straightener. This A-shaped device is made from wooden slats, reinforcement or thick wire.
The skin is placed on a straightener, slightly stretched. At the same time, the tension should not be too strong, otherwise the fur may thin out. The head of the former rabbit carcass should be located strictly in the center of the straightener, the legs should be straightened and positioned symmetrically.
By the way! Do not turn the stocking inside out before placing it on the rack. The fur must remain inside.
In summer, you can dry it in the shade under a canopy, but then you should wrap the rules with gauze or non-woven material in order to avoid encroaching on the remains of bird meat and insects. In autumn and winter, drying is carried out in a well-ventilated area where the temperature is maintained at least 30 degrees. The rules are placed away from heating devices, drafts, and wet places. At least 3 days are allowed for drying. After this, the material can be stored for 1-2 months until the next stage of processing.
Advice! Before storage, it is better to place the stockings removed from the straightening bars in a fabric bag.
Useful tips
If you are new to this complex business, listen to the advice of experienced farmers, this will help you cope with the job successfully:
- Pickling can also be carried out in water at room temperature, without additional heating. The process in this case is extended by a day.
- Pay attention to the thickness of the flesh; the duration of exposure will depend on this.
- Before you start cleaning the fur, inspect the condition of the coat. Leftover debris can damage your skin.
- Monitor the condition of the molt; if it is in the initial stage, slaughter is possible in a month.
- Do not use oak bark in the tanning process if the skin is light in color, otherwise its color will become yellowish.
- Do not skimp on water; 3 liters of solution are used for one medium-sized workpiece.
- Individuals no older than 3 years are subject to slaughter; greater age is a low indicator of the quality of the skin.
Don’t be afraid to start learning new things, if this is your first time dealing with breeding rabbits, processing products with their subsequent use - study the proper material. At home, you can handle everything yourself.
Author of the publication
offline 2 years
Natalia V.
1
Publications: 56Comments: 0
Neutralization
Neutralization is a very important point in the preparation of rabbit skins. Thus, acid remains on the pile, which creates obstacles to future procedures. Neutralize the acid in a soda solution at the rate of 1.5 kilograms of soda per 1 liter. The acid can be neutralized in a solution of photographic hyposulfite (10 g per 1 l) for 20-60 minutes. After fermentation or pickling is complete, the skins are tanned.
Tanning
Tanning is divided into two main types:
- Chrome tanning;
- Tannin tanning.
To carry out chrome tanning, you will need 1 liter and 7 g of chrome alum, which you will then mix. Chrome tanning involves adding 50-60g of table salt.
In this state, they are kept in the mixture throughout the day, remembering to stir frequently. 1 kilogram of skins requires 3 liters of tanning agent. At the end of chrome tanning, the material may lose a high level of strength. Neutralization with the same composition as after curing will help with this.
Potassium alum is washed out from the surface of the skin and separation occurs. It is worth noting that many amateurs rely on potassium alum. Such alum is used only in the case of a lame tanning agent solution (per liter per 14 g of alum).
Tannin tanning is carried out together with a decoction of bark (oak, willow). To do this, take a bowl and fill it (do not compact it) with willow bark and small twigs. After this, the dishes with twigs and bark are filled with water and boiled over fire for half an hour.
Willow branches in a pan
Drain the resulting liquid and add 50g of table salt per liter. The next stage is cooling. Thus, the tanning agent is ready. They are stored in such a tanning agent for a period of time from 1 to 4 days.
The amount of tanning agent is calculated in a volume four times the weight of the skins. It is worth noting that a decoction of oak bark can be used as a tanning agent, but this method implies one significant drawback - they tighten, become stiffer, and the fur and skin acquire a yellow color.
Nowadays, the following tanning agent composition is considered the best: a bucket of water with willow decoction and 2.5 liters of horse sorrel root decoction are mixed and prepared like a willow decoction.
Leave for 1-4 days.
Based on the fact that overexposure during tanning is extremely undesirable, the end point of processing is determined as follows: a small piece is cut off in the groin area; on the cut, using a magnifying glass, they look at how effectively the tanning agent penetrated deep into the skin (tannin tanning agent gives a yellowish tint). In the case when complete penetration of the tanning agent into the surface of the skin is observed, the procedure stops and can be considered complete.
After the tanning process, they begin curing in order to ripen for two days under the pressure exerted on it (press of 5-7 kilograms). Using pressure, excess liquid comes out of the skins. Drying at this stage is strongly not recommended, since the next procedure, called greasing, requires moisture.
Zhirovka
Approach the procedure with special care. It is carried out in such a way that the rabbit skins become softer, and their strength and elasticity properties are significantly increased. Most often, water-fat emulsions are used to achieve these goals. Emulsions are applied to the flesh using a lye or swab. For example, here are several emulsion recipes:
Recipes:
- Take egg yolk and glycerin in a 1:1 ratio. Whisk the ingredients.
- Dissolve 50g of laundry soap, cut into small pieces, in half a liter of boiling water, then stir (stir constantly in the future). Next, stirring, add 0.5 liters of fish or pork fat (any other fat of animal origin can serve as an alternative to fish and pork fat). Then you need to stir the resulting solution, add 5-10 milliliters of ammonia to it.
- Dissolve 50g of laundry soap in 0.5l of boiling water, and stirring thoroughly, add a fifth of any animal fat, 25g of machine oil intended for household purposes. Next, add 30 g of glycerin, a quarter kilogram of egg yolks, and do not forget to stir the solution, 30 milliliters of ammonia. The resulting composition is well beaten.
After you have applied the emulsion to the flesh, place the skins in a separate pile with the fur part facing inward. The stack remains in this position for several hours (4 hours is enough).
Drying
Can be left to air dry
The final point in dressing is drying. As soon as you notice that they have begun to dry out, knead them and stretch them in different directions.
Rub the inside with chalk or tooth powder. This way you can give them a snow-white appearance. Next, sand them down with sandpaper.
Now knock them out and comb the fur part. With such actions they will gain lightness and become elastic. The technological process for preparing rabbit skins at home described above is widely used for dressing other animals.
However, in the case of dressing other animal skins, the concentration of solutions, the duration of pickling, the time spent in alum, tanning agent, depends on several factors: the type of animal, its age, the area of the treated surface, the type of feeding, etc.
Pickling
Change in size as a result of fermentation.
Pickling is the classic method of fermentation. Thanks to this procedure, greater skin strength is achieved. The tensile load during pickling is almost several times greater than during pickling. The disadvantage of this method is the lengthy processing and significant consumption of flour.
In a glass or enamel bowl, stir a mixture of 200 g of coarse rye or oat flour per 1 liter of hot water. The resulting solution is brought to a homogeneous mixture, after which 7 g of yeast, half a gram of baking soda and 30 g of table salt are added.
A similar solution is prepared at the rate of 3 liters per 1 kilogram of skins. The raw materials are placed in the cooled mixture with the inside out. Over the course of two days, the flesh swells and ferments as the acidity increases. They are turned over, while mixing the jelly. This is done so that the composition does not rot and a film does not form on top.
A few days later, when a white coating appears on the top of the flesh, this essence will smell identical to the smell of bread (this serves as a signal to complete the fermentation procedure).
It is worth noting that if the skins are overexposed in the mixture, it risks being left without hair. In this regard, it is worth adhering to general recommendations and not overexposing it. At the end of fermentation, the material is removed and the liquid drains from it. Let's move on to the next stage - tanning.