Manufacturer
The Nesushka incubator was developed and produced by a domestic manufacturer in Novosibirsk.
The device is designed for breeding most types of poultry (chickens, geese, ducks, quails, turkeys and others) without a brood hen. The body is made of high-quality foam, which ensures low weight and thermal insulation. Depending on the configuration of the device, it comes with a manual, automatic and semi-automatic rotary device. The egg capacity differs; models are available for 63-104 eggs. Each device comes with instructions and a 1-year warranty card.
The laying hen incubator Bi-1 has four subtypes, differing primarily in the capacity of the tray.
Specifications
Device specifications vary by model.
Bi-1
The incubator is available in two variations: for 26 eggs and for 72 eggs.
- The size of the device is 67x34x31 cm.
- Weight 1.8 kg.
- Case material: polystyrene foam.
- Maximum power 28 W.
- The device maintains a temperature of 33-45 degrees with an error of up to 0.2 degrees.
- The device operates correctly at a room temperature of 18-28 degrees. The device is connected to a network with a range of 198-242 V.
B2
He has two versions of the device: for 77 eggs and for 104 eggs.
- Incubator size 60×30×65 cm.
- Weight 2.6 kg.
- Foam body.
- Maximum power - 70 W.
- The device maintains a temperature of 33-45 degrees with an error of up to 0.2 degrees.
- Operates from a 220V network.
The laying hen Bi 2 incubator for 104 eggs is equipped with enhanced protection against electric shocks and water penetration. Inside the package there is an instruction manual with an assembly diagram.
Reference. In Nesushka they breed not only chickens, but also other birds: ducks, quails, turkeys, pheasants, pigeons. This will require a special grill.
Technical description of the incubator
The device is available in two versions: Bi-1 and Bi-2, differing in capacity. At the customer's request, the incubator can be equipped with a thermostat with a battery and manual or automatic switches.
The models have the following characteristics:
- Temperature range: from 30 to 45°,
- Error in determining temperature: less than 0.5°,
- Warming up for the first time takes 1.5 hours,
- The egg turning timer is set to 1-8 hours.
The incubation apparatus operates from a regular electrical network. When voltage fluctuations are /- 10%, it is recommended to use a stabilizer. The incubator is equipped with a battery that allows you to maintain the set temperature in the absence of electricity for up to 20 hours. The standard package includes a digital automatic control unit required for:
- Maintaining humidity levels and temperature conditions,
- Turning eggs at a specified time interval,
- Switching to 12 W battery operation
- Calculating the incubation period of eggs,
- Water level control,
- Internal lighting.
The capacity of such units depends on the type of eggs being laid. So, in an incubator for 52 chicken eggs, you can put 36 turkey eggs or 36 duck eggs. This volume is more than enough for home poultry breeding.
Before placing eggs in the incubator, they must be checked with an ovoscope for fertilization, and make sure that the shell is clean and undamaged. Not only the health of the brood, but also the serviceability of the machine depends on this.
Contamination can lead to the rapid development of mold and mildew inside the cooking chamber.
In the Layer incubator, the temperature difference inside the incubation compartment is no more than a degree. For greater accuracy of operation of the device, it is not recommended to place it next to other electrical devices.
Automatic control of the incubation process is carried out using digital thermostats. They are equipped with memory, a temperature sensor and additional terminals necessary for connection to the battery. When laying eggs, you need to take into account that it takes time to completely warm up the chamber: when the containers are completely filled, about 3-3.5 hours.
Temperature and humidity depend on the type of bird. For chicken eggs, the first 11 days are set at 37.9°, from 12 to 20 - 37.2°, from the 21st day - 37°. For ducks: from 1 to 7 days - 38°, from 8 to 25 - 37.8°, from 26 days before hatching - 37.5°. For geese: 1-2 days - 38°, 3-4 days - 37.8°, 5-10 days - 37.6°, from 11 to 27 - 37.5° and from 27 until the chicks appear - 37.3 °. The temperature increases or decreases gradually, by 0.1° every 10 minutes.
Humidity setting
It takes 4 to 10 hours to achieve the target humidity of 80%. It is not recommended to open the lid of the device during warming up. To maintain a given moisture level, the Nesushka incubator is equipped with baths. The liquid level must be higher than the sensor if a humidity of 60% or more is required.
Indicators depend on the type of bird and the incubation period. For chicken eggs:
- 1-11 days: 66%,
- 12-17 days: 53%,
- 18-19 days: 47%,
- 20 days to hatching: 66%.
For goose eggs:
- 1-9 days: 70%,
- 10-27 days: 60%,
- 28 and before hatching: 90%.
For ducks:
- 1-7 days: 70%,
- 8-25 day:60%,
- from 26 days until the chicks hatch: 90%.
Features should also be taken into account:
- Adding cold water lowers the temperature by 2-3°, and it takes 2 to 4 hours to stabilize it.
- Adding water at a temperature above 40°, the humidity level rises to 85%, normalizes after 3.5-4.5 hours,
- The optimal temperature for pouring is from 33 to 35°.
General characteristics of incubators
The body of the device is made of thick foam, which retains heat well in the inner chamber.
But the material requires careful handling; it is fragile and easily dirty. The internal porous surface of the laying hen incubator requires thorough cleaning and disinfection after each cycle of operation. The dimensions and weight of the device depend on the size of the incubation chamber. There are modifications that can accommodate 36 - 104 chicken eggs. The device includes only a grill for hatching chicks.
Other pallets with larger or smaller cell sizes can be purchased additionally. The laying hen incubator and battery are not included; you can use a car battery or buy an additional one with a charging station.
An important function during the hatching period is the periodic turning of embryos. In the simplest models it is done manually, which is very troublesome. There are models with automatic egg turning, and fully automatic devices that regulate temperature and humidity. The laying hen automatic incubator works on the principle of setting it up and forgetting it for a week.
The difference between the Novosibirsk model is the absence of containers filled with water. The bottom bottom is made of foam plastic with recesses into which water is supplied. The network supplies 220 V power to the rotary device and 12 V to the thermostat through a converter. Therefore, using the battery does not change the setting and will provide 20 hours of operation.
Initially, the incubator for domestic needs had a BI 1 series for 36 and 63 eggs. Later, the BI 2 device appeared, which is characterized by greater productivity, the bookmark is 77 and 104 pieces. In principle, household incubators BI 1 and BI 2 are no different. Both models are equipped with additional options.
The temperature is set and controlled using an analogue or digital thermometer. You can check the accuracy of their values with a medical thermometer placed on top of the eggs. When packaging, the use of different types of thermostats for Laying incubators has a big impact on the cost.
The figure shows a simple 220 V thermostat that supports:
- auto-flip function;
- set temperature in the chamber;
- switching to a backup power source.
Such a device is inexpensive, it is necessary so as not to work as a hen during the entire incubation period.
A digital thermostat is used to automatically conduct the process. It has a process program, memory, humidity measurement sensor, and additional terminals for connecting the battery. Moreover, if there is no voltage in the network, the turning device does not work.
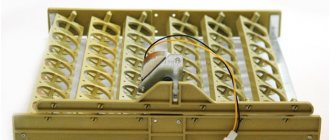
The circuit of the incubator BI-1 and BI-2 is assembled on a board and has the following form:
It regulates the operating mode of the device:
- temperature in the range 33-450;
- temperature error 0.50;
- bringing into operating mode no more than 90 minutes;
- revolution frequency – 1-8 hours;
- mains voltage – 200-240 V.
Types and their characteristics
One of the main advantages of the Laying Incubator is the ability to choose the appropriate volume for hatching eggs. For small farms, compact models with limited functionality are suitable, and for large poultry farmers, devices with increased space and full automation are produced. Below is an overview of all current incubator models.
BI-1 for 36 eggs
The smallest incubator in terms of capacity, ideal for private farms. Available in three versions:
- with manual thermostat and automatic rotation;
- similar equipment with backup battery;
- with digital thermostat, automatic rotation and power supply.
Flexible configuration allows the device to be used by both beginners and experienced poultry farmers. It is possible to use a manual turning mode, which allows you to lay up to 50 eggs.
BI-1 for 63 eggs
The average model provides the ability to lay 63 chicken eggs, which is optimal for home use. When the automatic rotator is turned off, the capacity increases to 90 pieces. Sold in a wide range of configurations, analogue or digital thermostat. A number of incubation models have a battery backup option.
BI-2M for 77 eggs
This model can hold 77 medium-sized chicken eggs, which is very suitable for raising broiler breeds. The automatic rotation function is provided at the request of the buyer. When it is turned off, the size increases to 100 eggs. Depending on the modification, there is a manual or digital thermoregulation mode and the ability to use backup power.
You can read about ovoscoping chicken eggs before placing them in the incubator here.
BI-2 for 104 eggs
The largest capacity for the laying hen incubator. Available in several versions, all have an automatic rotation function, which simplifies control over the bookmark. When it is turned off, the capacity increases to 140 pieces. Depending on the configuration, there is analogue or digital control. All automated models are sold with a battery backup only.
Incubator Layer Bi-2
It is an improved version of the Bi-1 household incubator in every way. This model can hatch 104 chicks from an egg at the same time. It will also work with a smaller load, for example, 77 eggs. It also comes with an automatic egg turning rack, making the process much easier.
Modifications
Depending on the type and size, 36, 63, 77, 96 and 104 eggs can be placed in the device. If you purchase a model without an auto-turning grid, you can incubate up to 140 pcs at the same time.
What does it consist of?
The internal structure of the Bi-2 incubator is no different from the Bi-1 incubator. It is worth noting that its body is made of lightweight materials and the entire structure weighs 2.6 kg.
How to use?
To begin with, the mechanical grill is pulled out, and warm boiled water is poured into a special container at the bottom, after which everything is installed back. Pre-adjustment of the temperature is also recommended. For a more accurate result, it is recommended to use a regular mercury thermometer for comparison and insurance.
The temperature in the incubator is established in approximately 20–30 minutes. If there is a spread between the readings on the sensor and the thermometer located on the grill by more than half a degree, then it is worth continuing to regulate the temperature and check that all conditions are met. New checks should be done after 15 minutes for better reliability.
Once the adjustment is complete, the eggs are placed. You can place any quantity, as long as the grid size allows - 36, 77 or even 104. Next, following the instructions, the incubation process is started. You can see the operation of this device in the video at the end of the review.
Reviews
Most owners have positive reviews after using the Laying Bi-2 incubator. The main thing is to correctly determine the desired grid in accordance with the size of the eggs. It is possible to purchase additional grilles for hatching chicks from goose or quail eggs.
Temperature and humidity levels should also be closely monitored to ensure a successful and healthy hatch. You should not worry too much about temperature changes within 0.5 degrees, in the morning it can be up to 1, this is quite normal, but large changes should not be allowed. Otherwise, it is very convenient and practical and successfully copes with its functions.
Incubator structure
Before starting work, you should carefully study the instructions for use, since the quality and speed of operation of the device directly depends on this. The most important part of the functionality is manual or automatic rotation of the eggs. The manual process is extremely inconvenient and is not suitable for large bookmarks. Below is the procedure for connecting the rotation.
How to install
First you need to place the incubator in a horizontal position, which is an important requirement from the manufacturer, and disconnect it from the network (remove the battery). Step-by-step algorithm for setting the lattice rotation:
- Connect the rotary device connector to the thermostat.
- Plug in the incubator.
- Within 7-15 seconds, the grid should move from one wall of the incubator to the other.
- If this does not happen, you need to turn on the thermostat connector with the AUP output to the network, wait for the grille to move, and then turn off the power.
- Normally, the next turning cycle should occur within an hour. Only after this can you start laying eggs.
The instructions for the Nesushka incubator describe in detail the operating principle, diagrams and internal structure. The body of the device is made of thick and durable pressed foam. The material helps maintain a high internal temperature. The outside of the housing can be painted or sheathed in plastic.
Pros of polystyrene foam: lightness. Disadvantages - fragility and the need to clean and disinfect after each incubation cycle. The removable top cover allows you to lay eggs in the Layer incubator without damaging the shell.
There are special protrusions inside the device for installing a removable tray. At the bottom there is a movable grill that facilitates the process of cleaning the inner chamber after hatching the chicks. The grill is removable and can be adjusted according to the size of the eggs.
Eggs are heated using incandescent lamps. For natural ventilation, there are several holes at the bottom and top of the case, which can be closed with plugs if necessary.
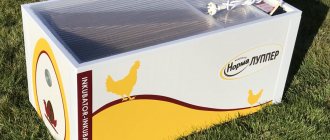
Incubator Laying hen: description, instructions, reviews
photo: Incubator Laying hen
Every novice poultry farmer asks this question: which incubator to buy. Large and roomy for several hundred eggs, or to begin with, limit yourself to a small, inexpensive model to protect yourself from risks. If you are just going to try your hand at home poultry farming, I recommend choosing inexpensive and simple household models. One of these is the Nesushka incubator, Novosibirsk .
Its name speaks for itself. The incubator was named so, claiming to be compared with a laying hen. This incubator is for a small farm or self-breeding poultry on a country plot. It is suitable not only for chickens, but also for many other types of poultry. I hatched young chickens and quails in the laying incubator
and we can say that I got a relatively good result. Depending on the size of the eggs, you can buy trays by selecting the desired cells.
Layer incubator models are designed for 63 and 90 eggs . They are equipped with automatic tray rotation and a device such as a digital thermostat. Its advantage is that you can set the desired temperature once, and a special thermal controller remembers it and maintains it independently. Depending on what type of poultry you're breeding, temperatures can range from 33 to 43 degrees, with a claimed accuracy of up to 0.1 degrees in digital models, but in truth, the true values aren't that good. I measured the temperature in the corners in a heated incubator - the range was 0.4-0.9 degrees
The incubator has an alarm system - if problems arise such as unexpected shutdown of the device, excessive temperature or any failure, the system immediately notifies about the problems. You can increase the capacity of the device to 160 eggs if you prefer manual turning of eggs over automation.
A very important point for breeding absolutely any type of poultry is the regular turning of eggs. If this does not happen, the embryo sticks to the wall of the shell and dies. In nature, a caring hen performs this action up to 50 times a day. The laying hen incubator will turn the eggs as many times as you program. The rotation can be automatic, mechanical or manual . The latest models, of course, are much cheaper, but I recommend that you do not save money and give preference to an automated incubator.
The body of the laying hen incubator is made of polystyrene foam. This material is popular for making incubators because... It has good thermal insulation and lightness. The weight of the device may vary depending on its capacity - from 2 to 5.5 kg. It is compact and easy to carry from place to place. Among the interesting and practical features provided in the design, I would also note a special viewing window through which you can see everything that is happening inside. This allows you not to open the incubator every time and not disturb its microclimate. For good ventilation, holes are equipped to allow fresh air to pass through.
The disadvantage, as with all foam incubators, is poor sanitary conditions. Hatching waste is poorly washed (foam is porous), mold accumulates, and a coating of dried water forms on the bottom of the incubator (water baths are not provided, water pours directly to the bottom). The bad thing is that in the Layer the foam in the incubation chamber is not protected in any way from the direct materials of incubation , and even outside, the birds repeatedly tried to peck and crumble the body. It is necessary to pay due attention to the disinfection of this model, and the temperature run , which it is advisable to periodically adjust and catch, does not guarantee a good output.
This is all personal experience and feedback. In the form below the article you can leave your feedback about this incubator
Operating instructions for the laying hen domestic incubator
1. GENERAL INSTRUCTIONS 1.1. Before starting work, you must carefully familiarize yourself with the design of the incubator and the rules for its operation. 1.2. The location of the incubator in the room plays an important role in the incubation process. It is necessary to ensure a flow of fresh air and its free access to the ventilation openings. Do not expose the incubator to direct sunlight and install the incubator in ventilated places (avoid drafts). The optimal room temperature is between 20°C and 25°C. Temperatures below 15°C and above 35°C are not allowed. The incubator is not intended for use on the floor. 1.3. Before laying eggs, you must make sure that the incubator is working, according to paragraph 6 of this manual. 1.4. The incubator is designed to be powered from a 220V ± 10% network; if the supply voltage changes by more than 10%, it is necessary to use a voltage stabilizer to stablely maintain the temperature in the incubator. 2. TECHNICAL DATA 2.1. Main parameters - supply voltage, V ______________________ 220 (50 Hz)12 ± 10% - power consumption, W __________________ 20...6030...65* - temperature control limits, °C ________ 33°C - 43°C - temperature maintenance accuracy, °C _________ ± 0.2 egg capacity a) with turning device (grid) _____________ 36; 63; 7077; 96104 b) without a device for turning _____________________ by 50; 90; 100; 140; eggs - incubator weight ______________________________ 2-6 kg.* - temperature spread inside the incubator in the corners is about ______________________________ 1°C - class of protection against electrical damage. current ___________ II - degree of protection against water access ________________ IPX4 - type of thermostat * - analog / digital / digital with a humidity meter. 3. COMPLETENESS 3.1. The delivery set includes 1. Household incubator, pcs. _______________________________ 1 2. Thermometer, (alcohol) pcs. ___________________________ 1 3. Packaging, pcs. _______________________________________ 1 4. Operating manual, pcs. _______________________ 1 5. Mechanical automatic turning device* ______ 1 4. SAFETY REQUIREMENTS 4.1. It is forbidden to open the lid of an incubator connected to the power supply. Before opening the incubator, it should be unplugged. 4.2. Do not use the incubator if the insulation of the power cord is damaged. 4.3. Do not place any objects on the incubator. 4.4. It is prohibited to place the incubator near heating devices or open flame sources. 4.5. It is prohibited to open or repair the thermostat and electrical parts of the incubator yourself. The thermostat elements are exposed to a network voltage that is dangerous to human health. 4.6. Alteration or modification of the incubator and its parts and design is prohibited. 5. INCUBATOR DEVICES 5.1. The household incubator BI-1 (BI-2) is designed for incubation and hatching of chickens, ducklings, goslings, turkey poults, quails, pigeons and other birds. 5.2. The appearance and structure of the incubator are shown in Fig. 1. 5.3. The incubator is reliable. 5.4. The incubator has an analogue or digital* temperature controller with a temperature sensor located on the incubator lid and maintains the required temperature throughout the incubation period. The thermostat is connected to a 220V network. To stabilize the temperature inside the incubator, the thermostat periodically turns the heater on and off. The temperature should be adjusted by turning the knob* clockwise to increase the temperature, counterclockwise to decrease it. Temperature control is carried out using a thermometer through observation windows or directly. In incubators, eggs are placed on grids. Turning eggs is carried out in three ways: a) manually b) mechanically - using a turning device (mesh with cells) included in the kit c) automatically - using a mesh with cells and an automatic egg turning device (AUP). 5.5. Depending on the model, the incubator is equipped with an additional thermostat powered by a 12V battery in two versions with automatic and manual switching of the incubator power supply. 5.6 The manufacturer reserves the right to make changes to the design and electrical circuit that do not impair the technical characteristics of the incubator. 6. PREPARATION FOR WORK 6.1. Unpack the incubator, conduct an external inspection, check for completeness. 6.2. A grid 8 is placed on the bottom of housing 1, smooth side up. (Fig. 1) 6.3 Install the AUP* on the body of the incubator 1. (see Appendix AUP) 6.4 Install the cover 2 on the body 1. 6.5 Connect the power cord to the 220 V network, the AUP must move the grid to the opposite wall. 6.6. By rotating knob 10 of thermostat 4, we set the average temperature value (knob 10 in the middle position). Indicator 9 should be lit constantly (the incubator is heating up). After 10 - 30 minutes* the temperature inside the incubator will rise to the set temperature and indicator 9 will start flashing, which means it has entered operating mode. 6.7. Connecting a 12V thermostat. Disconnect the power cord from the 220 V network. Connect the clamps to the battery terminals, observing the polarity. The operating principle of a 12V thermostat is similar to the operation of a 220V thermostat (see paragraph 6.6). After the incubator enters operating mode (the indicator blinks), it is necessary to disconnect the clamps from the battery terminals. 7. PREPARATION FOR INCUBATION 7.1. Preparing the incubator: remove the lid, remove the grid and the turning device*. Pour warm boiled water (see table 1), install the grille and turning device into the housing. Table.1 Dependence of humidity in the incubator on the evaporation area
| Evaporation area, % | Humidity in the incubator, % |
| 50% | 40-47 |
| 70% | 45-55 |
| 100% | 55-70 |
The humidity level in the incubator depends on climatic conditions and the location of the incubator, see paragraph 1.2. 7.2. Maintaining optimal humidity in the incubator increases the hatching of healthy chicks. Air humidity depends on the surface area of the water being poured, based on the nature of the room. The recommended humidity for chicken eggs is 50-55%, and two days before hatching - 65-70%. It is recommended to irrigate duck and goose eggs with water in the second half of incubation (preferably twice a day). During the hatching period for duck and goose eggs, it is necessary to maintain humidity to 70-80%. If there is no device for measuring air humidity, it can be determined according to the description in Appendix A of this manual. 7.3. Before laying eggs, the thermostat needs to be adjusted. To accurately measure temperature during adjustment, it is recommended to use a medical thermometer. In this case, you need to shake the thermometer after each measurement. Place the thermometer on the grill in a place convenient for viewing from the viewing windows. Close the incubator with a lid and plug in. A continuous glow of the indicator will indicate that the heaters are turned on. After 20-40 minutes, the incubator will reach the set temperature. Indicator 9 will go into flashing mode. The incubation temperature should be 37.7°C with the thermometer positioned at grid level. If the thermometer readings differ from the indicated temperature by more than 0.5°C, then it is necessary to adjust the temperature in the incubator. The adjustment is carried out in several steps with an interval of 10-15 minutes by slightly turning the thermostat knob*. This time is necessary to stabilize the temperature inside the incubator. To increase the temperature, turn the knob clockwise, to decrease it, counterclockwise. When the required temperature is established in the incubator, replace the medical thermometer with the thermometer supplied with the incubator (preliminarily compare the readings of both thermometers, then take into account the difference). It is advisable to ensure that the thermometer you use is of adequate accuracy. Unplug the incubator. 7.4. Carry out the same operations with the 12V thermostat as in paragraph 7.3. Disconnect the incubator from the battery 7.5. Select eggs that are fresh, fertile, clean (unwashed), and of medium size, suitable for incubation. The surface of the shell should be smooth, matte and uniform. The shelf life of eggs should be no more than 10 days, the storage temperature should not be lower than 10°C. All kinds of deviations reduce the incubation quality of eggs. An ovoscope** can be used to collect eggs. The ovoscope will help detect defects in the shell and check the correct location of the air chamber and its size. The air chamber should be located in the blunt part of the egg without displacement and have a round shape and medium size. 7.6. Before laying the eggs, mark them with a simple soft pencil on two opposite sides (for example, “O”, “X”). This will give you control over the orientation of the eggs when turning them. 7.7. Place the thermometer in a place convenient for viewing from the viewing windows. 7.8. Close the incubator with a lid. Plug in the incubator. 8. INCUBATION 8.1. Periodically monitor the temperature and availability of water in the incubator. If necessary, pour warm water into the recesses at the bottom of the body through the grate, after unplugging the incubator from the mains and removing the lid. 8.2 The AUP turns the eggs automatically once an hour*. 8.3. In incubators, it is recommended to swap eggs, moving them from the center to the walls of the body and vice versa, placing them with the opposite mark up. It is advisable not to transfer the eggs, but to roll them carefully so as not to damage the embryonic tissue. You can do this by removing the eggs from the center of the incubator and carefully laying them on a soft bedding, carefully rolling the outer eggs into the center, and placing the removed ones along the edges. 8.4 After transferring the eggs, close the incubator with a lid and plug in. After some time, the temperature inside it will be restored without additional adjustment. Attention! Do not turn the eggs two days before the end of incubation! At the same time, you should remove the turning device from the incubator, if present. 8.5. It is necessary to control the quality of eggs twice during the incubation period using an ovoscope or by shining a bright light source (for example, an electric lamp with a power of 150-200 W, the light of which can be limited by cardboard with a hole the size of an egg). When an egg is candled on the seventh or eighth day of incubation, the embryo is visible as a dark area in the yolk. When candling on the eleventh to thirteenth day, the entire egg should be darkened, which is a sign of normal development of the embryo. Infertile eggs (“scattered eggs”) will remain light in color and must be removed from the incubator. 8.6. In case of a power outage for a long time (more than 5 hours), the incubator must be placed in a warm place to maintain the required temperature, or use a 12V thermostat (if this model has a 12V thermostat). For short shutdowns, it is enough to cover the incubator with warm things (blanket, pillow, etc.), blocking the exit of warm air from it. If the incubator is left for a short period of time at a room temperature below 15°C, the ventilation openings must be closed. 8.7. Incubation time in chick days _____________________________________________ 21; goslings ________________________________________________ (28-30); ducklings ________________________________________________ (28-33); turkey poults _____________________________________________________ 28; quail _________________________________________________ (15-17). 8.8. Read the specialized literature about the peculiarities of incubating eggs of various breeds of birds. 8.9. When the first chicks appear one day ahead of schedule, it is necessary to reduce the temperature by 0.5°C. If chicks hatch late, increase the temperature by 0.5°C. 8.10. Analysis of incubation results. To analyze incubation and determine the reasons for the death of the embryo, biological control data is used, both intravital (without violating the integrity of the shell) and at the end of incubation (based on pathoanatomical autopsies). Intravital biological monitoring during the incubation period can provide information on egg fertilization and embryo development, as well as embryo mortality over incubation periods. Eggs with dead embryos are conventionally divided into three groups: embryos that died before 7 days of incubation - blood rings; frozen, that is, dead - in chickens on days 8-17, and in other types of poultry - on days 9-24, and upon hatching - suffocated. For a high-quality hatching egg and a favorable incubation regime, the level of blood rings in the batch should not exceed 1-2%, and suffocation - 3-4%. If the deviations are significantly large, then this indicates a violation of the storage conditions of the eggs or their overexposure. If there are more eggs with frozen embryos than blood rings and dead embryos, then they were not biologically prepared for incubation (lack of vitamins). There may be cases when, during ovoscoping in the first days of incubation, it is difficult to determine whether the eggs are unfertilized or frozen (when the egg is candled, the embryo is not clearly visible). To do this, you need to open several eggs. In fertilized eggs, the yolk shows a rounded blastodisc, 4-4.5 mm in size, with uneven edges, surrounded by a gelatinous mass. In unfertilized ones, its size does not exceed 2-2.5 mm. Increased infertility may be the result of incorrect sex or age ratios in the flock or a decrease in the reproductive abilities of the bird due to certain reasons (underfeeding or obesity). The increased waste of eggs with dead embryos in the first two days of incubation is most likely the result of their storage in unfavorable conditions. The reasons for the death of embryos in the first week of incubation may be severe overheating of the eggs or feeding the hens with poor quality feed. The freezing of embryos in the middle of incubation and up to transfer to hatching is due to the low incubation qualities of the eggs as a result of inadequate feeding of laying hens. Increased mortality of embryos at the end of incubation and during the hatching period is usually the result of violations of the incubation regime. The main reasons for violation of the incubation regime are mostly associated with overheating, underheating, high or low humidity, disruption of air exchange and rotation patterns. High humidity is dangerous during the middle period of incubation (after the closure of the allantois) evaporation slows down, egg drying and development are poor, and the embryos poorly utilize nutrients. The hatching of the eggs is delayed, the hatched young are weak, with dirty sticky fluff. Low humidity is dangerous at the end of incubation and when the young are hatching. Dried shell membranes prevent the hatching of young animals; overdried young animals grow poorly in the future. In the absence of turns, especially in the first half of incubation (during the period of closure of the allantois), its non-closure and poor use of protein are possible. Violation of air exchange causes temperature changes in certain areas and disruption of oxygen supply to the embryo, up to suffocation. Overheating is very dangerous in the first days of incubation. Even with a short-term increase in temperature to +39.5 ° C, there is a large death of embryos and the presence of a large number of blood rings, sometimes even rupture of extra-embryonic blood vessels and massive hemorrhage occur. Embryos that survive the temperature attack subsequently develop deformities. The most common cause of early overheating is head deformities. Overheating in the middle of incubation is accompanied by hemorrhage in the internal organs and under the skin, and at the end it provokes premature pecking and hatching of small young animals with an unhealed umbilical cord and not retracted yolk. With minor but prolonged overheating, the allantois atrophies too early on the inner surface of the shell and remains of unused protein are visible. There are many hatched embryos, but chick hatching is difficult. The output is significantly delayed. 8.11. As the chicks hatch, remove them from the incubator to a dry, warm place (with an air temperature of 37°C) for about a week. You can warm up the chicks using an electric lamp or an incubator lid mounted above the chicks on stands. 8.12. After hatching the chicks, the incubator should be unplugged and thoroughly washed with warm water and a small amount of detergent (soap, washing powder). The incubator lid must be carefully wiped with a cloth moistened with the same solution. Remove any remaining detergent with a cloth soaked in clean water. Dry and reinstall all components removed from the incubator. 8.13. Store the incubator. The incubator should be stored in dry, heated rooms that protect the incubator from precipitation and solar radiation. Errors that occur during operation of the incubator. 1. The time to reach the set temperature in an incubator with eggs is much longer than in an incubator without eggs. 2. The temperature sensor must be positioned strictly vertically in relation to the incubator lid; the temperature sensor must be located in the area of the eggs and not touch them. 3. When the incubator lid is opened for a long time, the temperature in the incubator decreases. After closing the lid, the temperature stabilizes within 10-20 minutes, so there is no need to adjust the temperature of the thermostat. 4. If cold water is added to the incubator, the temperature in the incubator decreases until the water warms up. 5. The ambient temperature in the room changes greatly (± 10°C), which is reflected in the change in incubation temperature (inside the incubator ± 1..2°C). The use of abrasive products intended for cleaning bathtubs and sinks is prohibited; If the solution gets inside the thermostat housing; Application of great forces leading to wire breakage and other mechanical damage and deformation. Open and disassemble the incubator and parts of the incubator while connected to the network. 9. MANUFACTURER WARRANTY 9.1. The manufacturer guarantees the long-term performance of the household incubator provided that the consumer follows the rules of operation, transportation and storage. 9.2. The warranty period for the incubator is 24 months from the date of sale. If there is no mark from the trading organization on the date of sale, the warranty period is calculated from the date of release of the incubator. Incubators without this manual and those with mechanical damage will not be accepted for warranty repairs. 9.3. For warranty repairs, please contact the manufacturer. After the warranty period has expired, repairs should be carried out in specialized workshops. 9.4. At the end of its service life (10 years), its further operation is allowed in the absence of mechanical damage and provided that it is in working order. If there are defects, further operation of the incubator is prohibited.
Instructions for the laying hen incubator
Figure 1. Structure of a household incubator; “Laying hen” 1 - body, 2 - lid, 3 - viewing windows, 4 - thermostat, 5 - temperature sensor, 6 - heaters, 7 - power cord, 8 - grill, 9 - indicator, 10 - temperature control knob, 11 - rotating device. APPENDIX (reference) METHOD FOR DETERMINING HUMIDITY 1. Make sure that the incubator is in working order and maintains the set temperature. Prepare two thermometers. For one thermometer, wrap the volume with the measuring liquid in a small layer of cotton wool or two or three layers of cotton fabric. Wet the wrapped part in clean, boiled and settled water and remove excess water from the fabric. 2. Turn off the incubator. Place both thermometers in the incubator at the same level, close to each other. Close the incubator lid. Connect the incubator to the network. 3. No earlier than 15 minutes, but before the fabric dries, determine the temperature on both thermometers. Using a psychrometric table, determine the humidity in the incubator. 4. For each new humidity measurement, use a fresh piece of cloth and fresh water.
| Dry bulb temperature, °C | Wet bulb temperature, °C | |||||||||
| 25 | 26 | 27 | 28 | 29 | 30 | 31 | 32 | 33 | 34 | |
| Humidity, % | ||||||||||
| 36 | 38 | 43 | 48 | 53 | 58 | 63 | 68 | 74 | 79 | 86 |
| 36,5 | 37 | 41 | 46 | 51 | 56 | 61 | 66 | 71 | 76 | 83 |
| 37 | 35 | 40 | 44 | 49 | 54 | 58 | 63 | 68 | 74 | 80 |
| 37,5 | 34 | 38 | 42 | 47 | 52 | 56 | 61 | 66 | 71 | 77 |
| 38 | 32 | 36 | 41 | 45 | 50 | 54 | 59 | 64 | 68 | 74 |
| 38,5 | 31 | 35 | 39 | 43 | 48 | 52 | 57 | 61 | 66 | 72 |
APP APP (automatic egg turning device) Instructions for use 1. Purpose. Designed for automatic turning of eggs in incubators BI-1, BI-2 2. Technical data. Supply voltage - 220V, Power consumption - 3.5 W 3. Complete set. 1. (AUP-01-05) assembled - 1 4. Fastening washer -2 2. Egg grid -1 5. Instructions -1 3. Fastening nut -2 6. Packing bag -1 4. Assembly procedure. 1.Insert the mounting bolts of the device into the holes on the wall of the incubator, secure them from the inside using fastening washers and nuts. 2.Connect the turntable rod with the egg grid pin. To do this, you need to lift the side of the grille opposite to the pin up, place the grille under the limiting bars and insert the pin into the hole in the rod. 5. Operating procedure. Install the incubator in a strictly horizontal position. Connect the rotary device connector to the thermostat connector. Attention! Connect the connector only WHEN the incubator is DISCONNECTED from the power supply. When a thermostat with output to the AUP is connected to the network, the grid moves from one wall of the incubator to the other in about 7-15 seconds. The grid is located near the wall of the incubator. If this is not the case, then you need to turn on the thermostat with the AUP output to the network and, when the grille reaches the edge of the incubator, disconnect it from the network. The next grate movement cycle will occur in approximately 1 hour. When you turn it on for the first time, you need to make sure that the grille moves smoothly. You can start using the incubator in accordance with its operating instructions.
Read similar information:
- Blitz incubator: description, instructions, reviews (0) Good day to all lovers of poultry farming. I continue to tell you about my many years of experience in this rewarding business, and today we […]
- Incubator Ideal hen: description, instructions, reviews (72) Recently, many different models of incubators for breeding poultry have appeared on sale. Now I will tell you about such a device as [...]
- Kvochka incubator: description, instructions, reviews (69) I continue to tell you about my experience of using various incubators, and now we have a Ukrainian-made device in turn - an incubator […]
- Incubator Bi-2: description, instructions, reviews (59) Over the years of my poultry farming activities, I have tried many models of incubators - both domestic and imported. I can say that Russian […]
- Incubator r-com: description, instructions, reviews (26) Every poultry farmer who is passionate about his business, in search of the ideal incubator, has to try more than one device - from factory-made to home-made. […]
- Cinderella incubator: description, instructions, reviews (93) A couple of decades ago, breeding poultry - chickens, geese, ducks, etc. - was carried out only under the hen. Some amateur poultry farmers made [...]
Principle of operation
Before starting, remove the lid, remove the grill and the turning unit. Warm water is poured into a special container, the grate is returned to its place and the rotating mechanism is installed. Clean eggs are placed in cells and a thermometer is placed nearby. The lid closes.
The incubator is connected to the network. The desired temperature is set by turning the thermostat knob. To control the process of turning the eggs, it is recommended to mark them with a simple soft pencil.
For better heating and ventilation, eggs need to be transferred once a day from the central rows to the side rows, turning the mark in the opposite direction. Egg turning is turned off two days before the chicks hatch.
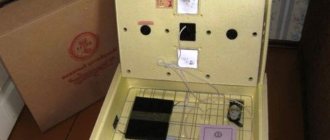
Instructions for use
After purchasing an incubator, you need to check the device for damage and integrity of components. The device must be installed in a dry and warm room. During the first start-up, you should carefully monitor the operation of the temperature sensor and rotary device. Stable operation largely depends on voltage; if it fluctuates above 10%, the incubator may not work correctly.
Layer incubator equipment.
Thermoregulation
After the first turn on, it takes 1-1.5 hours for temperature conditions to normalize. All factory models are produced with a set temperature of 38°C. The device itself can operate in the range from 33 to 45°C with an error of up to 0.3°C. Depending on the configuration, a manual or digital thermostat sensor is supplied. The values should be adjusted at intervals of 10-15 minutes by slightly turning the knob (pressing the button).
To check temperature readings, you need to use an additional medical thermometer to identify possible fluctuations. It must be placed in close proximity to the grille. Subsequently, to adjust thermoregulation at different stages of embryo development, you can use only the factory sensor.
Thermoregulation of the laying hen incubator.
Humidity
The humidity level is controlled using water, and also directly depends on the climatic conditions at the location of the device. Maintaining optimal humidity values directly affects the yield of healthy chicks. The recommended rate is 50-55%, and two days before hatching it should be raised to 65-70%. This is done by increasing the area of water evaporation, the data is given in the table.
| Evaporation area, % | Humidity in the incubator, % |
| 50 | 40-47 |
| 70 | 45-55 |
| 100 | 55-70 |
After laying chicken eggs, you need to control the temperature and humidity in the incubator. For this purpose, it is advisable to use an additional thermometer and hygrometer. The AUP turns the embryos every hour, but the procedure can also be carried out manually. In addition, you should regularly rotate the eggs from the walls to the center to ensure even heating.
If there is a power outage, the device should be placed in a warm place or a backup battery should be used. Embryos must be checked with an ovoscope twice during the incubation period. On days 7-8 and 11-13. All infertile eggs should be removed. This material will tell you about ovoscoping quail eggs.
Chicken egg incubation table
User manual
We suggest that you read the instructions for using the incubator, which includes a detailed description of all processes.
Preparatory process
Before laying, it is recommended to carry out preparatory work, which consists of the following processes:
- Initially, an inspection is carried out and the equipment is checked.
- A grate is placed on the bottom. It is important that the smooth side faces up.
- A device for rotation is installed on the body.
- The body is covered with a lid.
- Connect the device to the network.
- Set the thermostat to medium temperature. The incubator will heat up for about half an hour, after reaching the set level the indicator will begin to blink.
- Connect to thermostat.
The owners of the incubator do not have a question about how to increase the humidity, since the device has a water container, which allows it to independently regulate this indicator.
Video: preparing the incubator for laying eggs
Laying eggs
Eggs are placed only after pouring warm water and reaching a temperature of 37.7ºC. You can use a regular thermometer to check the temperature. Only fresh, uncontaminated eggs are selected for laying; washing them is strictly prohibited.
They should be medium in size, the shell should only be smooth and matte in color. Eggs that will be subsequently placed in an incubator can be stored for no more than 10 days at a temperature of not lower than 10ºC.
Otherwise, all incubation qualities will decrease. To make it easier to control when turning over, it is recommended to mark the shell with a soft pencil; these can be ordinary numbers. After all the manipulations, the eggs are placed next to each other on their sides.
Incubation rules
On average, if all recommendations are followed, chicks appear 21 days after laying.
To achieve success in this, it is important to adhere to the following rules:
- Constantly monitor the temperature inside the incubator.
- Do not forget to add water after disconnecting the device from the power supply.
- Make sure that the turning device does not malfunction and the revolution occurs at the specified time. In the first 5 days, it is recommended to carry out these manipulations every 3 hours. Then no more than 2 times a day.
- Starting from day 5, it is recommended to ventilate the incubator. To prevent the eggs from overheating.
- Swap eggs, performing these actions using a roll, so as not to damage the tissue of the embryo.
- Two days before the chicks hatch, it is prohibited to carry out a coup.
- Throughout the entire period, egg development is monitored twice. This can be done using a regular lamp. The first on the 7th day, and the second on the 13th day.
- If the light goes out, the incubator is moved to a warm room and covered with thick material.
- After the appearance of the first chicks, the temperature is reduced by 0.5 ºС.
- After finishing hatching the eggs, wash the apparatus well.
Chicks hatching
After the chicks are born, they are not removed from the incubator until they are completely dry. At this time, it is important to conduct an inspection to identify unhealthy chickens and not waste time and money on their further maintenance.
Suitable young animals are selected according to the following indicators:
- Umbilical cord. Ideally, it should be closed and without traces of blood.
- Pooh. Yellow in color, soft to the touch and shiny in appearance.
- Beak. Strong without anomalies.
- Eyes. No cloudy spots with shine.
- Wings. Tightly pressed to the body.
- The chick must be mobile and respond to surrounding sounds.
Important! The time of the initial examination depends on the subsequent direction of the hens: for egg hens it is 6 hours after birth, and for meat hens it is 10 hours.
Assembly and operation in domestic conditions
After connecting the device to the network for the first time, you need to wait for the microclimate inside to normalize, and only then begin laying the eggs for the first time. Even at this stage, you should check the stability of the voltage, as well as the operation of the temperature sensor, ventilation grilles and set the rotary device mode.
Before the procedure, you need to select all the eggs and check for the absence of a dead embryo using an ovoscope. To control the revolution, you can make marks on the shell at this stage. You can only use fresh eggs that have been stored for no more than 10 days at temperatures up to 10°C. After setting up the incubator and connecting it to the network, you need to wait for the indicator to blink. Only then can you start laying the eggs, and after placing them on the grill, you can close the lid and put the device in a dry and warm place.
The average duration of work is 21 days. During this time, you need to control the temperature and humidity, and also monitor the rotation of the grate. The eggs need to be inspected twice with an ovoscope to check the development of the embryos. Even in a fully automated incubator it is impossible to achieve harmonious development of all embryos.
The level of humidity directly affects the quality and speed of development of chicken chicks. To regulate this parameter, it is necessary to reduce or increase the area of water, based on the table presented above. Some poultry farmers practice additional spraying (irrigation), but such a measure is necessary only for waterfowl.
Each model of the Laying Incubator has a special viewing window for monitoring the development of embryos, as well as ventilation holes for air circulation. If the operating rules and optimal indoor climate are observed, there is no need for artificial ventilation of the device. However, if the temperature inside the device constantly increases or the temperature sensor fails, it is necessary to additionally control the heat level. This can be done using a heating source, a heat gun on low, or a regular household fan.
Scheme of the laying hen incubator.
Advantages and disadvantages
The device of this series compares favorably with its analogues due to its low price and long service life. The manufacturer guarantees uninterrupted operation for 10 years. Users of the Nesushka incubator note the following advantages:
- price-quality ratio;
- lightness and compact design;
- possibility of automated control of the incubation process;
- Great variety of configurations.
Despite the large number of positive aspects, the device also has disadvantages:
- difficulty in washing and disinfection, inability to use ultraviolet light;
- fragility of the structure, the possibility of leakage in the chamber at the bottom of the incubator;
- frequent failures of the electronic system, so you have to switch the device to completely manual mode;
- the need to rotate eggs, since heating is uneven.
You can read about the “Ideal Hen” incubator here.
The advantages include a low price - from 3100 rubles - and compact dimensions. Model Bi-1 with automatic egg turning and digital display weighs 3.3 kg and has dimensions: 67*34*31 cm. The standard package includes two additional grids for quail and goose eggs. Another plus is the presence of an inspection window, which eliminates the need to remove the cover each time.
The device also has a number of disadvantages. Users note:
- fragility,
- Unreliability of the egg turning mechanism,
- The need to insulate the incubator during a power outage.
conclusions
- The Laying Incubator is assembled by a domestic manufacturer, due to which it has a low price, ease of operation, good characteristics, is easy to use and does not weigh much.
- Depending on the model and configuration, the device is equipped with space for laying (laying) 63-104 eggs, an analogue or digital temperature sensor and a backup battery.
- There is a manual or automatic (automatic) device for turning the embryos, which simplifies the work process and if repairs are required.
- The humidity in the incubator can be adjusted/adjusted (increased or decreased) by adding or decreasing the area of water evaporation in the bottom tray.
- The device has a viewing window and ventilation grilles, thanks to which you can monitor (show) the development of embryos without disturbing the internal microclimate of future chickens.