Learning to pluck a chicken correctly
For many owners, the most painstaking work when raising poultry is not feeding or even cleaning the house, but plucking the carcass. Beginners in this business generally do not know how to pluck a chicken, but experienced ones have their own secrets. And the technical process does not stand still, and recently you can find special devices on sale, the task of which is to make this procedure as easy as possible at home. We will look at several methods, show them on video and, for comparison, describe how the process of processing a carcass takes place in a large-scale production environment.
Dry method
It is recommended that the dry plucking procedure be carried out with the bird still warm immediately after decapitation. Everything is done step by step:
- Place the bird on the surface, upside down.
- Pluck coarse feathers from the tail and wings.
- Process the back and sides of the bird.
- Turn the turkey over and pluck the breast down to the craw.
- Remove fine feathers and fluff from the neck.
- Get rid of fluff by scraping the carcass with a dull knife or holding it over a gas burner for several seconds (no longer than 3 seconds for each zone).
- Wash the bird in cool water.
Advice! Removal of turkey feathers is carried out in the direction of their growth, and no more than 1-2 pieces at a time, to avoid damage to the turkey skin.
The advantages of the method are the following factors:
- no need for special devices;
- obtaining a high-quality pen for further use;
- maintaining the attractive appearance of the plucked carcass;
- possibility of long-term storage of processed poultry.
Before dry plucking a turkey at home, it’s a good idea to learn about the disadvantages of the method:
- the likelihood of injuring the turkey’s skin if you are inexperienced in plucking;
- difficulty collecting fluff (dry material scatters easily);
- duration of the procedure.
Advice! For dry plucking, tools such as tweezers and pliers for the thickest feathers are useful.
Step-by-step instructions for plucking
The method of plucking a carcass may vary. We will tell you some secrets that will simplify the process at home, and you can see the main points in the video.
Pre-scalding method
The essence of this method is that as soon as the blood drains from the killed carcass (usually this takes two to three minutes), it is immersed in hot water. The water temperature should be between 80-90 °C, and the duration of such a “bath” should be approximately one minute. After this, the water is allowed to drain, the carcass is placed on a table or hung by the leg and the feathers are removed.
An unconditional advantage is that the feathers are very easy to remove and the whole procedure takes from 10 to 20 minutes, depending on the size of the bird. But there is also a significant drawback: if the water was very hot, then when removing the feather the skin may tear. Fatty birds, such as well-fed chicken, are especially susceptible to this. If it is killed for oneself, then there is no big problem, but if it goes for sale, then the plucked carcass will lose its attractive presentation. If done correctly, this method helps to quickly pick off the feather, so it is good if you need to score several pieces at once.
Combined method
The slaughtered carcass is immersed in very hot (90 °C) water for just a few seconds. Then the water is allowed to drain, and the bird is wrapped in thick cloth and left for 10-15 minutes. To improve the result, it can be sent in this form in a package. The point is that a steam bath effect is created, due to which the pores on the skin expand, which makes it easier and faster to remove feathers at home. The carcass is processed on the table; during the process, the carcass can be periodically dipped in hot water to wash off any feathers and fluff that have been plucked but remain on it.
Craftsmen were able to slightly transform this method. They iron the dry carcass wrapped in cloth with an iron at maximum steam output. In this way, a similar effect is achieved, but there is no need to boil large amounts of water.
Using a special attachment
Enterprising craftsmen did not miss the opportunity to make money from this process, so you can find special attachments on sale that are designed to simplify plucking. The attachment you see in the photo is installed on a drill or screwdriver. It has so-called punching fingers made of rubber or rubber. As the developers assure, it takes up to five minutes to process one carcass at home.
Another device in action can be seen in the video.
Stage No. 3. Removing feathers. Basic methods for plucking poultry carcasses: Method 1 - dry method.
Suitable for small farms (up to 10 carcasses). It is used immediately after bleeding, but before the carcass has completely cooled. After rigor, plucking will be very difficult. Basic rules for dry plucking: - first of all, remove the wings from the feathers and tail, - then - pluck the chest, neck, legs of the bird, - the feather is pulled out only in the direction of growth; - remove the plumage carefully, without taking too much, because The delicate skin breaks easily and the carcass loses its presentation. Method 2 - plucking after scalding. Suitable for processing large numbers of carcasses. In this case, scalding and plucking is carried out both with the help of special devices (scalding machines, feather removal machines and nozzles), and without them. Scalding makes it much easier to remove feathers from a carcass, because hot water softens the feathers and the fatty base that holds them. You need to scald carcasses by immersing them in hot water (65-70ºC) 12-13 times. A large bucket, pan, vat, bath, etc. will do. Feathers are plucked from a wet carcass in the order indicated above - wings, tail, chest, neck, legs. Then, using a blunt knife, remove all the fluff and hemp remaining on the skin of the carcass. Larger-scale poultry breeding will require the use of special equipment. This will speed up the processing process and improve the appearance of the product. Shparchan is used to scald carcasses. This is a small barrel with lattice inner walls, in which water is heated to 53-60 ºС and circulates. The carcass is completely immersed in water for 1-2 minutes and, due to water flows, is held at the bottom of the scalding tank, which allows it to be scalded evenly. In addition, a constant temperature of the water in the scalding tank is maintained automatically to avoid disruption of the processing technology. For plucking carcasses, feather removal attachments and machines are used, which greatly facilitate and speed up the process of plucking carcasses. The feather removal attachment is designed to remove feathers from a bird carcass of any weight and size. The attachment is installed on a regular household drill or screwdriver. The carcass is brought to the nozzle and turned in different parts. Rotating, the nozzle, using rubber strikers, grabs and pulls out the feather. The productivity of such a nozzle is about 60 carcasses per hour. But there are also significant disadvantages of its use - the carcasses of large and heavy birds are difficult to hold in weight, feathers fly away, as well as the constant presence of humans. The feather removal machine does not have these disadvantages. It is designed for plucking carcasses of any size and does not require constant human presence, and the feathers are collected in one place. The machine is a kind of washing machine, in the drum of which there are also rubber fingers. The scalded carcasses are loaded into the drum and rotated in it. After plucking, the carcasses are removed, and the feathers are washed off with water and placed in a basin. Stage No. 4. Toilet and singeing of carcasses. In a household setting, after plucking, it is recommended to clean broiler carcasses. Toileting a carcass is the removal of droppings from the cloaca, for which it is enough to lightly press on the bird’s belly. If its legs become dirty in droppings, they are thoroughly washed without wetting the body of the carcass. A clean paper swab is again inserted into the oral cavity of the carcass, taking away any remaining blood. After toileting, the carcass is singed to remove fine feathers. Before singeing, it is recommended to rub the carcass with flour, which will help quickly get rid of soot on the skin of the bird. Searing is carried out over a gas burner or over a fire. Stage No. 5. Gutting birds. Evisceration is the separation of edible and non-edible internal organs from a broiler carcass. Gutting technology: - cool the carcasses for 10 minutes in cold water to avoid darkening of the meat, - place the carcass belly up, - make a circular incision in the cloaca, and then make a large longitudinal incision about 4 cm long, - be careful from the incision, trying not to ruptures, first remove the intestines with the cloaca and the end of the duodenum, then remove the internal organs that go into food, or, in simple terms, “offal” (heart, liver, stomach), clean off adhering contaminants and wash. To facilitate the process of gutting a large number of carcasses, it is recommended to use a fork to remove the entrails (heart, liver, lungs, stomach, intestines, crop). With this fork you can gut 200 carcasses per hour. Stage No. 6. Storage of carcasses. Prepared carcasses are placed for storage in a refrigerator or cellar. In winter, carcasses can be frozen outside. To do this: - the carcasses are left outside for 24 hours, - then the frozen carcasses are dipped in cold water and put out into the air again, - this can be repeated several times so that an ice shell forms on the carcass, which allows you to preserve all the taste of chicken meat and ensure long-term storage of carcasses - after freezing, it is recommended to wrap the carcasses in clean paper and store them in a cold place. Conclusion The process of slaughtering broilers requires thorough preparation: - choosing methods of slaughter, scalding, plucking carcasses, - purchasing special equipment and devices, - preparing a place or room for slaughter, as well as observing sanitary and hygienic standards in it, - preparing a place for storing carcasses. If you prepare thoroughly and in advance for the slaughter process, it will not cause you any trouble and will not take much time and effort.
Machine plucking is a modern way to make it easier for farmers to pluck poultry! Plucking on a feather picking machine requires adherence to technology, thanks to which we get the desired 100% feather harvest and the desired appearance of the carcass!
There are two types of poultry scalding:
- soft;
- tough.
When using a soft scald, the yellow epidermis of the bird is preserved, but it is almost impossible to achieve 100% feather removal.
A hard scald prepares the carcass for complete removal of feathers and yellow epidermis.
This table shows the temperature conditions for scalding before plucking on a feather picking machine. Since the conditions for keeping poultry, the age of food and other indicators are different for everyone, adjustments should be made in your specific case. Before mass slaughter, test the temperature on 2-3 carcasses. If the plucking was successful, then continue to adhere to this temperature and time.
How to properly adjust the scalding regime? If the bird's skin breaks during the plucking process, lower the scalding temperature by a few degrees. If feathers remain on the bird's body, increase the water temperature a few degrees. In the same way, you can change the time the carcass stays in water.
How does this happen in a poultry farm?
The process at a poultry farm cannot be compared with what happens at home. The volumes and rates of production here are completely different, so large farms use special defeathering machines for plucking carcasses. Depending on the modification, they are designed for different volumes and tempos, which may cause the quality of the final product to suffer. Let's consider both stages in production.
- Heat treatment. Large industries use special baths filled with hot water. To speed up the process and increase efficiency, salt can be added to the water, and an air supply mode can be turned on in the bath itself, creating a bubbling effect. The duration of this stage is from 2 to 2.5 minutes. A correctly performed step will help you quickly remove the pen without overloading the equipment.
- Remove the feather. There are two types of feather removal devices: automatic cyclotypes and disk ones. Regardless of the type, their action is based on one principle, which is that the friction force of the rubber nozzles must be greater than the force holding the feather in the carcass. Nozzles can be made of rubber and caoutchouc. The material does not affect the quality of work; the duration of operation only depends on it.
Water is continuously supplied to any machine, allowing you to wash away the removed feathers. Overall, these machines are very efficient. Their efficiency is about 95%, which makes it possible to maintain farm profitability at the proper level. Each carcass is brought to marketable condition manually, but this process takes no more than two minutes.
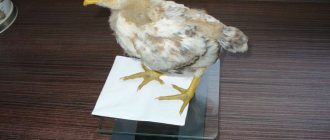
Is it possible to eat chicken meat if you are sick?
The most common disease of chickens and broilers is coccidiosis. In this case, the skin of the bird becomes bluish and loses its presentation. Such a carcass is no longer suitable for sale.
The answer to the question whether it is possible to eat meat if broilers have coccidiosis will be negative. This disease is not dangerous to humans. However, meat loses its beneficial qualities and is not recommended to be eaten.
Another common bird disease is dropsy. Often the result of this disease is the death of the bird. At the same time, the answer to the question whether dropsy in broilers can be eaten is quite simple. You can eat this kind of meat. The main condition for its use is good heat treatment. If this is followed, meat will not pose a danger to humans.
Read also: Why do broiler chickens die, what to do to prevent the bird from dying at one month of age, video
Several ways to pluck a bird
After the bird has been raised, it is time to slaughter it. Poultry farmers themselves determine which birds are time to be slaughtered and which need to be fed for another couple of weeks. Typically, broilers gain the required body weight by the end of the 8-9th week of life. Two-month-old broilers weigh approximately 2.5 kilograms. This age and this body weight have the highest profitability when raising broiler chickens.
It is very important not only to raise birds and slaughter them on time, but also to pluck them correctly. It is especially important to carry out the correct plucking procedure if the broilers are intended for sale. The appearance of a slaughtered bird affects its selling price.
Video: How to properly pluck a broiler
There are several ways to pluck a broiler:
- pre-scalded;
- steaming method;
- using a special plucking attachment.
With scalding
Since time immemorial, a method has been known that was also used by our mothers and grandmothers - preliminary scalding of the bird carcass in very hot water.
What you need for scalding
- Scalding a bird is a process accompanied by very unpleasant odors. Therefore, whenever possible, this procedure is carried out outdoors. If plucking has to be done indoors, it is advisable to open the windows.
- To work, you need a cutting table where you can put the chicken and pluck it comfortably.
- Place a deep tray or other wide and shallow dish on the work table where the wet and hot chicken will be placed. If you do not do this and place the chicken directly on the table, then the water draining from the carcass will stain the surface of the table and the floors in the kitchen.
- Hot water (almost boiling water) is prepared in advance. Place a large amount of water on the fire to warm up. To scald one broiler you will need at least 10 liters of very hot water. The water temperature must be at least +85. +90 °C.
- Look for a large and tall basin or other container in advance. The main criterion for selection: a fairly voluminous chicken (in width and height) must fit into the container, and there must also be a space of at least 15-20 cm to the top of the basin.
- You will also need a basin to collect wet feathers (when collecting feathers for pillows), or the housewife needs to install a large garbage bag for feather waste near the future plucking site.
How to scald a broiler
- The bird is slaughtered just before the water boils for scalding.
- Immediately after slaughter, the carcass is turned upside down and the blood is allowed to drain for 8-10 minutes.
- Before bringing it to a boil, turn off the heating water and pour it into the prepared container for scalding.
- Holding the legs, the broiler carcass is lowered into hot water for one minute so that the hot liquid covers the bird well.
- The wet chicken is pulled out, turned upside down and then immersed in boiling water for one minute.
- The chicken is again taken out of the hot water, held by the legs with one hand, and the wing is straightened with the other hand and lowered into boiling water so that the armpit area is in the hot water. The armpits are also scalded in boiling water for 40 seconds or one minute.
- Exactly the same operation is carried out with the second wing.
- The back of the bird (where the tail feathers are) may need a longer bath, so stop scalding the tail only after the large, coarse tail feathers begin to pull out easily.
- You can check whether the bird is well scalded and whether it is ready for plucking: the housewife tries to pull out a feather in different places of the bird’s carcass; if this is easy, the chicken can be plucked. If the feather does not come out in any place, then the bird should be immersed in hot water without steaming for another 30-40 seconds.
- If the bird is old and difficult to scald, then after bathing in boiling water it should be wrapped in a large plastic bag or cloth and left for 5-7 minutes for additional heat treatment. Once this procedure is complete, the pen will be easy to remove.
How to pluck
- The bird, scalded to the desired condition, is taken out of the hot water and placed on a cutting table.
- The bird cannot be allowed to cool while it is hot - the pores on the skin are open, and the feather can be easily pulled out.
- First of all, coarse feathers are pulled out from the tail and wings (flight and tail feathers), after which the axillary region, belly, back and neck are treated.
- After the initial plucking, the chicken is carefully examined and previously unnoticed fluff and feathers are removed.
- After this, the carcass is ready for fire treatment (to remove small hairs on the skin).
Steam method
In this case, water heated to almost boiling (90 °C) is also used. It is easy to determine the desired temperature visually: small bubbles will begin to appear on the surface of the heating water, after which the water is immediately turned off.
What you will need
- A work table with a flat surface and a comfortable height.
- Deep container for scalding poultry.
- Bucket for heating water.
- A piece of cloth large enough to wrap a broiler in.
- A large plastic bag, large enough to fit a large chicken.
- In some cases, an iron may be needed.
The scalding method
Plucking a turkey carcass after scalding is a faster and more convenient method than the dry method. The step by step procedure is:
- Heat 10 liters of water (75-80°C), take a container of the appropriate size for immersing the bird.
- Dip the turkey in hot water for 50-60 seconds, remove it, place it on the table and start plucking.
- First remove feathers from the back and wings, then from the sides and breast, then from the neck. Pluck feathers as they grow.
- Scorch the carcass over a gas stove to remove fine fluff.
Advice! Feathers must be removed after scalding as carefully and quickly as possible, before the carcass has cooled down.
There are a number of advantages that confirm: scalding a bird before plucking a turkey quickly and efficiently is very convenient:
- coarse feathers are successfully removed from the carcass along with the “stumps”;
- wet fluff is easy to collect, as it does not fly apart;
- little time is spent on the procedure;
- You can quickly process a large number of carcasses.
There are also disadvantages:
- unsuitability of wet fluff for further use;
- danger of getting burned if scalded carelessly;
- the likelihood of skin ruptures in too hot water;
- impossibility of long-term storage of carcasses;
- Difficulty in working with hot birds if you are inexperienced.
Interesting! Scalding is an ancient method of preparing turkeys and other birds for plucking, which remains relevant to this day.
How to singe a bird efficiently and correctly
When the broiler carcass is cleared of feathers, it needs to be treated with fire - this will help clean the bird’s skin from small hairs.
In households, in order to singe a bird carcass, they use:
- a gas burner turned on with the flame distributor disk removed;
- a small fire of dry twigs built in the yard;
- blowtorch;
- with a homemade torch made from newspapers rolled into a tight tube.
Carrying out the procedure for roasting a carcass over a fire or gas burner:
- The bird is held by the legs and neck.
- The restrained bird is lowered towards the open fire for one to two seconds.
- After which they lift it up, inspect it and lower the carcass to the fire on the other side.
- When all accessible surfaces of the skin are cleared of hairs, begin to singe hard-to-reach places (armpits and groin folds).
- Processing the wing liner - to do this, take both legs of the chicken in the left hand, and the wing of the bird in the right hand and pull it back so that the fire has access to the armpit. This procedure is carried out for both fender liners.
- Processing the inguinal folds - take the broiler by the neck with your left hand, and grab the bird’s leg with your right hand and pull it at an angle of 45 degrees to the side so that the inguinal folds become accessible to the fire. This procedure is carried out for both the right and left legs.
- If the housewife needs chicken feet to prepare jellied meat, they are also tarred over the fire.
When processing with a newspaper “torch” or a blowtorch:
- The carcass prepared for singeing is placed on a stand that will not quickly catch fire (a thick wooden stump, an iron grill, two bricks mounted on an edge).
- Fire from a blowtorch or a lit newspaper tube is quickly passed along the bird. This operation takes no more than 1-2 seconds.
- After which the carcass is turned over to the other side and a quick fire treatment is carried out again.
- To treat the wing liners, the broiler is laid on its back, and a wooden spacer stick (8-10 cm long) is inserted between the wing and the bird’s carcass. This spacer must be inserted under both wings. This allows the fire to treat the armpits in one or two seconds.
- Processing the inguinal folds - for this, the chicken is also laid on its back, one long wooden stick-spacer is inserted between the legs of the bird (across the body). The inguinal folds are also treated with fire within a few seconds.
- At the end of the procedure, the treated broiler is inspected for remaining untreated areas. If such places are found, they are re-burnt.
Video: singeing a bird with a gas burner
Stage No. 1. Selection of broilers for slaughter. Preparing poultry for slaughter. Bird catching.
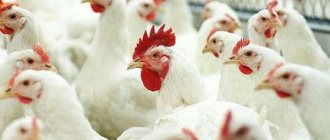
For slaughter, as a rule, 40-60 day-old broilers are selected or guided by the weight of the bird - a broiler ready for slaughter weighs, on average, 2-2.5 kg. Further weight gain is unprofitable from an economic point of view - broilers eat more feed, and gain weight slowly.
Before slaughter, selected broilers are fasted for 18 hours. At the same time, water is provided in unlimited quantities and the lighting is not turned off.
Under such conditions, the bird’s body becomes disoriented and begins to digest the remaining food in the intestines at a faster rate. Water helps clear the contents of the stomach and intestines faster. Cleaning the stomach and intestines of chickens, as well as drinking plenty of fluids before slaughter, affect the quality of the meat.
Advice. To quickly cleanse the intestines, it is recommended to give the birds a laxative in the form of a 2% solution of Glauber's salt. If there is no salt, the day before slaughter, the chickens can be given rye flour or wheat bran (in the amount of 1/4 of the daily ration). In addition, to obtain a clean feather, it is recommended to bathe the bird before slaughter.
Requirements for the place and tools for slaughtering broilers.
The main requirement for tools, clothing and the place where poultry is slaughtered is to keep them clean. It would also be useful to have a water supply, which is necessary for feather removal machines, scalding chambers, washing walls, tables, and tools after the slaughtering process.
In addition, even on a small farm it is not difficult to set up a place for slaughtering poultry, and the simplest equipment will help speed up the process. It is advisable to have: - a place for hanging birds (usually a wall with hooks or cones for slaughter), - a container for collecting blood, - a container for boiling water or scalding, - a place for plucking manually, or using a feather picker or a feather picker, — a table for gutting carcasses and tools (such as knives, forks for tearing out entrails, etc.), — equipment for cooling, freezing and storing finished carcasses.
Basic sanitary and hygienic requirements for the slaughter site: - washing walls, tables, floors with water and disinfection with a 2% solution of bleach; - washing instruments in warm water, soaking for 30 minutes in a 2% bleach solution or boiling for 15 minutes; — parts of the feather removal machine and the scalding machine are disinfected by applying a 0.04% solution of bleach; - boots, aprons, gloves are cleaned and washed daily after the end of the shift.
Stage No. 2. Broiler slaughter.
Before slaughter, the bird's legs are tied and its wings are folded one behind the other. Further actions depend on the method of slaughter.
There are 3 main methods of slaughtering poultry on a farm.
Method 1 - cutting off the bird's head. The simplest and most common, usually applicable for slaughtering small quantities of poultry. Requires some strength and skill to hold a struggling bird before and after cutting off the head. However, according to adherents of this method, a few times are enough to understand the technique and achieve automaticity.
Tools: sharp cleaver; stump or any stand.
Technology: The ax must be well sharpened, its sharpness must be such that the bird's head will fly off the first time. After cutting off the head, the carcass must be hung to drain the blood or placed in a metal bucket.
The advantages of this method: - the simplest, does not require knowledge of poultry anatomy, - suitable for small farms.
Cons: - not suitable if you are storing chickens for future use - bacteria quickly penetrate through the open neck cut, and the meat cannot be stored for a long time, there is a lot of dirt and blood.
Method 2 – slaughter of broilers through the beak or using the split-split technology with or without preliminary stunning.
Read also: Keeping chickens of different breeds together, Web
Tools: a blunt object for stunning such as a bat, an axe, scissors with very sharp ends or a narrow knife such as a scalpel
Technology: - stun the bird with a blow to the head; - take the bird's head with your left hand, turning the beak towards the scorer. With your right hand, sharply insert the scissors or knife into the chicken’s oral cavity (you will get right to the place where the jugular and pontine veins connect). Make a shallow incision, pull the knife towards you and inject a little to the right and lower (into the anterior part of the cerebellum through the palatine fissure). The injection will relax the muscles of the bird, which means it will improve blood flow and make plucking easier; — hang the carcass by the legs for complete bleeding; Place a swab in the bird's mouth to remove any remaining blood.
Method 3 – external method of slaughtering broilers. Divided into one- and two-way methods.
Tools: a blunt object for stunning such as a bat, an axe, a sharp long knife, a cone for slaughtering a bird.
Technology: - stun the bird with a blow to the head; - place the bird in a cone for slaughter, stretching the head through the hole; - with the one-sided method - take the bird's head with your left hand and, holding the beak, cut the skin with a knife 20 mm below the earlobe. Push the knife deeper and cut the jugular vein, facial and carotid arteries. The length of the cut is no more than 15 mm; for a two-way slaughter method, take the head of the bird with your left hand and, holding the beak, cut the skin with a knife 10 mm below the earlobe. Point the knife to the right and cut both carotid arteries and both jugular veins at once. The blade of the knife should come out from the other side of the bird’s head, forming a small through hole no more than 15 mm long, - leave the carcass in the cone for complete bleeding, - put a swab into the bird’s mouth to remove any remaining blood.
Advantages of methods 2 and 3 for slaughtering broilers: - excellent for slaughtering large birds, including broilers, - the workplace is kept clean, there is no splashing of blood, - the carcass has a marketable appearance due to quick and effective bleeding, - the possibility of long-term storage of meat – the cut in the carcass is minimal, bacteria practically do not penetrate. There are practically no downsides, with the exception of skill, which comes quite quickly.
Further actions with the carcass
At home, housewives:
- The scorched bird is thoroughly washed with warm water using a kitchen sponge.
- The legs and head are cut off using a kitchen hatchet.
- A cross-shaped incision is made in the lower abdomen and the insides are taken out (esophagus, stomach, heart, lungs, liver, gall bladder, ovipositor). This procedure requires care and precision, as a crushed gall bladder will spoil the meat and give it a bitter taste.
- When the insides are pulled out, the bird is cut into portioned pieces (legs, wings, breast, back).
- Meat cut into portions is washed under running water and placed in containers or plastic bags for long-term storage in the freezer.
- The stomach is cleared of gastric film and washed in clean water along with other offal (heart, lungs and liver). After washing, the offal is also placed in a tray and placed in the freezer for storage.
- Chicken legs are cleaned of coarse film, the claws are cut off, and the beak is cut off on the broiler's head. After which it is all washed and stored until the time comes to cook the jellied meat.
How to pluck a chicken at home: step-by-step instructions
Plucking without mechanical devices is performed in two ways - dry and hot. Farmers purchase feather removal machines or use handicraft mechanical tools. For housewives who pluck poultry periodically, manual methods are suitable.
Dry plucking of chickens
It is used immediately after slaughter, when fluff is expected to be collected. The method is good in cases where slaughter is carried out during seasonal molting. In autumn, the feathers are removed without prior scalding, the skin is not damaged.
How to pluck a chicken by hand:
- During slaughter, chickens are hung upside down and their throats are cut with a sharp knife. The second option for slaughter: a chicken or rooster is held by the legs and wings, placed with its head on a stump, and the head is cut off with an ax. Then they hold the paws to let the blood drain.
- The uncooled carcass is left hanging and feather plucking begins immediately.
- The back and breast of broiler chickens are plucked in the direction opposite to growth; tail and flight feathers - vice versa.
- After plucking, they tar on a gas burner, removing the divider, or use a hand torch.
Important! The dry method is suitable for processing young meat breeds. Broilers are easier to feather than laying hens. The slaughter of meat breeds begins at 4-5 months, which coincides with the period of juvenile molting.
Processing carcasses using the dry method is acceptable for 1-2 birds: they do not have time to cool down and the feathers will easily separate. If there is an unexpected delay in work, the carcasses are scalded with boiling water and the remaining plumage is removed. This method is called combined.
Hot method of scalding chickens
The method of plucking feathers with soaking in hot water is universal, convenient for simultaneous processing of 3-10 carcasses. After steaming, the skin pores expand and cleaning is effortless.
However, here, too, compliance with the rules is required:
- Before slaughter, birds heat the water to a temperature of 70-800 C. The volume of hot water is adjusted according to the number of slaughtered carcasses.
- The chicken is immersed 5-6 times in a bucket filled 3/4 with water for 10-15 seconds. Do not pour hot water over the carcasses or steam them for more than 1 minute, since under the influence of high temperature the protein coagulates and the skin shrinks, tightly holding the feather cover. When plucking such a bird, the feathers are removed with damage to the skin, which makes it difficult to oil the carcasses and spoils the presentation.
- After allowing the water to drain, the bird is transferred to the work table. Holding by the neck, pluck the feathers on the chest and back, remove the feathers on the wings and tail in the direction of growth.
- After initial processing, the carcasses are processed over a burner flame, washed and gutting begins.
Important! During processing, attention is paid to plucking the wings: in this part of the carcass there is thin skin and strong thread-like feathers, which are removed with tweezers after tarring.
The hot method of plucking chicken is based on the physical properties of the bodies and is superior to the dry processing method in saving time. Disadvantage of the hot method: wet fluff is more difficult to sort for making pillows.
Plucking chickens using devices
For a large poultry farm, it is more convenient to use a feather removal machine: its cost will be recouped by saving time on processing poultry meat. Manufacturers offer two types - with a centrifuge and a drum.
Devices operating on the centrifuge principle are convenient for small breeds of poultry. Inside the centrifuge there are beating fingers that easily remove feather cover during rotation. They produce models that are additionally equipped with water supply mechanisms to prevent skin damage due to sliding.
Drum-type devices are a more convenient option for farmers breeding poultry of different breeds and sizes.
The second mechanical processing method, which speeds up the process , is a special attachment with hammer fingers, which is attached to an electric drill or other rotating tools. This is an economical option for small personal farms. The principle of operation of attachments with striker fingers is the same as that of drum-type feather removal machines.
conclusions
Choosing one or another method of plucking a turkey should be based on a number of factors. If this is a one-time event, any method will do except using a special apparatus. If you have no experience in processing poultry, it is better to avoid scalding and ironing. If the slaughter occurred a long time ago, dry plucking the turkey will not work. For each specific situation, you need to select a separate method. But all of them, with a certain level of skill, are convenient and effective.
- Related Posts
- Feeders for turkeys
- How to distinguish a turkey from a turkey?
- Purina feed for turkeys
- Turkeys Hybrid Converter
- When do turkeys start laying eggs?
- Turkeys big 6