Advantages of rope halters
Today we will learn how to weave a rope halter for your four-legged friend. This halter is called a rope halter. It has a number of advantages over conventional halters. It is quite light and does not irritate even the most finicky horses who do not like wide buckles on their halters.
If the horse begins to pull hard on the harness, the knots put pressure on certain sensitive areas of the horse's muzzle, forcing the head to return to the desired position. After the horse does this, the knots will stop pressing and he will not feel it at all, which will allow you to work more softly, but more effectively. Conventional halters are heavier and put pressure on the bobbin simply because of the weight; if the horse pulls on the bobbin, the pressure is distributed evenly across the wide straps, so you need to put more effort into reducing the pressure.
The advantages of rope halters also include its relative cheapness. For the rope halter you will need rope, scissors and matches (to melt the ends of the rope).
Don't be discouraged if you don't get it right at first, the halter will gradually become easier and you'll soon be able to make a halter in just 10 minutes.
Master class – synthetic halter
If the dimensions are taken, you can proceed to the selection of materials. We recommend making your own synthetic halter, which can be sewn with strong threads. It is more difficult to work with leather, as it requires some skill. If everything is ready, you can get down to business.
Tools and materials
- Durable synthetic straps;
- fleece or soft velor;
- sewing machine;
- strong threads;
- needle, scissors;
- awl;
- other tools as needed.
The request returned an empty result.
Step-by-step instruction
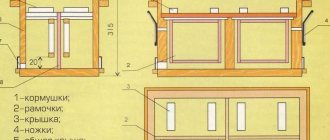
- Knowing the size of the horse's head, draw up a diagram of the halter and measure each strap to the correct size. You should get seven straps with allowance for stitching.
- Thinner material straps need to be double stitched. If you are ready to take them, then additionally you can only sew the edges.
- We attach a buckle or carabiner with a ring for fastening the halter to the top left side of the head strap. To adjust the length of the buckle, we make holes at the other end of the strap. To work with a carbine, immediately measure the required size of the neck strap.
- We leave an empty ring on the lower strap at the junction with the fastening strap. For this, either a chomp, or a cord, or an interchange will be attached to the halter.
- We connect all the straps using rings. An additional fastening with a buckle can be made on the capsule strap to adjust the size of the guard.
- We sew thin fleece or velor onto the inside of the snatch and back strap to prevent chafing.
- To see more clearly how to make this type of equipment for a horse, watch the video from newfriz sun.
Learning to knit knots
Rope halter is knitted with double knots, if you don’t know how to knit them, you should practice a little.
The basis for a double knot will be the most ordinary knot
Now, you need to tie a knot inside this knot. For learning, it is better to take a rope of a different color to knit a double knot, it will be more clear.
It is tied like this: the end of a rope (for learning a different color) is pulled into an untightened simple knot, passes over the loop of a simple knot and, returning again to the loop, a second knot is tied.
Let's look at the technique of tying a double knot step by step.
Tying a regular knot.
Next, we take the end of the same rope (here it’s easier to start with a different color rope) and thread the end through the first loop, parallel to it.
Returning to the loop, we carefully tie a knot in the knot, trying to tighten the knots equally. You will end up with a round knot with an “x” on both sides.
If you absolutely cannot knit double knots. You can tie a halter with regular knots, but since they are flat, they will not work as effectively and they will not look as beautiful as double ones.
Introduction
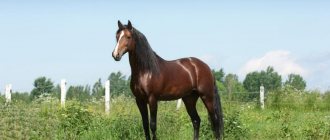
A halter is an integral part of general horse equipment. Any owner of an animal who must be accustomed to it from childhood should have it. Most often, this device is bought in special stores, but knowing how to make a halter yourself, you can sew a halter for a horse with your own hands.
Table of measurements
| Node origin | Small (ponies, yearlings) | Medium (Arabs, kleppers) | Large (regular horses) | Extra Large (large horses) | XXL (heavy trucks) |
| Snoring girth, cm | 50 | 55 | 60 | 65 | 70 |
| A | 70 | 80 | 90 | 100 | 110 |
| B | 17,5 | 20 | 22,5 | 25 | 27,5 |
| C | 20 | 22,5 | 25 | 27,5 | 30 |
| D | 72,5 | 77,5 | 82,5 | 87,5 | 92,5 |
| E | 20 | 22,5 | 25 | 27,5 | 30 |
| F | 20 | 22,5 | 25 | 27,5 | 30 |
| G | 20 | 22,5 | 25 | 27,5 | 30 |
| H | 72,5 | 77,5 | 82,5 | 87,5 | 92,5 |
| I | 20 | 22,5 | 25 | 27,5 | 30 |
| J | 70 | 80 | 90 | 100 | 110 |
| Rope length | 550 | 610 | 670 | 730 | 850 |
What is a bridle
A halter is a type of bridle without a bit. This type is put on the horse every day. Typically, a halter is made of dense woven material (wide rope, braid, coarse belt, even elastic) that does not rub the animal’s skin. However, there are also more decorative options. Gypsies decorate their halters especially brightly. For decoration it is customary to use:
- gold and silver chains;
- precious and semi-precious stones;
- embroidery in various styles;
- lace.
Typically, a product decorated in this way is worn on those horses that participate in various exhibitions, circus performances, exhibition shows and sporting events.
Halter
Halters are used to facilitate their work by people assigned to care for animals. For example, it can be used to move a horse to another stall.
Important! The halter is simply pulled over the animal's head and a rope rein is attached to it. However, it is impossible to give precise commands to the horse using this device. The maximum that can be done with a halter is to hold the horse in the required position (for example, if a groom is brushing his charges or a veterinarian is examining them). It is also an indispensable item when saddling.
The simplest halter, made of rope, has many advantages compared to classic versions of the halter. This variety is the most humane for horses. The animal almost does not feel a foreign object, so it behaves calmly. Rough belts do not rub the animal's skin. There are also no calluses from metal buckles because the halter has no metal parts at all.
Bridle structure for a horse:
- capsule;
- forehead protector;
- occipital, chin, cheek straps;
- reins;
- bit (elements that are in the animal’s mouth).
Horse bridles come in many different shapes, each used for a different harness.
A typical bridle consists of the following elements: noseband, browband, straps, reins and bit.
Types of bridles:
- For direct contact between horse and person - a snaffle.
- To hone movements - a mouthpiece.
- The cowboy's reins have three straps - their reins are not connected, so that if they fall to the ground they do not get tangled.
- For fast walking and running, the bridle is more like a halter - with the bit unfastened, the animal can stop to eat.
- A bridle without a bit is called a hackamore.
- Without capsule and forehead - Western headband.
For a beginner rider, a snaffle bridle is suitable. This is a classic option that will allow you to control the horse, understand its movements and behavior. This is a soft product, the materials for manufacturing are rubber, iron, plastic, the risk of injury to the animal’s oral cavity is minimal.
The product must be put on carefully; even with your hands you can injure the horse. The headband must be selected or made exactly to size, and the degree of tension must be adjusted. Some parts of the bridle are modified.
A mouthpiece is a part of a product with a curved middle to regulate the behavior of an animal through its mouth. It is important to choose the correct height of the bend so that it does not interfere with the animal’s tongue or put pressure on the cheeks.
Hackamores are horse bridles without a bit, used if the horse has problems with the oral cavity or while walking to make it easier to eat grass. In order for the manager to have influence on the horse, pressure is applied to the nose. Only an experienced rider can cope with such control.
In addition to cleansing the bridle from dust and dirt, it needs to be lubricated with a rich cream once a week.
A properly fitted bridle and rider control will help your horse stay healthy longer. When the head is in the correct position, the shoulder girdle is unloaded, and the muscles of the front legs are not so tense.
The interaction between the rider and the horse is carried out through the oral cavity. When the bit presses on certain parts, the animal understands what to do. The iron element is installed in the mouth without touching the teeth.
Certain actions also put pressure on the back of the head, cheeks, and bridge of the nose. The effect is on the tongue, palate, corners of the mouth, and chin pit.
The chin and noseband straps are unfastened, the headband is in the left hand, the reins are in the right. A halter is put on and an iron is placed in the mouth on the area of the jaw without teeth.
The horse may refuse to do this, then you can add a piece of sweet carrot or sugar along with the bit.
Next, the occipital bridle strap is put on and the chin strap is fastened. A fist should be placed between the last element and the head. After fastening the noseband, there should be a space of two fingers between it and the skin.
We weave a halter
We take the rope and measure the distance A - measure about 25 cm for the fastener. If you doubt the size of the halter, then it is better to lean towards the larger side.
Tie a simple knot, measuring the distance according to the table, do not tighten it. Next, using the diagram below and the table, tie simple knots.
After tying the knot at point E, you will need to make a loop. The loop should be approximately 10 cm long. Carefully measure the distances to the points, then correcting everything will be quite problematic.
It is tied very simply.
Next, using the diagram below and the size chart, measure point F and tie your first double knot.
After you have tied point F, according to the diagram we tie point G - at the end you should have two parts of the rope parallel to each other, connected with double knots. Please note that the two ends of the rope must be the same length.
Now we measure the distance H and tie a double “neck knot”. To do this, we use the diagram below. Please note that the distance between the H and D lines must be the same. These will be the lower parts of the carrying strap and the strap that goes to the chin strap under the horse's lower jaw. Check the measurements again.
Well, our halter has finally acquired its familiar shape. Next, position it as shown in the figure below. Now you will need to tie a double knot, measuring the distance I. Remember that all lines must correspond to the table ones.
Place the two long pieces of the halter (H and D) in regular knots, you will have two loops about 10cm long. It is not recommended to tighten them until you have tried the halter on the horse.
Melt the ends of the rope and if you wish, you can connect them with a leather strap - it’s up to you.
It's time to try your creation on a horse. You can already adjust the knots on the animal, and even move them a little somewhere.
If the halter fits well on the horse, all the knots are corrected, tie it on the horse to make a knot as in the picture
The main principle of this knot is that it can be easily untied on occasion. So, the halter is ready, it's time to test it!
Types of bridles for horses
Two main types of bridles:
A snaffle bridle may have one split bit or two bits, one of which has an inseparable thin rod. The last type of bridle is called a mouthpiece bridle.
The mouthpiece is used mainly by more experienced riders where complex commands are required, such as dressage elements. If you are inexperienced, using a mouthpiece can hurt or injure your horse.
Nowadays they also use various bridles, without bits or without bits. They sometimes require a lot of experience from the rider, but some, on the contrary, are used for young individuals and inexperienced riders.
Safety precautions
But remember, since your halter is made from a single piece of rope, it is very strong and not easy to remove, so if used incorrectly, your horse could be harmed.
To prevent this from happening, remember these simple rules:
- Do not leave your horse in a stall wearing a rope halter.
- Do not let her frolic in the levada without removing the halter.
- Do not tie your horse in it for a long time.
- Playing with other horses is also prohibited while wearing a rope halter.
- And, of course, the halter must fit the size of the horse.
Using the video below, you can clearly see how rope halters are made.
Master class – synthetic halter
If the dimensions are taken, you can proceed to the selection of materials. We recommend making your own synthetic halter, which can be sewn with strong threads. It is more difficult to work with leather, as it requires some skill. If everything is ready, you can get down to business.
Tools and materials
- Durable synthetic straps;
- fleece or soft velor;
- sewing machine;
- strong threads;
- needle, scissors;
- awl;
- other tools as needed.
The request returned an empty result.
Step-by-step instruction
- Knowing the size of the horse's head, draw up a diagram of the halter and measure each strap to the correct size. You should get seven straps with allowance for stitching.
- Thinner material straps need to be double stitched. If you are ready to take them, then additionally you can only sew the edges.
- We attach a buckle or carabiner with a ring for fastening the halter to the top left side of the head strap. To adjust the length of the buckle, we make holes at the other end of the strap. To work with a carbine, immediately measure the required size of the neck strap.
- We leave an empty ring on the lower strap at the junction with the fastening strap. For this, either a chomp, or a cord, or an interchange will be attached to the halter.
- We connect all the straps using rings. An additional fastening with a buckle can be made on the capsule strap to adjust the size of the guard.
- We sew thin fleece or velor onto the inside of the snatch and back strap to prevent chafing.
- To see more clearly how to make this type of equipment for a horse, watch the video from newfriz sun.