Milking machine pulsators
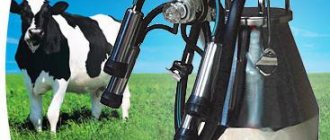
The milking pulsator sets the operating mode of the milking machine by creating the necessary pulsation of sucking and compression strokes during milking. The pulsator requires variable vacuum to operate.
There are different types of pulsators:
In adjustable pulsators, you can adjust the pulsation frequency, unlike unregulated ones. Manufactured pulsators can have different clock frequencies (cycle ratios) - (50/50, 65/35, 60/40, 70/30). The most common milking pulsators have a clock frequency of 60/40.
Milking pulsators are also divided into pair milking and simultaneous milking pulsators.
It is necessary to understand that for the milking machine to work correctly, it must be equipped with a pulsator and a collector of the same type - that is, either simultaneous or paired milking. Otherwise, the milking machine will not work.
Pulsators for paired milking
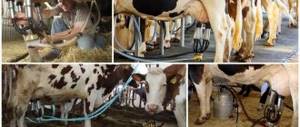
Paired milking pulsators work alternately, applying vacuum to only one pair of udder lobes out of four, allowing the other two lobes to rest. This operating principle of the pulsator ensures better milking, bringing it as close as possible to manual milking. The device is equipped with the function of pre-milking udder massage, which has a beneficial effect on the condition of the udder. A correctly adjusted ratio of milking and resting phases and a stable pulsation frequency guarantees thorough and quick milking of all parts of the udder.
Nowadays, all European and American farmers use paired milking pulsators for machine milking. But in Russia in recent years there has been a tendency to increase the use of pulsators for paired milking. And although the cost is higher, in contrast to traditional cheap analogues of Russian origin, many have already realized that the result obtained justifies the high costs of purchasing pulsators of this type. In addition, paired milking pulsators are compatible with almost any milking machines and milking machines.
Advantages of the paired milking pulsator:
- The paired milking pulsator provides alternate compression of the left and right quarters of the udder during milking, which brings the process of machine milking as close as possible to natural milk production.
- Paired milking pulsators provide quick and comfortable milking, stable pulsation and, accordingly, minimal stress for the cow. The use of such pulsators increases milk yield up to 25-30%.
- The use of steam milking pulsators reduces the incidence of mastitis.
- The possibility of vacuum fluctuations in the nipple chambers during milking is eliminated (no water shocks on the udder teats when changing pulsation modes).
- Can work with any milking machine or apparatus at a vacuum pressure of 42-50 kPa.
- The paired milking pulsator is more durable, reliable, easy to operate and maintain.
Simultaneous milking pulsators
Pulsators for simultaneous (synchronous) milking are the most common in Russia, since the majority of domestically produced milking machines are equipped with pulsators of this type. Synchronous milking pulsators have only one advantage - low price compared to paired milking pulsators.
Pulsators for simultaneous (synchronous) milking ADS 11.00.000 and DD 4101-11
From us you can buy pulsators for both paired and simultaneous milking of different modifications and price categories. Pulsators made in Russia, Belarus, Turkey, China, Italy, Sweden, etc. are available for sale.
Source
Milking machine pulsator device
The most common at the moment is the unregulated pulsator ADU 02.100. It is installed on almost all models of mechanical milking machines Burenka, Berezka, AID, Doyarochka. The operating principle of the milking machine pulsator is a synchronous push-pull mode during operation, in which milk is pumped out from four teats at once. In the first stroke, the vacuum compresses the teat rubber causing milk to be discharged, and in the second stroke, when the air supply is blocked, the udder rests and pumps out.
The pulsator of the milking machine has two pipes on the body. One is supplied with constant vacuum from a pump. Inside the housing it is converted into a variable and comes out of another. The pulsation frequency corresponds to 65 cycles per minute. However, its frequency is not adjustable, the settings are factory settings. Therefore, no additional configuration is required. The body is made of high-quality PVC plastic and consists of two parts: a cover and a base. Inside there is a rubber membrane that acts as a valve, alternately opening and closing the air flow.
How to assemble the AID-2 milking machine
How to assemble the Aid-2 milking machine?
How to assemble a milking machine?
Today we’ll look at how to assemble the Aid-2 milking machine. For this you need very little. The first thing you need is an exclamation: “Hurray, I finally bought an AID-2 milking machine!” The entire process of assembling the Aid-2 milking machine was filmed back in the last century on an old camera, which began its century by filming cinematography.
Since the quality in those days was worse, we tried to describe in detail and step by step the entire process of assembling the Aid-2 milking machine.
All milking machines of our production consist of two main parts: a vacuum unit and milking equipment. Let's start with the simplest thing: connect the teat cups with the supplied hoses.
The delivery set includes 4 assembled teat cups and 4 nozzles. We connect the pipe with the glass.
Then we connect the glass to the collector.
We do this procedure with all four glasses. At the end we should get something similar to an octopus or an octopus, it all depends on which of these creatures you like best.
Well, after putting in some effort, we have practically assembled the suspended part of the milking machine. The milk collection part is ready.
Let's go further. Let's connect the pulsator to a PVC pipe.
After all the procedures we have completed, we will receive the following kit for assembling the milking equipment of our milking machine:
Now let's connect the pulsator to the lid of the milking bucket. Then we put the lid on the bucket and secure it with a handle.
It's time to take a break from the milking equipment and start installing the vacuum installation of our milking unit. We take a vacuum gauge and screw it into the pipe on the crosspiece of the vacuum regulator.
Now we have three hoses left with which we need to connect all parts of our unit. We take a milk hose (larger diameter) and connect the manifold (we also use a larger diameter outlet on the manifold) with the bucket lid, using the bucket’s outlet, which also has a larger diameter.
As a result, we get this design:
Using an alternating vacuum hose, we connect the remaining outlet on the manifold and the bucket lid (any outlet).
We connect the bucket lid and the vacuum regulator crosspiece with the remaining hose.
As a result, we get a milking machine.
At this point, the assembly process of the Aid-2 milking machine can be considered complete. Then you can move on to the milking process itself, but that’s another story...
You can see the entire assembly process in video format on the description page of the Aid-2 milking machine:
Milking machine pulsator repair
Despite its reliability, one day you may encounter a problem that the pulsator on the milking machine does not work. This is expressed in a change in the speed of sound clicks or their complete disappearance. A more common problem is the wear and tear of the rubber gasket itself over time. A less common cause is internal blockage of the passage holes. This can happen when milk gets inside the vacuum hose due to a leaky cup or torn nipple rubber. It is advisable to constantly monitor its condition and change it every 6 months of use.
Pulsator disassembly
First, unscrew the nut, then remove the camera. Set aside the rubber sealing ring. Next comes a plastic ring with grooves. If clogged, clean them with a brush and soapy water.
Further disassembling the housing, remove the membrane. It should be intact without cuts or sprains. Pay attention to whether the holes on it coincide with the channel below it. If it was partially blocked, this will change the pulsation frequency downward.
Pull the diffuser with valve out of the housing. Disassemble all its parts and evaluate the tightness of fit to each other.
All that remains is to clear the vertical channel from the blockage in the housing itself. After making sure that each part is in working order in the reverse order, you need to put everything back together.
How to properly assemble a milking machine pulsator
Take the pulsator body and place the rubber ring in it. Then take the diffuser and connect the valve to the washer. The side with the smaller diameter should be facing down. Take the membrane with the side facing inwards, lining up the two holes. A plastic ring is installed on top of it. Press the rubber ring with the camera, tightening the nut at the very end.
If you need components for self-repair, follow the link to the spare parts section for the milking machine.
Source
Other malfunctions of the milking machine
1. High vacuum pressure that cannot be adjusted
- Disassemble and clean the vacuum regulator or buy a new one.
2. Vacuum level is constantly changing
- The vacuum regulator is faulty or the pump blades are damaged
3. The electric motor does not start
- The power cord is faulty
- The button is broken
- Overheating or short circuit protection has tripped
4. Poor oil flow from the oil tank
- The pipes are clogged or the adjusting screw is incorrectly adjusted (oil drill)
5. Pump noise
- Bearings require replacement
- Foreign object in the pump
- Something is blocking the air from escaping, a problem with the muffler
The article was provided by the online store of milking machines - https://inlet.com.ua/doilnye-apparaty/
If you have questions about troubleshooting, selecting spare parts, or purchasing a new device, please follow the link.
Primary requirements
An individual milking machine for cows or goats, such as AID, Burenka, Berezka and similar designs, is used to work in rooms with air temperatures above +5 degrees. This requirement is determined by the hardening of rubber hoses, nipple rubber, changes in the elasticity of the pulsator membrane, plastic parts become brittle, and the viscosity of the oil in the oil pump changes. However, work should not be carried out on a hot day when the electric motor is exposed to direct sunlight. The optimal operating temperature range is +10+20 degrees.
The milking room must be heated in winter for proper operation of the unit. For oil installations, good supply ventilation is required. In this case, it is necessary to separate the milking area from its technical part. Engine oil evaporates during operation, exiting through a hole in the exhaust pipe. Then it will enter the respiratory tract of the operator and the animal, enter the stomach with the food, and then into the milk. For ease of maneuvering, make the floor rigid from wood or poured concrete.
Electrical wiring requirements. The European standard socket must be firmly attached to the wall with an operating rating of 10-16 Amps in a place protected from moisture. Select the input cable of the required cross-section with a circuit breaker and, if possible, additionally equipped with an RCD (residual current device), which will be triggered when voltage hits the housing.
You can view prices and assortment on our website by following the link to the milking machines section.
Launch
- Choose a flat surface for the milking machine, and you can only move it on wheels by holding it by the special handle.
- Check the integrity of the electrical cable.
- Conduct a visual assessment of the integrity of all components. Make sure there are no foreign objects in the glasses.
- The oil level should be normal and there should be no leaks on the pump.
- Close the vacuum valve or clamps if they were open.
- Insert the plug into the socket as far as it will go.
- Use the button to turn on the electric motor.
Working with the milking machine
- Wait until the vacuum gauge shows 44-46 kPa. This value must not be exceeded. In case of deviations in any direction, adjust by unscrewing or tightening the vacuum regulator to the desired level.
- After preparing the udder, sequentially connect the cups to the nipples while releasing the clamp on the nipple rubber nipple.
- At the end of the milk pumping procedure, pull the valve on the collector cover. After this, remove the hanging part, making sure that there is no vacuum in it, otherwise you will damage the udder.
- Close the clamps and valve.
- Switch off the electric motor using the button.
Below is an algorithm by which you can find malfunctions of the Burenka milking machine, AID based on characteristic features. Many of them can be eliminated without special knowledge and tools.
Setting up the milking machine pulsator: if you’re not sure, don’t go!
A pulsator is an automated atmospheric pressure vacuum switch. Without it, the normal functioning of any milking unit is impossible. Successful and efficient milking of animals depends on the reliability of its operation.
A pulsator is an automated atmospheric pressure vacuum switch. Without it, the normal functioning of any milking unit is impossible. Successful and efficient milking of animals depends on the reliability of its operation. Also, the number of pulsations, the correspondence of the beats, and the way the teat rubber acts on the cow’s udder also depend on the operation of the pulsator.
It happens that during the operation of the milking machine various malfunctions occur. The reason for this may be a breakdown of the pulsator. And then the question arises: how to set up the milking machine pulsator, and is it possible to do this at home?
Today on the Internet you can find a lot of different information on how to troubleshoot a pulsator, how to assemble a milking machine pulsator using a video. But we can confidently say that it is not worth resolving this issue on your own. If the device fails, the milkmaid will not be able to properly repair the breakdown; on the contrary, there is a possibility that by changing the pulsation rhythm, she may harm the animal. For the smooth functioning of the milking device, it is recommended to use new, spare pulsators and frequently inspect the milking equipment for preventive purposes.
The milking machine does not gain pressure
In order to quickly understand the reason why pressure is not building up or there is no pressure at all, you need to visually break down the installation into individual components. Moving sequentially through each one, you will soon find this place.
Milking equipment consists of:
Nipple rubber – cracks or cuts may appear on its walls.
Milking cups - the teat rubber should fit tightly into them without gaps. If you have a combination glass or a plastic one, then the thin outlet pipe should not have cracks, and the O-rings (combi) should not have cuts or be jammed.
The collector - its cover becomes covered with cracks over time. When this happens, replace it with a new one. There is an O-ring between the cover and the body. Check if it is there. Like any rubber, it must be intact and elastic.
Hoses - their internal diameter must correspond to the factory ones. When it does not sit tightly enough on the outlet fitting, air is sucked in there. Check its integrity. Low-quality products quickly become covered with small cracks. Replace with a new one.
Pulsator - if it has all the sealing rubber bands, and the lid is screwed on sufficiently, then it rarely becomes leaky.
Tee and corner of the can lid - cracks may appear in the plastic or the lid may not fit tightly enough.
The rubber of the milking bucket – if the lid is skewed, cracks may form. The second reason is its wear and tear.
Power section units:
Receiver cover - in the Burenka milking machine they are made of transparent plastic and have an O-ring, which may become unsuitable for further use.
Vacuum regulator - if adjusting it does not change the vacuum gauge readings, then it is faulty.
The vacuum gauge is a fairly reliable part, but sometimes it shows incorrectly.
Pump - worn out blades develop insufficient air pressure. Replacement is done as a complete set.
Electric motor - make sure there is a sufficient number of revolutions, the mains voltage may be low.
Step-by-step setup of the milking machine
Preparing the milking machine for operation begins with an inspection.
Leak test
For the device to operate correctly, the vacuum must be constant. Any damage to the vacuum tubes or receiver will lead to subsidence. Poor pressure build-up can also be caused by wear of the graphite blades. In such cases, repair of the vacuum pump is necessary.
In order to check the tightness of the milking machine, you need to close the cups with plugs (included in the kit) and turn on the power unit. Monitor the negative pressure readings on the vacuum gauge - they should stop when they reach the specified level. Significant fluctuations are unacceptable.
Checking and adjusting the pressure of the milking machine
Vacuum pressure is displayed on a pressure gauge installed on the receiver. A special pressure gauge is used, since the pressure has a negative value. The dial of the vacuum gauge shows a scale with divisions. The division price may vary, but according to the standard it is 2 kPa.
The optimal pressure for milking cows and goats is different. For goat milkers it is 35 kPa. Cow milking machines with a push-pull system for milking cows are set to 48 kPa. With a three-stroke, the vacuum should reach 54 kPa.
The adjustment is carried out using a vacuum regulator. It is also located on the receiver. When the regulator is turned, the spring tension changes and air is sucked into the system. The vacuum is adjusted with the glasses closed with plugs.
Pulsator type and pulsation frequency
Milking machines use adjustable and non-adjustable pulsators. For unregulated push-pull pulsators, the standard contraction frequency is 75-85 per minute, the beat ratio is 70:30 (sucking and squeezing). For 3-stroke 60 contractions/min with a ratio of 60:10:30 (rest is added to sucking and squeezing). For paired pulsators the ratio is 60:40.
It is not recommended to independently regulate the operation of the pulsator. This should be done only after consultation with a specialist.
The Cropper store sells graphite plates, cup plugs, pressure gauges and vacuum regulators, which can be useful if the pressure is not set correctly.
Source
Features of the milking machine Doyarushka UDSH-001
The milking machine is used for milking cows and goats. Depending on the model, the Milkmaid is capable of serving one or two animals at the same time. The machine for simultaneous milking of two cows is equipped with attachments with two sets of milking cups. The equipment comes with one or two cans. Milk is collected by creating a vacuum in the system.
Important! The milking machine Doyarushka can be used for animals with developed udders.
The milkmaid is compact in size. In an hour of operation, the device can serve up to 10 dairy cows. Despite the crowding of nodes, they are always accessible for maintenance. The basis of the unit is a durable steel frame with a control handle. Wheels with rubber treads provide mobility. The cart is easy to move over uneven barn floors.
The working units of the Doyarushka are installed on the frame. There is a separate area for a can for collecting milk. The container is made of stainless steel. Can volume 25 l. The motor of the device is installed on the second platform of the frame, located closer to the wheels. The design is designed to prevent oil from splashing into the can or onto the milking cups. Attachments are fixed to the handle. The milking cups are equipped with elastic rubber cuffs.
The milk can is tightly closed with a lid with cut-in fittings. They are connected to milk hoses with transparent walls, as well as a vacuum hose, which is easily distinguished by its black color. To carry out milking with the Doyarushka machine, the can must be tightly closed so that a vacuum is maintained in the system. Tightness is ensured by a rubber sealing ring placed under the can lid.