What is an alpine hive
In the middle of the last century, Roger Delon created the most natural hive possible. The bees moved to conditions that were as close to natural as possible. The beekeeper took as a basis a wild nest, built by the insects themselves in a hollow tree. Thanks to the biosphere harmonization of the nest, insects tolerate cold weather more easily, get sick less often, and honey harvest rates increase.
The idea of creating a unique hive accompanied the scientist for many years. And he managed to realize it. Already in his old age, the owner's apiary numbered about 1000 families. Alpine hives were dispersed over an area of more than 120 square kilometers. But this did not force the owner to provide daily care over such a large area. His goal is maximum income at minimum costs, which was successfully achieved.
The first analogue was the hollow of an old tree. The bountiful harvest made the scientist think, and an Alpine hive was created, consisting of several buildings. As Roger stated, in nature bees live in drafts. Living conditions in home hives vary significantly. This is a closed space with a poor ventilation system.
During the period of active honey collection, the interior of the hive should be well ventilated. This shouldn't happen the rest of the year. But these are not all the conditions for creating conditions as close as possible to natural conditions.
The modern alpine hive is a bit reminiscent of a more familiar design, but with fundamental changes. It has only one entrance, more like a simple slot.
Contrary to claims about air movement, there are no vents.
- The air penetrates through the lower part, is warmed up inside by the bees and rises upward in the form of oxygen, saturated with carbon dioxide and metabolic products.
- The air gradually becomes heavier and sinks to the bottom of the hive, towards the entrance.
- At the bottom of the hive, carbon dioxide is replaced with fresh air.
This movement of air inside the Alpine hive occurs constantly .
And this is the optimal condition for better family productivity. Heated air at the top of the hive can cause condensation to form. But this is excluded due to the fact that immediately under the lid there is a feeder that acts as a pillow. During periods of active honey collection, the structure of such hives can reach a height of up to one and a half meters.
Manufacturing process
The manufacturing process is simple. Let's figure out together step by step how to make an alpine beehive with your own hands.
Making a stand
The stand is not part of the hive, but it is what provides it with stability. Hive stands are made from building blocks. They should be set clearly in level. The hives should be placed so that the entrances are turned to the southeast. Also in the summer, the hives can be placed on a stand made of paving slabs. It is strictly forbidden to place an alpine hive on the ground.
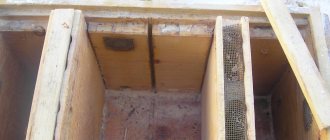
Making the bottom
To make the bottom of the hive, we trim pre-prepared boards for the front and rear walls, 350 mm long. We take one prepared board and make a recess 11 mm deep and 25 mm wide on both sides. We make such a cut on all the blanks of the front and rear walls, so that later they fit perfectly with the sides.
To make the bottom, we take one part prepared for the front or back wall, and one prepared for the sides. Bottom height - 50 mm. We cut our blanks 50 mm wide on a circular saw. The resulting parts are suitable for tying the bottom.
You need to cut out a quarter of the blanks: leave 20 mm of sub-frame space, and cut out the rest. We make a tap hole on the wall of the bottom trim. To do this, drill two holes with a diameter of 8 mm and cut them with a circular saw on both sides.
Let's start assembling the bottom trim. Assembly can be done using a square or jig. We set the bottom trim, level the tops and twist with self-tapping screws. We fix the landing board under the entrance. We assemble the bottom shield into a quarter and secure it with self-tapping screws. At the bottom of the bottom we screw runners to lift it above the stand. Our bottom is ready.
Case manufacturing
To make the hive body, we take the same blanks as for the bottom. On them we make a cutout of quarters for the hangers of the frame measuring 11x11 mm. For the front and back walls of the hive, choose the cleanest board without knots.
On the front and back, you need to mill out grooves for the fingers so that the hive can be comfortably picked up by hand. When everything is ready, we begin assembling the body. We assemble the body according to the same principle as the bottom strapping, twisting it with self-tapping screws.
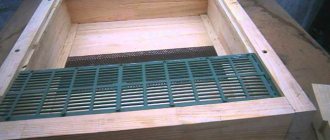
Making the liner
After making the body, we begin making the roof liner. We take previously prepared planks 10 mm thick and the blanks that were used to tie the bottom.
Using the same principle as in the bottom, we assemble the liner trim, then we take the shield in a quarter. We cut a round hole with a diameter of 90 mm for the jar feeder. Next, we close this opening with a 2.5 × 2.5 mm stainless mesh, which we fasten from below with a stapler. Our liner is ready.
Making the lid
The hive cover should fit freely onto the roof liner. A quarter is milled from the bottom of the cover, on which the liner rests. Otherwise, it is made in exactly the same way as the liner, but the corner connection will look a little different. We make the connecting quarter 15x25 mm, the shoulder remains 10 mm. Assembly follows the same principle.
Making frames
Let's finally start making the main part of the hive - the frames for the honeycombs. We make frames from linden on tenons without nails or screws. The sides are secured to the bottom of the frame with spikes and driven into the top bar. The top bar is wider than the bottom because it clings to the notches in the hive. Everything is assembled using PVA glue. In order to make such frames, you will have to be patient as it is a very labor-intensive process.
Read also: Review of the egg incubator “IPH 12”
Features of beekeeping
One of the main problems of relocating bees to alpine systems is associated with the protracted adaptation of insects to new living conditions. The transition period takes an average of a year, or more precisely, one summer.
You can plant a swarm, layering or a full-fledged bee colony in the hive.
If we are talking about a family, it will be easier to limit the housing in an already used home to the dimensions of an Alpine. After which the Roger Delon or Khomich section is installed directly on the frame. When the bees have built one building, a second one is substituted. And with the beginning of egg laying, the third one goes into the gap between the first and second sections.
How to pump out honey correctly: equipment, extraction, benefits
At the final stage of relocation, the bottom of the alpine is installed and the old hive is removed. The family continues to live in the same place, but in a house of a different design.
In autumn, the nest is reduced to two body sections. The foundation drawn by the bees is placed in storage. Nests overwinter with the entrance completely open.
In the spring, with the beginning of active flowering of plants, a third section is installed under the two overwintered sections, fully equipped with dry land built last year. This technique allows you to induce the uterus to more active scarring.
The fourth body section is placed between the two upper ones when a stable honey flow occurs. Here the bees must rebuild the foundation, after which the fifth section is installed under the uppermost body.
As soon as the fifth building is filled with honeycombs, the sixth is installed - in the cut between the third from the bottom and the fourth section. That is, the uterus is restricted and the swarm instinct is controlled. In this case, there will be brood frames only in the three lower sections.
Change of uterus
Replacement of old queens is carried out using the swarm instinct. When changing, there is no need to destroy old females! It is enough to shorten the socket on the body and install the cassette at the very bottom.
The bees are stretching the queen cells. After which the body section is separated from the hive and taken to the apiary for mating of the queens with breeding drones.
The fertilized “queen” is returned to the nest along with the body in which egg-laying begins, placing it under the upper honey section. A quiet change occurs, and the bee colony is strengthened with brood just before the main bribe.
After the end of the honey harvest, bee colonies live in three buildings until late autumn (the release of all the brood and the formation of a club).
Important Operating Principles
Not only bees will have to adapt to new conditions. Beekeeping in an alpine hive has its own rules and principles that must be strictly adhered to.
- For the winter, bees need only two hive buildings. The food supply is located on top.
- Roger Delon also proposed a new way to update the nest. To do this, he allocates one of the buildings under the core. And when necessary, it shortens the building by one tier. After the bees have placed the queen cell in the lower cassette, he takes it to the apiary for elite crossing. Then the fertilized females and new eggs are laid in the hive where the old individual is needed to be replaced.
- Collecting and pumping out honey is best done when five boxes are full.
- After collecting honey, you need to leave the following structure - the lower part is filled with bee bread, the middle part is filled with brood, and the upper part contains food for the bees to overwinter. These three elements will be enough for a bee colony for the winter.
- To insulate the hives, it is enough to cover them with polyethylene. Do not close the entrance!
This is interesting: Making a Dadan hive with dimensions and drawings
Hive Features
Delon's Alpine hive involves a multi-body design, which differs from other types in that it contains one entrance, in addition, there are no ventilation holes and separator grilles. As for the appearance of such a bee hive, it resembles a hive of four buildings, but there is an assortment of a wide variety of designs. The prototype and basis is a hollow tree.
Fresh air enters the hollow thanks to the entrance - the bees circle and rise in it, thereby warming the air. In the process of movement, bees breathe, and very useful vapors and metabolic products are formed in the air. After some time, the air becomes heavier, sinks, and then evaporates.
To make an alpine hive with your own hands, you will need a special drawing that will help take into account similar principles in the design.
It is important! Pay special attention to such a part of the hive as the feeder - the ceiling. It helps prevent large amounts of condensation from accumulating in Alpine hives. As for the insulating roof, which is about thirty millimeters thick, it protects the bees from hypothermia or overheating.
During the main harvest period, the height of the Alpine hive for bees reaches 2 meters, so it is important to maintain the internal microclimate.
Design Features
The “Alpine”, or Roger Delon hive, is a hive into which the beekeeper himself can place several boxes; it also does not have a dividing grille or a ventilation hole. The feeder is located in the ceiling of the hive and is a kind of air cushion that protects it from the formation of condensation, which is typical for other models.
Gas exchange in it occurs through the tap hole due to the fact that warm air rises and carbon dioxide falls down. Outwardly, it resembles four-hulled hives, but it also has significant differences. Thanks to the thick insulating lid, which is 3 cm thick, insects are perfectly protected from temperature changes.
The picture shows the design of an alpine hive and the arrows show air circulation. The size of an Alpine hive depends on the number of boxes you add. Its height can reach 1.5–2 m.
What is the difference between an alpine hive and a regular one?
- The multi-hull design provides only one taphole.
- There is no dividing grid.
- No ventilation holes. Air circulation is organized through a single entrance. The air rises, gradually heating up. After being saturated with carbon dioxide, it becomes heavy and moist, after which it freely exits through the tap hole.
- Feeder at the top. In addition to its intended purpose, the feeder prevents the formation of condensation.
- The frame is made of one strip and wire.
The construction turns out to be very simple and easy. If necessary, an additional level can be easily added, expanding the hive for a growing family.
Design and functionality of apilift
Advantages
We can now sum up the results and note the advantages of using Alpine hives in beekeeping:
- Delon hives are simple and easy to use;
- beneficial from an economic point of view;
- do not need insulation when cold weather sets in;
- Roger's evidence allows you to get a large amount of honey;
- the extraction of sectional comb honey is facilitated;
- easy to move and transport due to its light weight;
- compact dimensions, despite the number of cases;
- Apiaries with alpine hives are very easy to build yourself.
Advantages
Beekeeping in an alpine hive is profitable and convenient, and therefore you should consider the obvious advantages of keeping bees this way:
- in such conditions, bees produce up to 23 kilograms of honey, instead of the usual 2 - 3;
- due to the compact design, the hives take up little space, which is beneficial in cramped conditions;
- the ease of caring for bees and their homes makes it possible to support many more bee colonies;
- to create such hives you need less material, which reduces your expenses;
- the alpine hive is much lighter. Its weight without honey can be up to five kilograms. This means that it is much easier to carry if necessary;
- due to the creation of a microclimate and the absence of drafts, a constant temperature is maintained in the hive, which prevents it from overheating in the summer, and in winter does not require special insulation;
- the frames are more convenient and less susceptible to damage, which means they need to be repaired less often;
- rapid growth of the bee colony in spring;
- better conditions for wintering, which prevents bees from dying en masse;
- the absence of condensation keeps the alpine hive in better conditions and it will last much longer;
- if you don’t have time, you can collect honey once in the fall, since the elements are added as much as needed.
It is not surprising that such designs are becoming increasingly popular in beekeeping. In our country, the most famous person keeps bees in alpine hives. is Khomich. He has also developed the most convenient drawings on how to make them yourself, and gives advice on how to keep bees in such hives in our conditions. Some even call these hives not Alpine, but Khomich hives.
What kind of Alpine bee evidence is it and how to make it with your own hands?
In 1945, French beekeeper Roger Delon introduced the world to his Alpine Ulic. People began to simply call it the Roger Delon hive.
Differences between an alpine hive and a multi-hull hive
This design of the Roger Delon hive has many advantages for beekeeping. However, modern beekeeping also sees disadvantages in this model.
- Very simple operating principle, easy to use in beekeeping.
- In this case, families develop much faster in the spring.
- Wintering is very smooth and dry.
- The honey productivity of a bee colony increases several times.
- In such evidence, the number of rebuilt frames with foundation increases.
- When pumping out honey in a honey extractor, the frames do not break.
- Cellular and sectional honey is much easier to obtain.
- When traveling, it is very convenient to transport an alpine hive, because they are very compact.
- There is no need for insulation with pillows.
- Due to the fact that the Alpine hive has a frame of non-standard sizes, problems arise when choosing a honey extractor.
- It is very difficult to move bees into such a hive from classic models.
- Difficulties with purchasing bee packages and bee colonies on a similar frame in beekeeping.
Despite minor shortcomings, this design generally collects positive reviews. Next we will talk about the technical features of such a hive. A detailed description of Roger Delon's evidence is in the next video.
Specifications
The thickness of the walls in the Roger Delon street is 30 mm, the bottom is the same, the height of the slotted entrance reaches 7 mm, its width is 300 mm. The Alpine hive contains an inclined flight board at an angle of 45 degrees.
Alpine hive frames
The horizontal internal section of the evidence is 300 x 300 mm. The case contains 8 special frames. The height of the case itself reaches 108 mm. The walls of the case are equipped with ledges for placing metal combs, they also prevent the frames from moving.
Frame design
The design of the frames is somewhat unusual for those who have not yet encountered them in beekeeping. Such frames are shown in the top photo. They do not have bottom or side bars. Instead, 3 mm steel wire is used. In the top bar there is a slot for inserting artificial foundation.
Khomich's hive
Vladimir Khomich is an experienced beekeeper who in his work gives preference only to the Alpine hive. More than 200 bee families live in his apiary in such structures. Vladimir Khomich’s use of such evidence perfectly demonstrates the productivity and advantages of this type of beekeeping.
You can see for yourself the effectiveness of this method by watching videos from Vladimir Khomich. Also, for your reference, you can find many articles about the use of this type of hive in the private apiary of Vladimir Khomich. What could be more revealing than personal experience?
How to do it yourself?
It is possible and possible to make an Alpine hive yourself, the main thing is the desire and availability of drawings! Why not try making it yourself, because all the reviews about use are positive. So, let's start making!
Depending on the time of year, this design is equipped with 3 or more buildings. All this depends on the type of family and its performance. Sometimes in the spring only a few buildings are built, and in the summer, as they are filled, the remaining ones are completed. You can start work in the winter, so as not to rush and not disturb the bees, because in the summer, even without the construction of hives, there is more than enough worries in the apiary.
Roof feeder
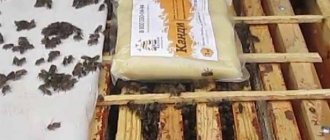
Unlike traditional hive systems, Roger Delon's hive contains not just a roof cover, but a special roof-feeder (look at the photos and drawings). The solution is very rational, but if you have just started mastering this system, you can get by with simple feeders for the first time, and after you gain experience, start modernizing the hives in your apiary. It is customary to keep medicinal mixtures for bees in such a roof-feeder.
Read also: Making a brooder for turkey poults with your own hands
The buildings are placed under the roof-feeder. Frames and bee brood are kept there. Manipulating the bodies helps avoid swarming of bees.
The lower body is placed on a special bottom - a stand, and a taphole is made there. If desired, you can put an anti-varroa mesh on the bottom. The height of the bottom is 10 mm, the same is the height of the taphole. The hive legs are made with dimensions of 30-50 mm, which makes it very convenient to place evidence in the apiary. If you put them in cans with kerosene, you can avoid the appearance of ants.
It is best to purchase materials from special institutions, sawmills or bases. You will need three pine boards with a thickness of 40 mm, width and length - 150 mm and 4 m, respectively. From this amount of consumables, five cases can be made.
The photo above shows diagrams of an Alpine hive in order to make it yourself.
You will find everything about how to properly make an Alpine hive created by Roger Delon with your own hands in this video.
Some disadvantages of alpine beekeeping
For all its advantages, beekeeping in an alpine hive also has some disadvantages. Although there are few of them, they stop many.
- Due to the non-standard size of the frames, it is difficult to choose a suitable honey extractor.
- Bees that previously lived in a regular hive are not immediately ready to move to an alpine one. To do this, you need to relocate them correctly, which will not be easy for a beginner to do.
- It is difficult to get suitable bee packages for such a frame.
If you really want to provide your bees with maximum comfort, it is worth overcoming such difficulties. Moreover, beekeeping in an alpine hive will give you a huge advantage in terms of the amount of honey produced and other bee products; their apparent fragility can withstand heavy loads.
Design Features
Born in France, Roger Delon created his brainchild there, around the early 70s of the previous century. As soon as this structure appeared in the vast territories of the Soviet Union, they tried to spread it everywhere where beekeeping was practiced. Beekeepers appreciated the design and still use it, assuming that nothing better has yet been invented.
It should be noted that Alpine hives are the most economical for their productivity. To arrange it you will need less material. And some can be abandoned altogether. Let's say, from tinned wire, which is very difficult to find.
A small amount of building materials ensures a modest weight of the structure. The hive, including the frames that will be filled with honey, weighs approximately 16 kg, 11 of which are honey.
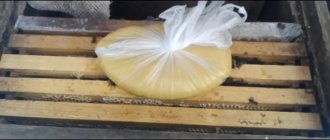
With the arrival of cold weather, there is no need to insulate them; just throw on a plastic bag.
Making an Alpine hive with your own hands according to drawings
It has already been indicated that the design of the hive is simple. Even minimal experience with carpentry tools and the proposed step-by-step instructions will allow you to quickly master the technique. Prepare in advance:
- slats;
- wooden block;
- polished board;
- screwdriver, saw or jigsaw.
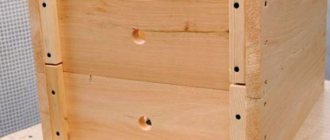
Making a hive body
The process of making hives is provided by the Khomich apiary. To make the body, prepare four wooden boards. It is better if it is a well-dried pine board. You will need two fragments of the following sizes (mm):
- 360 by 230 – for walls;
- 324 by 57 – for the lower part.
Treat the workpieces with an antiseptic. Make ledges in the walls that will secure future frames. They are also easy to make yourself. Secure the sides of the housing using a screwdriver. Make the recesses in the tanks necessary to move the structure. The workpiece should look as shown in the picture.
Cassette keeping of bees
Making the bottom
To make the bottom you will need the same pine board, the thickness of which is at least 30 mm. Be sure to treat the inner surface with an antiseptic and paint the outer surface.
Maintain the entrance gap within the width/height of 30/7 mm. Make the landing board at an angle of no more than 45 degrees
Making a cassette
The cassette is necessary for queen cells and royal jelly storage, and is also used during transportation of hives.
Making a roof
The lid is also a feeder. This is a kind of sandwich, for the manufacture of which they usually use:
- sheets of thin plywood, fiberboard, furniture cardboard;
- insulating material laid between these sheets;
- external upholstery (any roofing material).
The finished cover should be put on and removed from the body without effort. It looks like a composition of several buildings, just like in the picture.
Making frames
It has already been mentioned that the frames of the Alpine hive are not entirely familiar. They are difficult to find on sale, not easy to make yourself. To do this, mount a wire frame on the bar, the size of which (mm) is 320 by 25 by 9. The total length of such a workpiece is 730 mm. Prepare eight frames for each hive. The bees prepare the honeycombs themselves and by the time they start collecting they will look like the picture shown.
We build alpine hives ourselves
With a little construction skills and some available tools, you can easily create alpine hives for your apiary and reach a new level of beekeeping. For this you will need:
- wooden beams or at least slats;
- sanded boards;
- saw;
- nails or screws, at your discretion;
- depending on the previous point - a hammer or a screwdriver.
Let us briefly describe the process of creating ideal hives:
- You can start construction from the bottom of the hive. For this, a pine board is best suited and its thickness should be at least 30 mm. To avoid subsequent problems, it is better to immediately disinfect it with an antiseptic and paint the outside. At the bottom of such a hive there will be a hole. The entrance gap is made 30 mm wide and 7 mm high. The board itself should be installed with an inclination of 45 degrees. It is advisable to initially make the bottom removable, since it is recommended to replace it with a new one every year.
- The body is also best made from pine or fir boards. The important thing here is to dry them well before starting construction. For one hive you need four such blanks. Dimensions 360X230 mm and 338X230 mm. When you have knocked down the frame, you should definitely make ledges for future frames. Don't forget to disinfect the case first.
- The feeder will be the size of the walls surrounding it. And this is 324X57 mm in the upper part, and 320X295 mm in the lower part. The feeder is also treated with an antiseptic.
- Since the frames in the Alpine hive are completely different both in size and design, you will also have to make them yourself. To do this, take a ready-made strip measuring 320X25X9 and attach a suitable wire to it, bending it in the shape of the letter P. The total length of the wire is 730 mm.
- The lid is made from fiberboard sheets or suitable thick cardboard (for example, furniture). The dimensions of the sheets should be 360X360 mm. Insulation is laid on the glue and a clamping frame is made from additional strips. The dimensions will be the same as the case, and the width of the strips will be 10 mm.
This is interesting Bee bread or pollen: which is better and what is the difference?
Here is the finished alpine hive! As you can see, there is nothing complicated about this. For better clarity, you should use ready-made drawings. The peculiarity of the construction of such hives is that each additional building can be built as needed, gradually, and this makes the work simpler and minimal.
Some beekeepers, on the contrary, prepare additional bodies in the winter so as not to be distracted from the main work in the apiary in the summer.