Most beekeepers will naturally agree that the best wintering for bees is in the wild. If bee colonies overwinter outside, they will undoubtedly be stronger and more resilient than those that overwinter indoors. Usually, they do not sleep, but fall into suspended animation for the winter, but at the same time remain active and feed on honey all winter.
The bee colony begins to actively prepare for wintering in the spring and continues to do so for most of the summer. These insects can survive the winter very well if they cluster together in a club that looks like an ellipsoid.
Inside the club, each bee is quite free and in constant movement, thanks to this the temperature in the center of the bee club reaches 25-30 degrees. And the external individuals create a dense shell, which can be from 3 to 7 cm thick, and the optimal temperature of the outer edge is about 15 degrees. So, bees can easily survive the winter.
Cleaning hives with bees indoors
In areas with cold and long winters, winter huts are built in apiaries. In summer, the winter hut is thoroughly dried, the walls and ceilings are whitewashed with lime, and a layer of dry sand is poured onto the floor. After assembly and insulation of the nest, the bees are left in the wild. There is no need to rush to put the bees in the winter hut.
The later the bees fly around in the fall, the better they will winter.
Bees are brought into the winter hut after the onset of persistent cold weather. In the northern and central regions, this time occurs in mid-November, and in more southern regions - in early December.
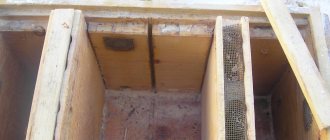
First, you need to close the entrances, then move the hives to the winter hut, and do it even more carefully than in the spring. In the spring, disturbed bees will fly around and return to the nest. In the fall, they can crawl behind the board and die from the cold. Strong families are placed on the lower racks, weaker families are placed on the top, where it is warmer. The roofs are removed from the hives.
Assembling the nest in the fall
In order to find out how bees are preparing for winter, preventive examinations are required - approximately once every 2 weeks
During one of the last inspections, such an important event as nest assembly is carried out. In the northern regions it is done in the first half of September, in the middle and southern regions - 2-3 weeks later
The number of frames left plays a decisive role.
It is known that bees suffer more from excess moisture than from cold. When 1 kg of food oxidizes in the hive, about 1 liter of moisture is formed, which, in extreme cold outside, will condense on the walls of the hive. And if there are unoccupied frames, then on the frames. As the humidity inside the hive increases, thermal conductivity also increases. In winter, bees in the hive begin to eat more food and, accordingly, the humidity increases even more. In such a situation, individuals at the edges of the club die, colonies weaken, and the bees' intestines become full.
To prevent this from happening, several points are taken into account when assembling a nest in winter:
- For strong families, 8-10 frames are left, for medium ones – 7-8 frames, for weak ones – 5-6 frames. Some professionals advise not to leave more than 8 frames, even for strong families;
- For wintering, leave full sealed frames with honey. If they are half filled, then they are replaced with full honey (at least 2 kg);
- Be sure to have frames with a certain amount of bee bread - food for spring brood. Such frames are not placed at the edges, because there they can become moldy;
- If at the time of the inspection there are frames with brood, then they are left in the nest - the bees will later make food reserves at the place of the brood.
Important! Small holes (up to 1 cm) are made in the middle of the combs for the bees to move, the streets are widened to 13-14 mm, frames with honey are printed around the edges of the nest (so that the bees transfer food inside the nest), the insulation pad is removed before the onset of severe cold. All these techniques help maintain normal humidity and temperature conditions and help stop scarring of the uterus
Conditions for wintering bees in a winter hut or barn
The most important thing for a winter hut is that the required temperature is maintained in it. For wintering in the winter hut to go well, it should be, at best, from 0ºС to 4ºС, this temperature should remain throughout the winter, regardless of the external temperature.
You also need to maintain air humidity, it should not be higher than 75 or 85%. Low humidity is also dangerous for bees. In a dry room, honey will quickly crystallize, and the bee may die from lack of moisture.
In order to provide such a microclimate in an omshanik or winter hut, supply and exhaust ventilation must be installed.
Wintering bees in an omshanik or in another room is also good because it allows you to use honey reserves economically. Since each individual, in a state of suspended animation, slows down its life rhythm, all processes in its body proceed much more slowly, and it needs much less food.
Wintering in the Urals
Wintering bees in the Urals is a crucial period in the life of local beekeepers. Read more about wintering bees. Starting in autumn, you can feel severe frosts and cold. The later the bees fly around, the better the harsh winter will pass. We must not forget that the mountainous region has changeable weather conditions. If you remove all the hives to the omshanik too early, they can become stuffy and too dry, which will have a negative impact on the immune system and health of the bees.
The average nighttime temperature in this region is 53 degrees below zero. July is usually cold and rainy. The temperature does not rise above fifteen degrees Celsius. In such conditions, bees are forced to collect honeydew from fir and other coniferous trees.
Often the amount of honeydew exceeds the amount of honey collected in one season. In order to engage in successful beekeeping in this region, as well as to ensure a prosperous and safe wintering, it is recommended to breed the Central Russian breed of bees. This type of insect is adapted to such wintering and is susceptible to severe frosts, as well as short periods.
When it's time to bring the hives into the winter hut
The bees are removed to the winter hut when cold weather sets in and it becomes clear that there will be no more fine days for flying around.
The hives are transferred with the entrances tightly closed and very carefully, since the colonies become very excited during the transfer and do not calm down for a long time. At the same time, the bees raise the temperature in the nest, and this leads to sweating of the walls of the hives and honeycombs frozen in the cold. The hives immediately become damp. If there is insufficient ventilation in the winter hut, they do not dry out for a long time.
Causes of death of bees in winter
The death of individuals is influenced by various factors, some of which are the result of improper preparation for wintering. Main reasons:
- increased humidity inside - due to poor ventilation in the room or improper processing during preparation;
- souring or sugaring of honey, bee bread, which leads to hunger;
- lack of food due to cold;
- bee diarrhea - lack of flight during late brood, which leads to the accumulation of feces in young animals (the disease affects the entire family);
- absence of a queen - due to the search for the “queen” the club begins to break up;
- bright light, high temperature, noise;
- hunger due to low temperature - death in the form of a slide;
- diseases - salmonellosis, viral paralysis, larval rot.
To prevent the death of the “wards”, it is necessary to comply with the rules for arranging comfortable conditions for wintering. The main thing is to maintain humidity and temperature within optimal limits, provide sufficient food, and insulate the room.
Feeding rules
During wintering, insects reduce food supplies, and to breed offspring they need a lot of honey and bee bread. Therefore, caring for bees in the apiary in the spring is to provide a sufficient amount of food before the honey plants begin to bloom. Beginning beekeepers should know: if there is a shortage of food in the hive, egg laying will slow down, and worker bees will weaken. Therefore, it is necessary to monitor the constant availability of feed.
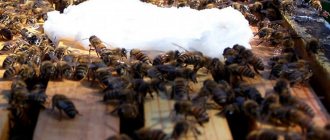
It is best to install several frames with high-quality honey and beebread after inspecting the hives. In the absence of a product, it is permissible to feed the bees with sugar syrup, sweet protein dough, giving 1 serving for 3-4 days, in order to disturb the families less often. Insects will also need additional nutrition in bad weather, or in the temporary absence of flowering plants in the vicinity of the apiary.
In addition to feeding, caring for bees includes providing fresh drinking water. The drinking bowl should be located near the hives, and the liquid should be heated. Otherwise, insects will have to collect moisture from bodies of water that are contaminated.
Features of wintering in Omshanik
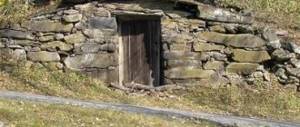
Those who plan to get serious about beekeeping need to forget about the barn and build a separate winter hut for their bees. Beekeepers call such a room an omshanik. There are three types of omshaniks: underground, above-ground and mixed.
The ideal option is to winter the bees in an omshanik, which is located underground. Omshanik must protect insects from wind and precipitation. It is desirable that the walls be brick. If you use wooden boards as a material, the risk of fungus formation will increase.
Wintering bees in a winter hut is an important component of beekeeping, but not every beekeeper has the opportunity to build an underground hive. As an alternative, above-ground structures can be used. In general, this does not change the essence of the matter. Regardless of the type of omshanik, the inside must be thoroughly disinfected. One of the most effective methods of disinfection is fuming the room with sulfur gas.
Types of winter shelter construction
Omshaniks are of three types:
- ground;
- underground;
- semi-underground
In underground structures it is easier to create an optimal microclimate; they are not afraid of winds and severe frosts. The heat in the room is maintained by the ground temperature. The winter shelter is deepened into the ground up to 3 meters, and the top mark is level with the ground level. If groundwater or other reasons do not allow the construction of an underground structure, an above-ground omshanik is erected. In this case, the walls need additional insulation. If this is neglected, the bees may die in severe frosts.
How to build an omshanik
Before you start building an omshanik, you should choose a location taking into account the requirements described above. Next, you need to calculate the area of the future winter hut, based on the number and design of hives in the apiary.
For an underground or semi-underground winter hut, it is important to take into account the groundwater level. If the omshanik is designed for 300 or more hives, it is better to equip two entrances to make it more convenient to bring in and take out the hives.
Step-by-step instruction
A guide on how to build an underground winter hut for bees with your own hands:
- mark out the area for construction;
- dig a hole 80 cm deep in the corners of the rectangle;
- install racks at least 1.5 m high above the ground;
- connect the supports with timber;
- fold the logs maintaining a distance of 65 cm between them;
- cover the walls of the winter hut with boards from the inside and outside;
- lay insulation between the boards;
- lay the floor joists horizontally and cover them with boards;
- mount the rafters and cover the roof with roofing felt (or slate). The roof can be single-pitched or gable. A layer of insulation is laid between the rafters and the covering;
- make holes in the walls for windows and in the roof for ventilation pipes.
Guidelines for the construction of underground structures:
- according to the drawing, dig a pit up to 5 m deep;
- install formwork around the perimeter;
- concrete the floor and partitions, after 7 days the formwork can be removed;
- weld a metal roof frame;
- lay the walls with bricks in two layers;
- cover the frame with boards, fill them with a thin layer of cement on top and cover them with polyethylene;
- then cover the roof with reinforcing mesh and fill it again with cement;
- wait 7 days until completely hardened;
- cover the top with roofing felt or roofing felt, sprinkle with earth for additional insulation;
- equip steps at the entrance;
- whitewash the walls from the inside;
- carry out ventilation;
- conduct electrical wiring.
The principle of constructing a semi-underground omshanik is identical to the above-ground one. The only difference is that you will have to dig a shallow pit (about 1 m) to deepen the building.
Video guide
Recommendations
To avoid undesirable consequences, before an exhibition after wintering, you need to:
- refrain from taking it out in rainy weather: this will negatively affect the timeliness of the first flight;
- start preparation at a temperature of 10 - 12 degrees in the shade, choosing a sunny place on the south side of the building without drafts;
- if insects begin to make noise in the winter hut, then removal should be carried out earlier, since they do not have enough food;
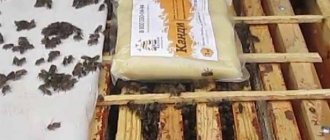
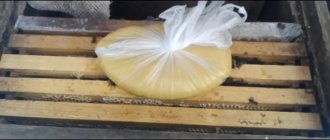
- for feeding it is ideal to use kandi - a dough of sugar and honey with the addition of vitamins;
- if the ground near the hives is cold, then it can be sprinkled with sawdust.
If you follow the recommendations, the likelihood of making it easier for insects to get used to open areas will increase, and their development will proceed many times faster.
Removing bees from the winter hut is a demanding and difficult task. The process will not harm bee colonies if you carefully and thoroughly study all the subtleties and tricks of the event.
Early exhibition of bees from the winter hut
Early exhibition is practiced if the insects begin to make a lot of noise, and the beekeeper is forced to take the hives to the apiary ahead of time.
In fact, an early exhibition is not considered a negative event. It is much better to take the hives outside sooner than to keep them in a room that does not meet the temperature and humidity needs of the insects. The early exhibition is especially relevant for families that spent the winter in conditions of lack of food.
Peculiarities
To ensure that an early exhibition does not lead to negative consequences (for example, hypothermia of insects), you need to take into account some features of the removal. Firstly, the hives need to be installed in areas that are well heated by the sun (Figure 3). Secondly, the place must be protected from drafts. In such conditions, insects will quickly get stronger and prepare for honey collection.
Figure 3. Early spring display of hives
In addition, after early removal, you need to carefully monitor the insects and control their first flight. If signs of illness or weakness of the family are visible, it will be much easier to help insects in the wild than in the winter hut.
Rules
The rules for conducting an early exhibition are approximately the same as for a regular exhibition of omshanik hives. You need to prepare the apiary in advance, remove the snow, install stands for the hives, and sprinkle the ground near them with straw or sawdust.
However, the main rule of early removal is to prepare a supply of feed. In early spring, individuals cannot yet look for food on their own, so you need to prepare food for them in case of a long and protracted spring. Without following this rule, there is a high risk of death of the entire family due to lack of food.
Rules for treatment of various diseases
Strong, healthy bees are usually immune to infections and parasites and can easily endure wintering. Weaker families need care in the spring in the form of treatment against ticks, for example, Varroa.
Multiplying pests can be eliminated with the help of suitable drugs, but only as a last resort. It is better to fight them without chemicals - using formic acid, pine flour, and plant decoctions. To combat microscopic parasites, bees are given fertilizing supplements with the addition of medicines.
If the walls and bottom of the hive, frames with honeycombs are heavily soiled, and insects show signs of infection, it is recommended to transplant the family into an empty, treated hive and improve its care. The previous home is thoroughly washed and disinfected. When a bee disease is detected, their corpses are sent to a laboratory for examination.
