DIY mobile chicken coop: step-by-step guide
For keeping poultry at home, a portable structure is very convenient, which you can quickly and easily make yourself.
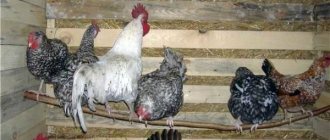
You will need a block, a board and some metal or plastic mesh. The dimensions are taken so that the chicken coop can be moved by 2 people. At the first stage, the frame is made. It consists of two triangles connected at the ridge and along the perimeter. This system is quite stable, and when covered it becomes as rigid as possible.
A horizontal shelf is installed inside, which will serve as the floor of the chicken house. An opening is cut in it so that the birds can go down and walk around.
The mesh is fixed at the sides and ends in the lower part. The top is covered with boards on three sides. A folding door is mounted along one slope. It is better to make it from 2 parts.
A wooden perch is installed inside. At the ends there are 2 nests made from any available materials.
To carry it along the ends, you need to nail the handles like a stretcher, for example, 2 long strong beams. With their help, you can move the chicken coop to another place with fresh grass or store it under a shed for the winter.
Building a pen with your own hands
In order for poultry breeding to generate income, costs must be minimal. Therefore, a pen for geese is usually built independently, purchasing cheap materials, using leftovers from construction. But, despite the budget option, it is being built according to all construction rules.
The construction of any building requires calculations at every stage. What work needs to be done:
- Design of the structure taking into account the size of the gooseneck;
- Selecting a site for development, marking the site;
- Arrangement of strip foundation;
- Construction of walls, roofs, floors, their insulation.
Project
It’s easy to sketch, all you need is a pencil and paper. The dimensions of the future structure are plotted on the drawing, taking into account what kind of herd will be kept in it. If, for example, you need a barn for 10 geese, then a room with an area of 3x4 m is sufficient. Other dimensions:
- height – 2.2-2.3 m;
- windows - 50x70 cm, must be opened for ventilation.
- bird hole – 50×50 cm.
The location and dimensions of compartments and passages are indicated on the room diagram. The goose's nest is made in a dark place, measuring 60x50x60 cm.
If desired, a gooseneck of this size can be built in a country house or a small plot of land.
Site marking
Using a tape measure, cord, and pegs, mark the location of the gooseneck at the selected location. A trench is made along the perimeter of the marks, 50 cm deep and 30 cm wide, under the foundation. Since wood and foam blocks are most often used to build a poultry house, a monolithic strip foundation is sufficient.
Foundation
A layer of sand (about 10 cm) is poured into the bottom of the trench, then a layer of crushed stone, everything is compacted.
Before pouring the foundation, a formwork made of boards is installed around the perimeter of the trench, 25 cm above the ground. The formwork should also have openings for vents in the foundation.
The solution for pouring the support base is prepared from a mixture of sand and cement in a ratio of 3:1. After a couple of weeks, when the solution hardens, they begin to build the walls. The foundation is first waterproofed by laying roofing material on its horizontal surface.
Gusyatnik
Walls
They can be made of wood, foam blocks, brick. If keeping geese is seasonal (from May to October), then a structure made of wooden beams covered with boards is most acceptable. The technology of frame construction is simple:
- From unplaned timber 100×100 mm, a lower frame is made in the form of a frame, which is fixed to the foundation. Floor joists can be attached to it in parallel.
- Corner supports are secured to the perimeter frame with steel corners. For rigidity, the lower trim and supports are fastened with jibs.
- Then the upper frame is assembled from the beams.
- Along the perimeter, vertical supports made of beams are attached to the finished frames.
- When installing the frame, take into account the location of doors, windows, and manholes.
When the frame of the structure is completely ready, they begin to cover it using edged boards.
To protect the room from wind and retain heat, a film 200 microns thick is fixed to the walls inside, then sheets of plywood, OSB boards, and plasterboard.
To reduce costs, the frame is constructed from timber of a smaller cross-section and sheathed with unedged boards. For the internal lining of the walls, use the remains of any suitable material.
Gusyatnik
Thus, it is not difficult to build a goose coop with your own hands for 10 geese. But an uninsulated wooden structure is only suitable for seasonal keeping of geese. Serious insulation of all parts of the goose barn will be required if the geese are planned to be kept all year round.
Selection of material and calculation of its quantity
You can build a small poultry house with your own hands to keep geese and chickens with your own hands, without the involvement of specialists. You can’t do without buying building materials.
The following materials are used for the poultry house:
- Unplaned beams (100×100mm, 50×150 mm), thick logs, boards (edged 25×150 mm, unedged);
- Foam blocks;
- One-and-a-half silicate bricks (250×120×88 mm).
Roll and tile insulation:
- mineral wool;
- ecowool;
- Styrofoam.
Roofing:
- slate;
- tiles;
- roofing felt
The amount of each material is calculated based on its size and the area of that part of the structure (wall, ceiling, floor) that will be laid out, sheathed, and insulated.
For example, knowing the height and length of foam blocks, they determine how many of them are needed to lay a wall with an area of 1 square meter. m. The amount of insulation, roofing and sheathing material is calculated in the same way.
Tools for building a gooseneck
To complete the work you will need:
- entrenching tools – bayonet shovel, shuffle;
- power tools (screwdriver, electric drill, electric saw);
- measuring instruments (level, plumb line, square, tape measure);
- concrete mixer.
Climate and lighting
Regardless of the materials used in construction, certain humidity and temperature parameters must be observed in the lining barn.
The health and productivity of geese depends on the microclimate in the poultry house.
- For geese, the optimal temperature for living is considered to be 10-30˚C. In the goose barn, the air temperature should be within 20˚C. Extreme heat or cold can lead to reduced bird productivity or death;
- Air humidity should not exceed 50-70%. Dry air below 50% leads to feather breakage and mucous membrane disease in geese. Rooms with high humidity become covered with mold or fungi, which is very dangerous for the health of livestock;
- The goose barn must have a sufficient level of lighting. For laying and better weight gain, birds need 14 hours of daylight. For this purpose, artificial lighting is used. Lighting of 20 lux is considered optimal. The calculation of the installation of artificial light is carried out according to the formula: per 6 m2 – one 60 W light bulb;
- Another important point is ventilation in the gooseneck. In the warm season, the room needs to be ventilated several times a day.
Before introducing birds into a new barn, it should be thoroughly disinfected. To do this, you can use ready-made mixtures that are sold in a pet store or self-prepared solutions (for 10 liters of water - 200 g of salt and 2 kg of lime). After all internal surfaces have been treated, the room should be ventilated for several days.
Features of a nest for geese
Geese are one of the largest birds living on the farm, so their nests need to be large and spacious. In order for the female to sit comfortably in the nest for a long time, she needs to take responsibility for its arrangement, adhering to all the requirements.
Types of nests
There are many options for goose nest designs. In each farm or private household, they can be equipped depending on the availability of the necessary material and the desire of the poultry farmer.
The most common types of nests are described below:
- round, made from an ordinary basket or car tire (or filled with straw);
- with a wooden bottom and slate side walls. The top of the box is also covered with slate sheets;
- from a construction mesh, rolled up in the form of a pipe and secured with clamps. The structure is attached to a wooden base with wire and covered with straw;
- a series of separate wooden sections with a small entrance and blind partitions - for a large number of geese.
Requirements for sockets
To make the place for laying and hatching eggs convenient for the bird, you need to take into account some important aspects of its arrangement.
Did you know? Geese are loyal to one gander. If they lose their male, they cannot form a pair with another gander for several years.
Here are the basic rules for his equipment:
- Sufficient space for birds. The dimensions of a standard goose nest are 50 cm wide, 65-70 cm deep and 60-70 cm high. Depending on whether it will be used for laying eggs or for hatching chicks, the depth can be made larger or smaller.
- Closed back. It is needed so that nothing frightens the bird or distracts it from behind, and also to fix the bedding at the bottom of the structure.
- Low board in front. Its height can be from 10 to 15 cm. Such a board is needed to hold the bedding.
- High side partitions. It is undesirable for a goose hatching eggs to be distracted by external factors. If there are several goose nests nearby in a poultry house, then such walls will help the females not to disturb each other.
- Timely preparation. It is necessary to arrange suitable places for geese to lay eggs a month before the birds begin their breeding period. Females usually begin laying eggs around the end of winter, so the nests should be ready by February. The goose must choose one suitable place and rush there.
- Doors on control sockets. Necessary for the female to feel completely safe while incubating offspring.
- Convenient entrance. So that the hen can easily get into the nest, a board with slats nailed across it is laid at an angle in front of the entrance. One edge of the board rests on the ground, and the other on the edge of the nest, forming a bridge for convenient entry for the bird.
- Possibility of choice. In order for a goose to want to hatch eggs, she must like the nesting site. It is recommended to set up several bird sections nearby so that the female can choose the best for herself.
Features of goose nests
The arrangement of places for laying eggs and hatching offspring in the poultry house must be taken with all responsibility so that the goose feels comfortable staying there for a long time. The goose is a large bird, and its nests differ from chicken nests.
- First of all, they must be spacious enough. Standard sizes: width – 50 cm, length – 65-70 cm, height – 60-70 cm. For incubation of eggs, nests can be deeper. The size of the nest can be adjusted depending on the breed of geese - larger or smaller.
- The back wall adjacent to the wall of the room will be blank. A boundary board 10-15 cm high is installed in the front part to hold the bedding.
- The cross boards separating the place from the neighboring one should be high enough so that once the hen sits down, she will not be distracted and cannot disturb her neighbor.
- At the end of February, geese begin their active egg laying period. A month before the mating season, it is necessary to equip the nests so that the female takes a closer look at the place and insulates it with her plucked down.
- The control sockets must be closed. It would be a good idea to put a board with nailed cross bars in front of the entrance.
- According to the norms (see table), one nest is installed for two or three females, although this does not guarantee even distribution of the clutch. 2-3 geese can fight for one place chosen by many, even if there are free sections. But hens should always have a choice.
Socket dimensions
Standard sizes for test sockets.
| Nest parameters, m | ||||
| Bird species | For one nest, goal | width | length | height |
| Chicken | 3 | 0,3 | 0,4 | 0,3 |
| Turkey | 2 | 0,4-0,5 | 0,7 | 0,6 |
| Duck | 1 | 0,3 | 0,4-0,5 | 0,2 |
| Goose | 1 | 0,4 | 0,5 | 0,5 |
Standard sizes for regular nests.
| Nest parameters, m | ||||
| Bird species | For one nest, goal. | width | length | height |
| Chicken | 5-6 | 0,3 | 0,4 | 0,3 |
| Turkey | 4-7 | 0,4 | 0,7 | 0,6 |
| Duck | 3-4 | 0,3 | 0,4 | 0,4 |
| Goose | 2-3 | 0,4 | 0,6 | 0,5 |
The diagram shows a nest for chickens. For geese you need to make larger nests
Goose barn project
Before you start building a gooseneck, you should first design it on paper. This will help avoid mistakes during construction.
Dimensions
The area and size of the building depend on the number of future residents. When building a stationary goose barn, 1 individual should have at least 1 square meter. m, mobile - at least 0.5 sq. m.
The height of the shed must be at least 200 cm so that it is comfortable for a person to stay and clean it. In addition, in low rooms the air circulates worse - moisture accumulates in large quantities on the walls and causes wood to rot. The rear wall has a height of 160-170 cm, since the roof is made with a slope for easier snow shedding and rainwater drainage.
The window area should be 10% of the total wall area. It's better to make them square. A bright room has a beneficial effect on the productivity of geese.
The figure below shows an approximate diagram for calculating the dimensions of the gooseneck:
Floor materials
Usually it is made of wood or concrete, sometimes adobe:
- Tree. This is a natural, environmentally friendly material that allows air to pass through well. But it rots, does not protect against rodents and has a short service life. Treating wood with special compounds allows it to last longer.
- Concrete. More durable than a tree, a rat or mole is unlikely to gnaw through it. However, concrete floors are cooler than wood floors. Using deep litter solves this problem. But concrete does not allow water and air to pass through.
Wall and roof materials
The walls of the barn are erected from the following materials:
- Brick and cinder blocks. They are considered one of the most durable materials for goose barn walls. But this is a cold material and contributes to moisture retention in the room.
- Wooden logs. They allow air to pass through perfectly, but are subject to severe rotting.
- Adobe. It is considered the best material for walls in dry climates. This is a raw brick made from clay soil with the addition of straw or other fibrous plant materials. If you first soak the adobe in lime, this will prevent rodents from appearing in the barn. For insulation, the inside and outside facades are treated with a mixture of clay and straw.
Sheets of wavy slate or polycarbonate are laid on the roof, but the latter material is a short-lived type. It is forbidden to use metal, since in hot weather it becomes very hot and creates unbearable conditions inside the gooseneck.
Thermal protection
In regions with harsh winters, the choice of insulation is approached responsibly. For these purposes use:
- mineral wool - it is easy to install and allows air to pass through, but at high humidity it begins to rot, and also settles and breaks;
- polystyrene foam or expanded polystyrene - this thermal insulation material is easy to install and retains heat well; on the other hand, it takes up a lot of volume and does not allow water to pass through, as a result, the humidity in the gooseneck increases;
- sawdust - they allow air to pass through well, but quickly rot.
Capital duck house: how to build it with your own hands at the dacha, private yard
Various building materials can be used for the gooseneck:
- tree;
- brick;
- cinder blocks;
- foam blocks.
In some cases it needs to be insulated, for example, if the goose barn is made of wood with thin walls.
Watch the video on how to build a gooseneck with your own hands.
The construction of a goose barn begins with the foundation. It is made ribbon and columnar. On damp soil, you can pour a layer of crushed stone and fill it with clay mixed with broken glass to protect the shed from rodents, top it with cement, and after it hardens, cover it with bitumen for waterproofing.
You can make a strip foundation. To do this, remove the top fertile layer of soil and dig a trench 30-50 cm deep, fill it with a mixture of sand and crushed stone, compact it and lay reinforcement on it. The trench is filled with concrete.
To protect against rats and mice, another trench is dug around the perimeter of the goose barn and filled with a mixture of clay and broken glass.
How to build a gooseneck? If we are building a frame shed from boards, then first we build a frame from timber. At this stage, windows and doors are provided. In this case, the window area should be at least 10-15% of the floor area. Birds need a sufficient amount of light, especially during the fattening period; in a dark room they will not gain weight well. Windows and doors need to be well insulated, otherwise in winter heat will escape through them.
We invite you to read: How to transport a cat on a train: rules for transporting cats on a train
On the south side of the goose barn, at least two windows and two manholes for geese measuring 50*50 cm are made. Small ladders are needed to the manholes. The Gusyatnik is made with the entrance facing south in the north and in the middle zone. In the southern regions, the entrance is located on the southeast or southwest side.
Also, near the entrance to the goose barn, you need a vestibule for storing equipment and bedding. This vestibule will also play a warming role - in winter, cold air will not immediately flow into the room where the geese are kept.
Particular attention should be paid to the floor of the gooseneck. It is raised 20-25 cm above the ground and made inclined to make it easier to wash off excrement
A layer of crushed stone is poured as drainage.
The roof of the gooseneck is made single-pitch or gable. The frame is covered with boards first from the outside. Then it is insulated by attaching heat-insulating material to the inside of the boards. The cheapest option is sawdust. After this, the structure is covered with boards from the inside.
Any roofing material can be used for the roof. It is usually insulated with sawdust. It is good to build a goose barn with an attic - you can store hay on it, in addition, it will additionally insulate the goose barn.
In general, as already mentioned at the beginning of the article, any room, for example, a small barn or stable, is suitable for keeping ducks. It is only necessary to insulate the walls, ensure the flow of natural light, limit the entry of rodents and the occurrence of drafts. Many poultry farmers keep ducks in greenhouses in winter.
Several types of poultry can be kept in one room. For example, chickens and ducks get along easily. But this is provided that the duck population is small - 6-10 individuals. If you have more than 15 ducks, you will have to allocate a separate room or pen for them.
Before you start building a duck house, you need to decide on the dimensions.
A duck shed should not be too large or high. This type of poultry does not require roosts like chickens, so they do not need high ceilings. The best option is a poultry house with a pitched roof, the front wall of which will be 1.8 meters and the rear wall will be 1 meter. Below in the photo are several drawings and a diagram of such a duckling.
Foundation
The construction of the duck house should begin by pouring the foundation. Since the room will be light, the trench under it is dug using the bayonet of a shovel (25-30 cm). Next, the formwork is constructed, then a layer of a mixture of gravel and crushed stone is poured into the trench. After this, concrete is poured.
The optimal materials for walls are brick and wood. The most economical option is to build a frame and cover it with boards. The outside of the cracks can be foamed with polyurethane foam, and the inside can be pierced with tow.
The roof can be anything. If you do not need an attic, then it is better to make a lean-to. The roof must be insulated and all cracks through which moisture can enter must be closed.
It doesn’t matter for what breeds (muscovy, indo-ducks, mulards, etc.) and for how many birds you are building a room - for 10 ducks or 50 ducks, in any case it should be warm, dry, with good ventilation and lighting
Do-it-yourself winter goose barn for 10 geese
If birds are kept all year round, a more reliable and warm design is needed. Goose sheds are usually built by yourself. However, complex or large designs sometimes require assistance. Specialists do the project, build it. A small barn for 10 geese can be erected without outside help.
Construction stages
The work is carried out as usual. First, decide on the material. A common option for the walls of winter shelters is foam block. The material has excellent characteristics:
- porous, well breathable;
- easy installation, thanks to which construction proceeds quickly;
- retains heat well;
- does not respond to fire;
- reliable and durable;
- inexpensive.
The construction stages are as follows:
- Construction of the foundation. They do it according to the same principle as for a summer shed. A good size room for 10 geese is 5 by 2 m. Although it is better that the total area of the structure and foundation is slightly larger than 10 m². Take into account the space for technological passages, equipment and other things.
- Walling. Sometimes the project includes a vestibule. This is a kind of canopy or “dressing room” - an auxiliary room that is the first to stand in the way of the cold and delay it.
- Next is the roof.
- Floor.
Walls
Warmth is especially important for the winter goose bird. To preserve it, make walls of sufficient thickness - at least 25 cm. Foam blocks are perfect. Their width is from 25 to 50 cm. The height and length are also convenient: 20–25 cm and at least 60 cm. Walls of any thickness and size are made of foam blocks. They do it like this:
- Place blocks on the foundation. Fasten with special glue or concrete mortar.
- Gives rigidity to the walls. To do this, grooves (grooves) are needed in the first and every fourth row. Metal rods are placed in them.
- After laying the foam blocks, a concrete belt is poured.
Winter goosenecks are sometimes also built on the basis of a frame made of beams.
They are similar to summer ones, but warmer and more airtight. Wall thickness - from 25 cm.
Sawdust is often used for insulation. Although the material has disadvantages. It cakes and sags. As a result, the upper part of the barn loses protection from the cold. Plus, sawdust ignites easily, which is dangerous.
Roof
Next they build the upper part of the goose barn. The roof is usually made pitched. This saves money and makes assembly easier. Warm air rises. Proper roof insulation retains 10% or more of heat in the shed.
The roof structure of a winter barn is generally the same as that of a summer barn. Only they approach insulation more responsibly. They do this:
- Install the rafters.
- Install the internal sheathing.
- A layer of hydro- and vapor barrier.
- Two layers of insulation.
- Film insulation again.
- Perform external sheathing.
- They put a roof on top.
- Insulate the ceiling. This is the main thing. Many people do not insulate the walls, but the top of the structure is a must.
Floor
Finish at the bottom. The floor is finished like this:
- Boards are laid on top of the joists.
- Sometimes the subfloor is laid first. Even unedged boards are suitable for it. Another finishing floor is placed on the subfloor.
- Instead of boards, concrete is used. It is not afraid of rotting and lasts longer. The disadvantage of this coating is that it is cold.
Any floor option is covered with bedding: straw, dry sand, sawdust, peat or a combination thereof. This keeps you warm. As a rule, a layer of no more than 10 cm is made.
The bedding is changed frequently. The optimal layer is 5 cm. Although some put up to half a meter.
Feeding geese: young and adults
Feeding geese
Particular attention should be paid to the preparation of geese diets. The type of feeding will depend on the following factors: age of the bird, gender, time of year, direction of productivity
Types of feed and feeding rates
Feeding characteristics of geese
Geese eat a large amount of green food (up to 2 kg per head per day), so in the summer it is best to send them to the meadows. If this is not possible, feed the bird plantain, nettles and dandelions. Geese love reeds, cattails and other plants that grow in ponds.
Geese on a walk nibble on lush grass
Here is a list of ingredients that make up the poultry diet, including the average daily requirement per head:
- green feed (fresh grass in summer, silage in winter) – up to 2 kg;
- root vegetables (beets, potatoes) and tops – up to 500 g;
- pumpkin, carrots, cabbage – up to 100 g;
- whey and skim milk - only for goslings up to 4 months up to 50 g;
- grain feed – up to 70 g;
- herbal flour – up to 50 g;
- mineral supplements – up to 25 g;
- fish or meat and bone meal (or fish waste) – up to 50 g.
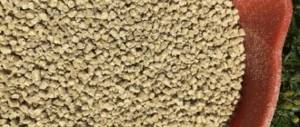
Feeding domestic geese
Many farmers use complete combined feeds to feed geese. In this case, the bird is given only dry food and greens. The daily feed requirement for adult birds is about 350 g.
Feeding the goslings
Feeding goslings from the first days of life
Goslings begin to be fed immediately after they are born. In the first 7 days, the chicks are given food up to 7 times a day. It is best to feed goslings with complete feed, but you can replace it with a mixture of grains (peas, wheat, buckwheat, rolled oats, corn). In this case, include cottage cheese, chopped herbs and boiled finely chopped eggs in your diet.
Potatoes, beets and cake are given to goslings for 3-4 days. The food is well crushed and moistened, shell and chalk are added. Gravel is poured into separate containers.
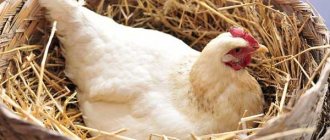
Diets of laying hens
A month before the start of egg laying, geese begin to be fed more intensively. The diet includes more green food. Be sure to increase the amount of roughage, since grain often causes obesity.
The basis of the laying goose's diet during the breeding period is wheat and oats. Be sure to increase the amount of meadow hay, cake, root vegetables, legumes and animal flour. Females are fed up to 4 times a day: two feedings with wet mash, two with grain. A week before the start of laying, geese are fed vitamin supplements.
Fattening geese for meat
Goslings from 3 weeks of age are fattened in two ways: meadow and intensive. In the first case, the chicks are sent to pastures, where they actively eat fresh grass. One month before slaughter (at 3 months), grain (especially oats) is included in the diet in unlimited quantities. There should always be drinking bowls in the room.
Fattening geese
With intensive fattening, goslings are sent to slaughter as early as 2.5 months. The birds are deprived of free range, kept in cages, and fed wheat, oats, barley and corn. If necessary, goslings are force-fed; for this purpose, special balls of hard dough are prepared (the composition includes wheat, corn and barley flour, as well as crushed bran), soaked in water and inserted into the esophagus using a tube twice a day.
Differences between winter and summer feeding
Geese eat from a feeder
In summer and winter, the diets of adult geese differ slightly. Here are the main differences:
- In summer, birds eat fresh grass on pastures all day long, in winter they replace it with silage;
- in summer, feed costs are significantly reduced, in winter they increase;
- In summer, geese eat wet and grain feed 1-2 times a day, in winter - 3 times;
- in winter, birds are fed a lot of root vegetables;
- In summer, geese get vitamin C from fresh grass; in winter, it is recommended to feed the birds pine or spruce needles (branches are prepared in advance, the needles are removed and ground in a meat grinder);
- The basis of the diet in winter is grain or mixed feed.
How do you know if your diet is wrong?
By the behavior of the bird you can understand whether you are feeding them correctly or not. When there is an excess of green food, geese experience diarrhea. In this case, limit the amount of fresh herb. A large amount of dry food leads to the development of cough. If this happens, start feeding the geese wet mash.
Preparing wet mash
Adults do not eat poisonous plants, but there have been cases of poisoning of young animals by nightshade or hemlock. In this case, give the birds plenty of clean water. If there is a digestive disorder at the beginning of the walking season, treat the geese with antibiotics. After some time, the birds will begin to eat aquatic plants without any consequences.
What kind of goslings are there?
Gusyatniks are available in winter and summer. The former are more suitable for the central and northern regions of the country. Distinctive features of such barns for geese are a good layer of insulation, additional heating and a high floor.
The summer option includes a small building with 2-3 walls made of mesh, where the geese take shelter from bad weather. In appearance, such a goose house looks like a gazebo. The roof protects from precipitation and sun.
If in hot countries and the southern part of Russia you can get by with a summer version of a barn for geese, then in areas where summers are cool and winters are harsh, it is worth building both a winter and a summer goose barn.
Requirements for conditions of detention
Sanitary and veterinary standards are developed taking into account the maintenance of favorable conditions for poultry and are aimed at preventing the spread of infectious diseases. They contain requirements for the placement of chicken coops in summer cottages and garden plots, as well as for general conditions of maintenance:
- the development site must have a drain for surface water;
- retreat at least 4 m from the boundary, 12 m from the house - a neighbor’s or your own, 7 m from the entrance to the house if the structure is attached;
- each type of bird must be provided with a separate room and run;
- observe the lighting, ventilation and heating regime in the chicken coop;
- regularly carry out thorough cleaning and disinfection (at least 2 times a year).
If sanitary requirements are grossly violated, not only will the health of your chickens be at risk, but it will also be unsafe for surrounding farms.
Description: how to build a warm chicken coop for 20 chickens
To build a chicken coop for laying hens with your own hands, you need to complete the preparatory stage in advance with the collection of building materials, and also thoroughly think through the drawing. The work itself will be carried out in several stages:
Heating using an infrared ceiling heater
- Pouring the foundation with all preparatory work
- Construction of the frame
- Insulation of buildings
- Ventilation system installation
- Interior arrangement with feeders, nests and lighting
- Preparing for a walk.
Each point has its own nuances that must be taken into account to make the bird house truly warm, light and spacious.
Working with the foundation
The foundation is the basis of any building. It must be durable and not shrink. You can choose a strip or column base for a winter chicken coop. The second option is less expensive, but the first is more reliable, so let’s consider it.
If you decide to choose the first option and make the foundation columnar, then after marking you should do several steps:
- Dig holes up to half a meter deep under the pillars located at a distance of 1 m from each other. In this case, the supports themselves should rise above the ground by 20 - 30 cm.
- Pour sand into the prepared holes, as in the first option, then make a frame and pour the mixture.
Pillar foundation option with frame
The difference in the two methods is only in the area of the foundation. If you are planning to build on loose soil, which is often washed away by water, then it is better to choose a strip option, which provides greater stability to the chicken coop. If weather conditions do not affect the selected area, you can save money and make a columnar version of the base.
The timber frame is made the same way in all cases. And do not forget to lay roofing felt to protect against freezing and destruction of the base.
Assembly of the structure
The next stage is no less important than the first. Construction of the frame. The work must be carried out slowly, avoiding drafts due to cracks. To create a reliable chicken coop for 20 chickens, do the following:
There are quite a few design options, the simplest option is presented above, which all that remains is to insulate, install light and arrange feeders with nests.
How to insulate a chicken coop for the winter with your own hands
In addition to laying insulation during the construction of the chicken coop, there are additional measures to maintain a comfortable temperature for the chickens: installing heaters and additional bedding.
If you have a chicken coop that was not intended to be used in winter, it should be insulated. To do this, use felt, sawdust or straw; a good option is polystyrene foam.
Roof insulation with foam plastic
To insulate the floor, it is enough to lay a dense layer of straw or sawdust. If you built the chicken coop correctly, then there will be no large gaps and such natural heating will be sufficient.
The inside of the roof can be sealed with felt, and the walls can be additionally sealed with polystyrene foam. If there are very severe frosts in winter, consider small heaters that should be placed in places inaccessible to birds. IR ceiling models are preferred.
A heater with a protective mesh is a good option for laying hens
Such insulation for the winter will be enough to maintain the productivity of chickens. The hens will feel comfortable, and with additional lighting, egg production will remain at the same level.
Ventilation in the chicken coop in winter
How to make ventilation in a chicken coop with your own hands so that the bird is comfortable in winter and summer? Quite simple if you follow all the recommendations. There are two types of room ventilation:
- natural;
- supply and exhaust.
The first is obtained automatically by arranging windows and an exit for chickens during the construction process. Moreover, it is better to place window openings opposite each other, ensuring maximum ventilation.
Quite large windows for good lighting and ventilation
You can create artificial ventilation of the room, which will take a little more time, but in winter the heat will be better retained. To do this, you can make two pipes or install a fan in the wall.
If you choose the option with pipes, then place one pipe vertically, where the edge above the floor (no more than 25-30 cm) is brought out in an arc to the street just above the roof. The second pipe is at the other end of the chicken coop and its upper part is high above the building itself.
Installing a small fan at the entrance
Any of the chosen methods will provide sufficient fresh air to the birds, which is necessary for the health of the laying hens.
How to build a gooseneck
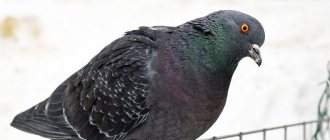
Poultry breeding has been a long-standing occupation of people permanently living in rural areas. One of the popular areas of poultry farming is keeping domestic geese. This is a strong and beautiful bird, the meat of which is very healthy and tasty. She lays large eggs that have a wonderful taste. Goose down is the best filler for feather beds and pillows.
Feeding geese to market size does not present any particular difficulties or significant costs - they receive most of their nutrition from pasture. You just need to organize grazing correctly. Ideally, there should be a river near the breeding site. The goose is an intelligent bird and always returns home after a walk, where it is prepared for additional feeding and comfortable living.
The gray goose is the most effective breed for stripping at home
Gooseneck device
Before you start building a barn for keeping geese, you need to decide on the design, taking into account the following circumstances:
- the absence of drafts is one of the main requirements for the premises;
- comfortable temperature and dryness. For geese with thick skin and a layer of subcutaneous fat (with proper feeding and maintenance), temperatures down to zero degrees are not terrible, but the best conditions are 22–28 degrees;
- good air circulation in the room, which is usually organized in the form of ridge or box ventilation using a deflector.
If such conditions are not met, one should expect a decrease in egg production, reproducibility of the herd and a deterioration in the taste of goose meat.
The standard of use for the area of the premises must be at least one square meter for each individual, that is, for 10 geese you need a room of 10 square meters, and for a hundred - 100. The external areas of the goose barn must be equipped with canopies from the sun or bad weather. Compliance with the required area will save the poultry house from excessive pollution, and the birds from diseases and uncomfortable living.
Poultry houses and outdoor areas should be divided into sections with a capacity of up to 50 birds. Birds of different breeds are also kept separately. The room should be delimited into sections by removable mesh partitions up to 120 centimeters high.
Video: portable enclosure for young animals
If there is no natural body of water nearby, you need to place containers of water near the place where the geese are kept or dig a pond. For ease of use, it is better to cover the bottom and sides of the dug container with plastic film. During use, you need to monitor the condition of the water and refresh it in time. If complete or partial replacement is necessary, water from the pond can be used to water garden plants.
The goose receives its main nutrition in the form of pasture
The birdbath should be designed as a trough and preferably have running water. To flush the gutter, you can arrange a drain from a plastic pipe of the appropriate size cut lengthwise. The norm for using a drinking bowl is calculated from a minimum length of six centimeters per individual.
Ventilation of the gooseneck
There should always be clean air in the poultry keeping room. For this we use:
- windows, which are intended mainly to provide lighting, but can also be used to ventilate the room while the birds are walking;
- exhaust ventilation. A box with windows for air intake is installed above the service passage; the ventilation pipe is led outside through the wall and equipped with a rotary deflector. It is designed for forced removal of air from the room.
If the roof of the building is gable, ridge ventilation is installed, which effectively removes warmer air from the room.
The hood provides fresh air in the goose barn
Ventilation devices are equipped with dampers or dampers to regulate the intensity of air exchange.
Diagram of the supply and exhaust ventilation device in the goose barn
Video: ventilation for poultry houses
How to properly arrange a goose's nest
Before laying eggs, crushed material similar to bedding is poured into the bottom of the nests: chopped corn cobs, straw, peat, sand, sunflower or millet husks. To prevent parasites, add a little ash to the bottom. Then the female will cover everything with her down. Females lay eggs in the first half of the day, every other day. Therefore, it is better to update the litter in the evening so that it is always dry, clean, hygroscopic, without traces of mold, since its quality affects the health of the geese. In a damp nest, the female's feathers are dirty, do not retain heat, and the laying hen's immunity drops. At the first sign of dampness, it is neutralized with fluff lime
Up to 40 kg of litter is required per head per year, so it is important to prepare the material in advance
It is important to update the litter on time
Geese tolerate freezing temperatures well, but if the nest is 4 degrees below zero or below, the eggs freeze and the chicks will not hatch during incubation.
That’s why it’s so important to equip high-quality, insulated nests in unheated rooms in winter.
Until daylight hours approach 14 hours, to increase egg production, you need to turn on the electricity from 6 to 20 hours.
If a goose is used repeatedly to hatch eggs, it is strictly not recommended to transplant it to another nest. This will be seriously stressful for her. To ensure that a caring mother does not refuse to hatch her offspring, place someone else's fresh (no more than 10 days old) eggs in her usual environment.
The goose will quickly get used to its new house if it lays its first egg in it. Confirmation that she has chosen him may be the fluff that the female plucks out while covering the selected nest.
The goose puts its down in the nest
To awaken the brooding reflex, farmers place special dummies in the nests.
Creating general comfortable conditions for geese will help consolidate the result: birds do not tolerate stuffiness and high humidity. The length of daylight hours should also be adjusted using additional lighting.
Lamp for additional lighting
Arrangement of the gooseneck inside
In addition to ensuring correct ventilation, lighting and the necessary heating, the inside of the casserole is equipped according to certain rules.
Litter
Natural materials are used as bedding - straw, sawdust, sand, wood shavings, sunflower or millet husks or sphagnum peat.
The material must be dry, clean, hygroscopic, without traces of mold or unpleasant odor. In winter, it is recommended to cover the floor with straw or peat, as they insulate it well. In summer, sand or sawdust can be used as bedding.
One goose per year requires up to 40 kg of bedding material. The thickness of the litter layer depends on climatic conditions, bird breed and time of year and varies from 5 to 30 cm.
The bedding is changed regularly - the old one is replaced with a new, dry one. If geese are kept on a damp floor, their feathers quickly become dirty. It becomes disheveled and does not retain heat well, which leads to hypothermia in the birds - their immunity deteriorates, colds occur, and productivity decreases.
In the fall, before the onset of cold weather, when laying a new bedding, the dry floor is sprinkled with slaked lime at the rate of 1 kg per 1 sq. m. m to prevent the appearance of unpleasant odors. Bedding material is poured on top of it in a layer of 5 cm. As it gets dirty, a fresh layer of bedding is added. For goslings, the bedding is covered with straw on top to prevent the young animals from pecking at the material.
Nests
When installing nests, the number of geese is taken into account - there is 1 nest for every 2 geese. They are placed in a dark place on the floor so that the female does not experience anxiety. They should not be placed close to cold walls or in places exposed to direct sunlight. The best placement is considered to be the side walls of the poultry house.
The nest has the following dimensions:
- width - 40 cm;
- length - 60 cm;
- height - 50 cm.
The inside of the nest is lined with wood shavings or hay, which are changed once every 3 days. Nests are installed a month before the start of egg laying, so that the geese do not get used to laying eggs in their favorite places.
The bottom of the nest is made of wood, but not metal, since the goose tries to bury the laid egg in the litter. In severe frosts, such care in the presence of a metal bottom can backfire, it can freeze or break.
Feeders and drinkers
The goose barn provides three types of feeders, which are designed:
- for wet mash,
- dry food,
- mineral supplements.
Features of feeders:
- A feeder with minerals - bone meal, crushed shell rock or shells - should always be kept indoors.
- For wet food, it is better to take plastic or metal containers that are easy to wash and clean from food debris.
- Wooden feeders will get wet from the food and rot.
- For dairy and fermented milk products (yogurt, skim milk, cottage cheese) do not use galvanized iron containers, since there is a possibility of poultry poisoning from zinc oxide.
- For dry food, select a container into which you can pour a portion equal to the daily norm.
It is better to attach the feeders to the wall, which saves space in the feeder barn. For dry food, they are usually mounted at a height of 40-50 cm, a metal trough - at a height of 20-30 cm from the floor surface. The length of the feeder should be quite long so that each bird can easily eat. Otherwise, the geese will fight for a place near it. For 10 heads, feeders and drinkers with a length of at least 2 m are used.
The drinking bowl must be at least 60 cm wide and installed above the feeders. Its bottom should be 5-7 cm above the goose’s back.
Disinfection of the goose house and release of the birds
Before introducing a bird into a new home, it must be disinfected. This helps reduce the risk of infectious diseases and prevents the development of fungus in the room.
The new gooseneck is completely inside - the walls, floors, and ceiling are treated with lime mortar (for 5 liters of water, take 1 kg of lime and 100 g of salt). Then the house is ventilated for three days and bedding is placed on the floor. After all these preparatory procedures, the temperature in the room is brought to the desired level and the bird is released to its new home.
Disinfection of the premises should be carried out regularly once a year with the onset of warm weather. The flock of geese is driven out into the fresh air, and general cleaning of the barn begins.
All litter is completely removed. Walls and nests are cleaned and washed of dirt, droppings, cobwebs and whitened with lime. When preparing for winter, experts recommend treating some parts of the goose bark with additional lime. Drinkers and feeders are washed with a 2% solution of caustic soda, which is diluted in hot water.
"Summer house
In the warm season, geese can be kept in mobile houses if the number does not exceed 50 heads. This is very convenient, since the bird will be in the fresh air all day.
Mobile house for a small number of geese
The frame is made of bars, the walls are covered with plywood or thin boards. It is better to make a lattice floor - the slats are stuffed so that the geese's feet do not fall through. A pitched roof is covered with plywood or boards, but it should not leak. Feeders and drinking bowls are made either mounted or portable.
If you want to have healthy individuals, then you need to create comfortable living conditions for them. Whatever kind of poultry house you build for geese, the main thing is that it is dry and clean. In this case, the bird’s productivity will be at its best, and strong immunity will protect it from adverse factors.
0
0
Copy link
Hygienic treatment
When the gooseneck is built, it is necessary to prepare it for landing the birds.
- The walls and ceiling are whitewashed with lime. For this you need a 20% solution. It is prepared from 5 liters of water, 1 kg of lime and 0.1 kg of salt.
- The floor is disinfected with a solution of creolin or soda ash. To do this, add 200 g of soda or 0.5 kg of creolin to a bucket of hot water. After this, the goose coop is closed for several hours, and before releasing the geese, it is thoroughly ventilated.
- Equipment, drinking bowls and feeders are washed with a solution of ash lye.
- A thick (about 10 cm) layer of bedding is placed on the floor. This is necessary for the comfort of the geese, as well as for hygienic reasons. Dry peat, sand, and straw are used as bedding. First they are laid about 5-7 cm, then they are filled with more. In winter, the layer of litter may be larger.
Gooseneck project
Before starting work, it is important to carefully calculate all the parameters of the goose barn in which 20 geese will live. If you intend to keep exactly this number of birds, then, as already mentioned, you need to proceed from an area of 20 m2. You can take length and width dimensions of 10,000 mm and 2000 mm, respectively. It is also important to consider the following points:
- The height of the structure should be approximately the same as in the house - approximately 2200 mm. This is necessary not only for the convenience of a person in the poultry house, but also to ensure that the room is sufficiently ventilated. In poultry houses that are too low, the air circulates less well and too much moisture accumulates on the walls and ceiling, which leads to rotting of the wood over the years.
- The roof should have a slight slope to facilitate snow shedding and rainwater drainage. Therefore, the height of the rear side will be 1600 – 1700 mm.
- The room must have a sufficient number of windows . We can assume that their area is optimally at least 10% of the total surface of the walls. Adequate access to sunlight is especially important for geese during the breeding season. In this case, the windows should not be made too wide - you can make square holes with the parameters presented in the diagram.
- Along with the windows, it is important to correctly calculate the parameters of the entrance to the room - you can make 2 openings at once: one to use as the main entrance, the second for the goslings.
- At the site of the construction of the door to enter the poultry house, it is important to think over a small vestibule - a kind of canopy that will prevent cold air from penetrating directly into the room in winter.
Note! It is important to correctly orient the room to the cardinal directions. It is best to make the entrance and windows from the south or southeast side, where the maximum amount of sunlight falls.
Poultry house project with mesh
Poultry house close up
Layout of two paired modular poultry houses
Poultry house modification
Poultry house drawing
Construction
Before actually erecting a chicken coop for a summer residence, it would be a good idea to familiarize yourself with the existing photo projects of this structure. This will protect you from annoying mistakes that can lead to the death of birds and deterioration in their egg production.
During the process of building a chicken coop, you need to pay attention to the following important points.
Foundation
If the chicken coop structure is frame, then you can do without a massive foundation. When walls are erected from concrete or brick, it must be strong and reliable in order to support the entire structure.
In this case, you can use any type of foundation, without forgetting to do waterproofing. Moreover, if the chicken coop is built from planed boards, timber, or logs.
Floor
The coating and its quality will affect the health and well-being of the chickens. If the chicken coop will be used all year round, the floor will need to be insulated.
After laying the waterproofing material, sprinkle a thick layer of sawdust or sand on top, which is periodically cleaned and renewed. It is not advisable to spread hay or straw, since rotting may result in the formation of pathogenic microflora, which will lead to mass mortality of birds.
Walls
The warmest ones are wooden ones. The frame itself is sheathed inside and outside with thick plywood, planed boards or clapboard with insulation between the layers.
Ceiling and roof
The best option is a gable roof with insulation of the attic space. After the construction of the rafter structure, the roofing pie is installed and the covering (slate, corrugated sheeting, ondulin or metal tiles) is laid.
When the chicken coop is small enough, the attic floor and the ceiling itself do not need to be erected. It is enough to insulate the rafter structure well (lay the roofing cake).
Containers for feed and water
Feeders are divided into 3 types:
- for dry mixtures;
- for wet mash;
- for mineral supplements.
You can buy containers at a specialty store or make your own. When choosing materials (for self-production), you need to choose ones so that they do not sooner or later begin to rot due to the presence of high moisture (applies to mash). The containers are made airtight to prevent food consumption and are regularly cleaned of leftover food and debris.
The container for dry food is mounted on the wall (at a height of 0.4-0.5 m) from the floor. This will help save space in the poultry room. You can use a metal trough for wet mash; you can also hang it at a height (0.2-0.3 m from the floor).
The main criterion for food bowls is their length; it should be such that the birds do not start fights for food. For 10 geese, the length of feeders and drinkers should be at least 200 cm.
A drinking bowl can be any container that is installed so that it is located above the feeder.
Construction of a goose coop (chicken coop)
Upon completion of the creation of the poultry house project, you should prepare all the necessary materials and tools that will be needed during the work process:
- axe, saw, hammer;
- electric drill, screwdriver;
- tape measure, construction level;
- fastening elements (screws, corners, etc.);
- building materials (bars, mortar, sand, roofing elements).
Tools for building a chicken coop
Prices for popular models of jigsaws
Jigsaw
The process of building an object can be divided into the following stages:
- Preparing the foundation.
- Walling.
- Floor installation.
- Roof installation.
- Creation of windows and doors.
- Thermal insulation of the room.
- Arrangement of a goose coop (chicken coop) inside.
In order to obtain the most durable structure, it is important to take into account all the nuances during its construction at each stage.
Building a foundation: step-by-step instructions
Building a foundation with your own hands is not difficult, especially if we are talking about a simple strip foundation.
Strip foundation diagram
Step one: it is necessary to place markings on the territory according to the preliminary design. Then you will need to dig a trench, the depth of which will be about 50 centimeters and the width - 60 centimeters.
Sand and crushed stone must be poured into the prepared trench
Step two: now the walls of the trench should be lined with wood boards and filled with mortar. It is recommended to work with concrete as quickly as possible because it hardens quickly.
The slabs are specially wrapped in film so that they can be easily pulled out
Step three: after about two days you will need to cover the foundation with film and leave it like that for a while. In the absence of oxygen, the material sets evenly, which will avoid the appearance of defects on the surface.
After a few days, the shelter will need to be removed; the solution will dry out in the open air.
Step four: since most regions of our country experience severe cold in the winter, you will need to make good insulation for the poultry house from moisture. To do this, it is necessary to remove the surface layer of soil by about 25 centimeters.
Removing the soil layer
Step five: now the ground for construction will need to be leveled and sand filled to about 12 centimeters (if there is groundwater nearby). Next, you will need to level the area again and fill it with crushed stone.
The soil needs to be leveled
Important point! When building a poultry house in regions with extremely low temperatures, in addition to crushed stone, an additional layer of expanded clay (about 25 centimeters) should be added to insulate the floor. This material retains heat in the best way.
Step six: to strengthen the structure, it is necessary to build an additional layer above the concrete surface, which is called a blind area. It will be needed to protect the goose coop (chicken coop) from pests.
Concrete structure
On average, it is enough to wait about 14 days, then the solution will harden. Only after this can you begin to build walls.
Important point! At any stage of foundation construction, it is important to double-check all measurements using a level. This will allow you to achieve the most even structure possible.
Building walls: step-by-step instructions
Prices for construction boards
Construction boards
Step one: you need to deliver building materials to the site and cut them. For the lower part of the frame we will need a beam with a cross section of 10×10 centimeters. Before you start sawing the boards, they will need to be thoroughly dried and treated with an antiseptic.
Antiseptic will protect the poultry house structure from rotting
Step two: now you need to connect the bars of the lower base. The bars are overlapped and secured with fasteners (angles and self-tapping screws).
The bottom base is a large rectangular frame
Step three: next you need to install the vertical supports, keeping the gap between them. The racks and planks should be secured at an angle.
The supports must be reinforced with furniture corners
Step four: put logs on the base (we will fix them with corners) for the floor, and secure the boards.
The logs are fixed with corners
Step five: we begin installing the trim from above.
Assembling the parts of the upper frame
When constructing internal walls, it is necessary to take into account the distance for insulation and insulation. Typically the insulation layer is about 4.5 centimeters.
Features of floor construction
If desired, you can make a concrete floor or a wood floor - each option has certain positive and negative aspects.
Table 1. Floor materials in the poultry house.
| Material | pros | Minuses |
| Concrete | Not destroyed by fungi. In addition, this is the most airtight flooring option, because predators and other pests will definitely not be able to penetrate into the goose coop. | Concrete cools faster than wood, so birds may freeze. In addition, it practically does not allow oxygen to pass through. When it is heated strongly in the summer, a smell appears. |
Wood | This is the most environmentally friendly flooring option; it allows oxygen to pass through in the best way. Birds will be comfortable in such a room. Moreover, the timber is easy to install. | If the humidity in the poultry house is high, the wooden floor will quickly rot. In addition, it does not provide reliable protection against rats and other rodents. Wears out quickly compared to concrete. |
You should choose one option or another based on weather conditions in a particular region. The concrete floor can be insulated on all sides or an automatic heating system can be installed, which eliminates the possibility of hypothermia in the winter season. This flooring will definitely serve you for many years.
Concrete floor
The method of creating a concrete floor is quite simple - to do this, you need to level the sand over the surface, then lay a layer of expanded clay, and then install a reinforcement base. After which the surface is filled with a solution, which should be evenly distributed. The setting time for concrete is about a week.
Concrete floor
Important point! When pouring the floor, it is necessary to take into account that it should be at a slight slope towards the sewer hole where the liquid will drain.
Wood floor
The method of laying a wood floor has the following sequence:
- Laying the roofing material base on the foundation.
- Installation of supports that will serve as the base of the floor.
- Fastening the flooring to the bars.
- Insulation of the floor and fastening of finishing boards.
The wooden floor has the following device
Important point! Before starting work, the timber must be thoroughly treated with an antiseptic and dried.
Features of applying antiseptic
Prices for antiseptics for external use
Antiseptics for external use
Roof installation: step-by-step instructions
The roof can be made in two ways: with one slope or with two (as shown in the project). This is not fundamentally important, so the choice depends on personal preference.
There are certain requirements for creating a roof:
- the roof must be as strong as possible - this is necessary so that it can withstand even strong winds and the weight of snow;
- no moisture should enter the poultry house;
- The quality of the roof determines the degree of heat retention in the room - as you know, warm air is concentrated at the top.
Important point! It is necessary to pay special attention to roof insulation - this will save costs on heating the poultry house in winter.
Step one: when starting work on the roof, you first need to mark the rafters.
We put markings on the slats
Step two: now you need to secure the structure as shown in the photo. Roof frame connections can be made using special metal fastening plates with holes for nails or self-tapping screws.
The rafter mounts look like this:
Step three: you need to put the sheathing on the rafters. From the inside of the roof you will need to attach a layer of moisture insulation using self-tapping screws and wooden planks. Mineral wool (or any other insulation) is placed between the roof and the moisture insulation layer. Then a protective membrane from moisture is installed.
We make the roof sheathing and sheathe the walls with boards
Step four: the last step is to install the metal tiles.
Prices for metal tiles
Metal tiles
We complete the roof installation
Installation of windows and doors
Installing windows and doors in a poultry house is not difficult, but it is important to consider that at least one window must open - this is required to allow fresh air to enter the room. It is worth understanding that the lack of ventilation leads to rotting of the barn from the inside.
All other windows may not open. Any gaps after installation must be filled with polyurethane foam, in addition, you can use additional insulation - polystyrene foam, mineral wool.
Important point! It is recommended to install windows at a height inaccessible to geese and chickens, otherwise they may pluck out the insulation layer.
Poultry house covered with boards
What conditions apply to the poultry house?
Geese should be kept in warm, draft-free rooms. The poultry house is equipped with lighting and a ventilation system. If existing standards are not followed, the livestock will lose its productivity.
It is important to know. When calculating the area of a goose barn, it is important to take into account the standard stocking density: 1 individual per 1 m². If you house more birds than this standard, the room will begin to become polluted faster, and this leads to the development of pathogenic microorganisms and, as a result, to outbreaks of various diseases in geese.
Before starting construction, its location is thought out. High ground next to pasture land and water is ideal. In this way, you can provide birds with a sufficient amount of green mass in the summer and save on feed. In addition, if desired, geese will happily go for a swim.
The building is constructed in such a way that the façade is on the south side of the goose barn. A walking space is also set up here. For a fence, a fence or mesh is installed at a height of up to 1.5 meters. In the warm season, birds can be out for a walk throughout the day, but in this case you will need to take care of the presence of a canopy that protects the livestock from the hot sun and precipitation.
Choosing a location for a shed
Building a gooseneck with your own hands is not that difficult.
Initially, it is necessary to select a site, preferably in order to protect the premises from spring floods and groundwater. In the southern regions, where there is an excess of solar radiation, the goose barn is built with a facade to the southeast or west, in the northern and central regions - to the south, so that the sun's rays enter the barns.
The floors in the barn are made of adobe or wood; it is important that they are raised about 20 cm above ground level (plus or minus a centimeter, this is not a problem). This is necessary to ensure that groundwater does not enter the do-it-yourself gooseneck, creating dampness and leading to the development of diseases in geese.
The final part of construction
Each stage has its own nuances that must be observed so that the home made by hand will serve the farmer for a very long time. All information, that is, photos and videos, about how we build a home goose barn can be found freely available on the Internet. This will greatly facilitate understanding of all stages of the work.
A good goose house should include a room with flooring, nests, a drinking bowl and a feeder. When the bird feels comfortable, then it will normally gain all and lay a sufficient number of eggs. Setting up a home gooseneck is not an easy task, but it is profitable in terms of financial costs.
Construction stages
After the drawing has been made and the necessary materials have been selected, you can begin to build the room, starting with the foundation.
Laying the foundation
The work begins with marking the area. For a goose house you will need a strip foundation, its depth is ½ m. The bottom is covered with crushed stone and sand, and the ditches are filled with reinforcement and then concrete is used for filling.
The foundation must be raised above the ground by 0.2 m and insulation must be laid, the role of which can be played by bitumen or roofing felt. A dug trench around the perimeter of the room will be an excellent protection against small rodents. It is filled with clay with broken glass or aluminum cans.
Walling
You can build walls after the foundation has hardened. They should be approximately 2 m in height and 0.25 m in thickness.
If walls are erected from wooden materials, then the following technology is used:
- construction of a frame from beams;
- the outer side is covered with boards;
- insulation materials are laid out from the inside;
- boards are stuffed on top of the insulation in the second row.
Sawdust has good heat-retaining properties; in addition to them, you can purchase special materials with thermal insulation properties.
Brick or cinder block structures are plastered or covered with plywood from the inside. For exterior finishing, lining is used.
Floor arrangement
It can be made from concrete, wood or clay. You must remember to lay the drainage before working with the main materials. A gravel embankment is used as drainage. The floor is raised to a height of 0.2-0.25 m from the ground and a slight slope is made to wash away the slurry, which is removed from the gooseneck through grooves.
Window and door openings
Several windows are made on the south wall, which in their total area should be at least 10% of the surface area of the room. All existing doors must be insulated both outside and inside.
It is recommended to allocate a small space for the vestibule. It will provide protection from the cold in winter, and at the same time you can store equipment for cleaning the room here.
So that the birds can go outside for a walk without any obstacles, special manholes of 50x50 cm are made. It is important not to forget that the floor is above ground level, and then it will be necessary to attach ladders leading to the manholes from the outside.
How to build a roof
There is nothing complicated here. The roofs themselves can be either single-pitched or gable. It doesn’t matter which option is chosen, it still won’t hurt to insulate it. Sawdust or special materials with thermal insulation properties are useful here. Some farmers set up an attic that serves as a storage area for feed supplies.
Interior arrangement
In this case, the entire room inside needs to be divided in half: one part will contain adult livestock, the other will contain young animals.
When constructing partitions inside, you need to remember that the barrier structures should not interfere with cleaning the room and not embarrass the geese. Wooden slats are reinforced between the compartments and a fine-mesh mesh is stretched between them. The use of a coarse mesh can lead to injuries to birds, for example, during a showdown, a goose will get its beak stuck in the mesh.
Instructions for building a gooseneck with your own hands
After choosing a place to build a poultry house, perform the following tasks:
A hole of this size is dug if it is planned to keep few geese in the barn
Cinder blocks can be used as a material
An adobe floor is a good option for a goose barn
Construction of a gooseneck
Before starting work, draw a detailed drawing of the gooseneck, indicating the dimensions. This stage will help you correctly calculate the amount of material needed. The step-by-step construction of the gooseneck looks like this:
- Pouring the foundation of the goose barn
. For a medium-sized poultry house, it is enough to stay on a strip foundation with a trench depth of about 50 cm. Inside the concrete perimeter, remove the top layer of soil using a shovel, add a layer of sand, and a layer of crushed stone or expanded clay on top (mainly for the northern regions of the country).
- Construction of the walls of the goose barn
. The frame of the poultry house is built quickly. Install the strapping beam along the bottom, attach the vertical supports at equal intervals, and finish with the strapping along the top. Strengthen the corners of the frame with additional posts. For cladding, use clapboard or wooden beams. - Laying the floor of the goose barn
. There are 2 flooring options: concrete and wood. The concrete floor is durable and will not require repair or replacement, but it is necessary to additionally insulate the room, since concrete freezes quickly. - Choosing a gooseneck roof
. Gable or single-pitched, the roof must be strong and protect from precipitation. Do not forget about high-quality roof insulation, since the main heat loss occurs through the ceiling.
- Installation of gooseneck windows
. There should be a lot of windows in the room, ideally if they are directed to the south. Make the windows blind, but be sure to install one window that can be opened for regular ventilation of the room. - Insulation of the gooseneck
. The choice of insulation depends on the humidity in the room and the possibility of air ventilation. If the room is regularly ventilated, choose synthetic materials; if the region experiences high humidity, give preference to natural insulation materials. Hide the material well behind the interior decoration; geese love to pluck insulation from the walls.