0
2033
Article rating
Owners of musk birds try to provide the most comfortable conditions for the growth and development of their pets. One of the important elements is nests for indo-ducks, which are organized according to all the rules of keeping. Their convenience and functionality ensure good results in breeding a new population of birds.
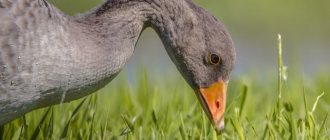
Choosing a location for a nest 600w, https://pro100ogorod.ru/wp-content/uploads/2018/09/shutterstock_0-39-300×225.jpg 300w, https://pro100ogorod.ru/wp-content/uploads/2018/ 09/shutterstock_0-39-90×68.jpg 90w" sizes="(max-width: 600px) 100vw, 600px" /> Organ
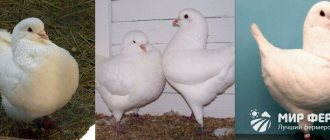
Duck selection
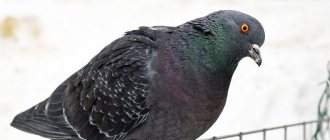
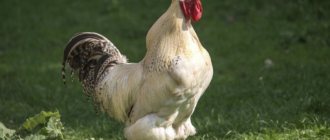
la indoutok
Socket requirements
The main requirement for a future nest is its maximum comfort. The mating season for musk ducks begins in February, and therefore it is worth starting the construction of the missing houses at the same time. After all, after mating, egg laying begins.
The main requirements include:
- nests are placed in a shaded, dry and warm place where the ducks will not be disturbed by people or other inhabitants of the poultry yard;
- sudden changes and drafts are not allowed;
- the bottom of the houses is lined with bedding, either straw or sawdust is used;
- the room should have moderate lighting;
- the nesting house is equipped with a threshold to prevent eggs from rolling out.
With a large flock of ducks, you need to track them so that the birds do not start fighting for the nesting place. A calm and quiet area is ideal for breeding, and therefore it is best to place the brood hens separately from other birds.
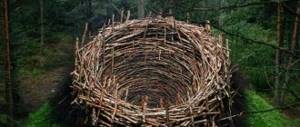
Example of nesting houses
Often, musk ducks themselves find a suitable (from their point of view) place to make a nest. Often it may be located outside the home farm, and therefore the poultry farmer should take care that waterfowl nest in the desired area.
It is important to know. If other ducklings appear in the place where the hen is located, then there is a high probability that the egg clutch will be abandoned in order to care for the chicks. This turn of events leads to the death of the unhatched offspring.
Do-it-yourself barn for indo-ducks
To breed any poultry, you will first need to create a permanent structure in which the animals can feel good throughout the year.
Creating a room for ducks and indo-ducks (duck house) with your own hands from available materials and means is a fairly simple task.
It is only important to correctly develop the project, draw up a drawing and select materials taking into account the climatic conditions of your region.
How to provide maximum comfort for ducks
Before you figure out how to build a duck house in a country house or on a country plot, you need to familiarize yourself with several requirements that apply to the premises, regardless of the climatic conditions and the types of birds that are supposed to be kept there:
The area of the duckling house is calculated as follows: 3 adult ducks live on 1 square meter.
- First of all, you need to decide on the size based on the area that you are ready to allocate for the duckling. The rule, which is derived from many years of farming experience, is this: no more than 3 adult ducks should be placed per 1 m2 .
- The minimum area of the premises should be the same as a room in a house: 16 m2. It is not worth building less, because otherwise it will be quite stuffy in the coop, and the birds will feel crowded and may begin to conflict.
- Since ducks are kept on the floor, and not on poles, like many other birds, special attention must be paid to the surface: the floor must always be dry and warm, even in the most severe frosts.
- Maintaining a constant temperature and humidity level (minimum 5°C and maximum 65%, respectively) is a very important requirement for a capital structure. From this point of view, you need to take care of the thickness of the walls and provide for the creation of natural ventilation in advance.
- It is very important that the shelter has a sufficient number of windows - usually 2-3 small holes are made, the total area of which is at least 10% of the total area of the walls.
- In regions with severe winters, a vestibule must be provided in the room so that upon entry cold air does not immediately penetrate inside.
- Next to the duckling house, you need to provide a place for a summer aviary, where the ducks will go immediately upon exiting.
Important.
Even the orientation of the building to the cardinal points is important: the entrance and windows should be located on the south side so that the birds receive the maximum amount of sunlight - this is good for health.
Types of ducklings
Basically, the variety of types of premises is associated with the choice of material and its dimensions, depending on the number of heads. However, two large groups of structures can be distinguished - a summer duck house and a winter one.
The duckling can be summer or winter.
Summer duckling
This is an option for a temporary structure that needs to be erected in the summer so that the ducks can walk, swim and eat greenery as often as possible.
This has a very beneficial effect not only on the bird’s rapid weight gain, but also helps strengthen its immunity.
In addition, the taste of meat from ducks that had the opportunity to eat in the natural environment and swim in ponds all summer is much better.
A summer duckling house is a pen that can be made in just a few hours.
To make it, it is important to choose the right place:
- it should be smooth and dry;
- be located in the open sun;
- at the same time, have natural or artificial canopies so that birds can hide in hot weather;
- If possible, have a small pond where ducks can swim and feed on small aquatic animals.
The sequence of actions is quite simple:
- A site is selected and the necessary markings are made.
- Metal pegs or wooden beams are placed at corners and intermediate points at intervals of no more than 1 meter.
Their height is selected based on the calculation: for adult ducks, the pen must have sides of at least 1.5 meters, for ducklings - 2 times less. To build a summer duck house you don’t need a lot of material. - The supporting beams should either be dug in half a meter deep, or they should be further strengthened.
- A metal mesh with a cell size of no more than 20*20 mm is attached and stretched to the supports.
- An entrance door is made for the farmer, which can also be made from beams, mesh and mounted on fastenings.
It is interesting that farmers often build such pens when they buy a large batch of ducklings for which a major duckling house is not yet ready. They are kept in the pen temporarily until the winter quarters are ready. Capital summer pens, built next to the main ducklings, are discussed in the corresponding section.
https://www..com/watch?v=NK6ziGzs2A4
Note. In the summer pen, it is necessary to install a drinker and a feeder - along with greens, the ducks will need a small amount of regular food. It is better to change the water daily - in the open sun it quickly heats up.
Winter duckling
All other types of premises are winter shelters. These are what they mean most often. They are permanent structures designed mainly for comfortable wintering of ducks. At the same time, the winter duckling is always combined with the summer one. This means that in summer the birds should have free access from their premises to the aviary, where they will walk, eat greenery and swim.
You can also make separate pens that will be specifically designed for ducklings. An important advantage of such structures is that they are mobile: it is easy to take pegs with a net attached to them and move them to the desired location.
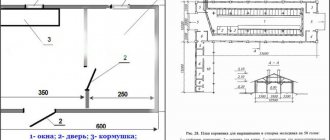
The photo shows a drawing of a warm duck house with a walk.
Preparatory stage
During the preparatory phase, it is important to complete the following steps:
- Choose a place for the future duckling.
- Decide on its size based on the expected number of livestock.
- Select construction material and finishing materials.
- Select all the necessary tools.
- Draw up a project and drawing of the structure.
The tools for creating a duck shed are ordinary construction tools that can be used to build any shed:
- screwdriver, electric drill, grinder;
- hammers, axe, saws;
- tape measure, level, rope, ruler, pencil;
- fastenings (bolts, self-tapping screws, nails, screws, metal corners, staples).
As for the choice of material, this point depends directly on the specific project of the room:
- A frame duck house made of wooden beams must be insulated with mineral wool and other materials that allow moisture to pass through well.
To build a duck house, you can use wood or other building material. - If you build a duck house from cinder blocks, this is the cheapest and easiest way, but in regions with a Siberian climate, additional insulation will definitely be needed. In addition, the cinder block material is destroyed quite quickly by moisture - accordingly, a large layer of waterproofing is also useful.
- Finally, a duck house built from a log frame is the most expensive option, although it is durable and also warm. In addition, wood does not create a greenhouse effect. The only condition is that the material must be well treated with varnishes, stains and other impregnations to prevent rotting. And again you will need waterproofing.
The calculation of the amount of material and, accordingly, the project estimate is made based on the parameters of the structure and the surface area of the cinder block, timber or frame wall.
Building a duck house with your own hands: step-by-step instructions
The construction of a duck shelter is in many ways similar to the construction of a permanent barn in terms of the main stages and work technology. The difference lies in the last stages: the duck house must be carefully equipped inside, ventilation must be created, lighting must be installed, the walls and floor must be insulated, etc.
Construction of the foundation
First of all, you need to lay the foundation. Building a shed on a foundation is a much better decision than building it on the ground: water will constantly evaporate from the soil, increasing the humidity inside. In addition, it is planned to build a duck shelter for many years to come.
It is enough to create a regular strip foundation:
- The area is being prepared and appropriate markings are being made.
- The trench must be made at least half a meter deep and wide.
- Next, a wooden fence is laid from the inside, concrete is poured, and carefully leveled. At each stage, the quality of work should be checked using a building level.
- The solution completely hardens in a few days.
First of all, you should make a foundation for the duck house.
Reference. Since ducks sleep on the floor, laying a monolithic foundation is impractical - concrete gets very hot both in winter and summer. It is also important to fill the space between the foundation strip with a layer of sand and crushed stone. In regions with harsh winters, it is a good idea to use expanded clay: it retains heat well.
Walling
This stage directly depends on the selected material. Cinder blocks and a log frame are laid on the base using standard technology.
If a frame structure is to be erected, it is constructed from wooden beams:
- The lower beam and vertical supports are installed - load-bearing elements of the structure.
- The lower and upper strapping is done. All elements are connected “groove to groove” or using metal corners of appropriate sizes.
- All intermediate supports are placed with a maximum step of 50 cm to make the structure more reliable.
Construction of floor and roof
For a duck house, a shed roof is most often used - the standard roof is laid out from wooden beams with intermediate steps that correspond to the wall supports. For large structures, gable roofs are erected, which are made using the same technology.
The roof of the duck house can be gable or single-pitch.
As for the floor, on one side you can leave a dense mound of expanded clay, which needs to be well leveled and added periodically as it settles. On the other hand, you can construct a wooden flooring - wood retains heat well. In this case, all beams must be carefully treated with a protective varnish to avoid rotting.
Duck training
Young muskies or individuals that have moved to a new farm are not always able to understand where to lay eggs, and therefore may begin to lay eggs on the floor or ground, which means the owner will have to try a little to accustom the birds to their new nesting houses:
- It is recommended to install nests in the fall, then waterfowl will have enough time to get acquainted with the structures and choose a cozy place for themselves;
- plaster, chalk or plastic eggs are laid in the houses, at the sight of which the duck quickly guesses where the place for laying is;
- An equally popular method is to put the duck in a house for a while;
- when collecting egg products, it is recommended to do this without the knowledge of the birds, because the ducks no longer consider the nest safe, abandon it and set up a new place for laying.
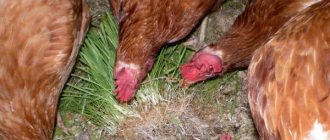
Duck chooses a nest
How to make a shed for an Indian duck
Breeding and raising ducks is a profitable and exciting activity. Ducks are unpretentious birds and their maintenance does not require any special knowledge or conditions. You can keep ducks in any shed or room that meets certain requirements.
This type of poultry is raised mainly for meat. Compared to chicken, duck meat is much fattier, has a darker color, rich taste, and large fibers.
Ducks are also distinguished by a relatively high egg production, but duck eggs are rarely eaten; they are mainly intended for incubation. You can also get down from this bird, which is suitable for making blankets and pillows. Duck droppings, in turn, are valuable fertilizer.
Be that as it may, keeping poultry involves creating optimal conditions for normal development and growth, in particular, the construction of duck houses (rooms for keeping ducks), equipping them with the necessary equipment, as well as the construction of pens for walking in the warm season.
Completing of the work
After checking that everything is at hand, you can begin building nesting houses in the following sequence:
- Boards or beams are marked and then cut to the required size.
- All parts need to be fastened together to form a wooden box that will serve as the bottom of the nest.
- The walls are growing. Here it is convenient to use plywood, chipboard or other material at the discretion of the owner. The extension is carried out to the required height.
- They make a round or square hole so that the bird can get into the house. A small threshold is also installed.
- The roof is constructed from the same materials as the walls.
- The house is ready, and the ducks can be introduced to it.
Placement of nesting sites
The most secluded and quiet place with moderate illumination is suitable for the nest. In addition, you need to remember that near the houses it is necessary to place containers with feed, water, as well as a bathing trough. Waterfowl must have the opportunity to eat, drink, swim and at the same time be in close proximity to the masonry. The most optimal distance would be 0.5 meters.
How to place nests
It is not worth placing all the houses in one part of the room. To set everything up correctly, it is recommended that you familiarize yourself with the following rules:
- houses should not be located far from feeders and drinkers (this will help maintain order in the poultry house);
- nesting boxes are placed in such a way that the back part is located towards the entrance (this will prevent the birds from seeing who is entering the room and reduce panic).
The humidity percentage in a home with musky waterfowl should be maintained at 60-70%. The bird reacts negatively to excess dampness. With the onset of cold weather, it is recommended to turn on the heating devices, and in the heat, spray the floors and walls with water to maintain a favorable microclimate.
Types of nests
You can make a nest for a duck with your own hands not only from wood; other materials are also suitable. Very often used:
- barrels;
- tin containers;
- baskets;
- cardboard boxes;
- plastic boxes.
It is not necessary to make some kind of special nest; improvised objects that the birds especially liked will also work. The placement rules have already been described above.
Using a tin bucket for a nest
When making nests, it is worth considering the dimensions of the muzzles. If the farmer already keeps some poultry, then the use of an area where chickens roost should not be used, as well as adapting chicken houses for waterfowl, since they have some differences, which can be found in the following table.
| Dimensions of the nesting house | Muscovy ducks | Chickens |
| How many nests are needed per livestock? | 1 for 3-4 heads | 1 for 5-6 individuals |
| By depth | 40-55 cm | 40 cm |
| By height | 40 cm | 30 cm |
| Width | 30-40 cm | 30 cm |
Ducks should have no difficulty entering the nesting box. Experienced poultry farmers recommend making individual nests for each bird; they should be placed in different places in the room. If such placement is not possible, partitions are made.
Selection of premises
The room for indo-ducks should be warmer than a regular chicken coop. Cages or a lightweight summer house are not suitable for these birds. During construction, you should immediately organize insulation of walls and floors so as not to worry in winter. Ideally, build a log barn and line it with bricks on the outside. But this option is quite expensive, so each owner chooses materials based on their financial situation.
When building a warm shed, special attention is paid to the floors and bedding. The feet of musk ducks do not have a fat layer, but are equipped with an extensive network of blood vessels
High sensitivity of the limbs is a big problem in breeding South American ducks. In cold weather, the paws freeze, which leads to the death of birds. Therefore, the floors of the room must be raised above the ground, additionally insulated with mineral wool or slag, and covered with a thick layer of bedding. It is best to lay wooden floors, and put a layer of linoleum on top for warmth and comfort. Clay floors will be warm, but they are not very hygienic. If the floor is concrete, then the bedding should be thicker than on the wooden version.
The concrete floor in the barn for turkey ducks is poured using a special technology. First, 15 cm of soil is poured to raise the surface, 10 cm of crushed stone is poured onto the soil, compacted and covered with mortar.
If it is necessary to adapt an existing outbuilding for breeding musk ducks, then it is insulated with mineral wool, slag or other material. It is best to plaster the walls of such a shed and cover 80 cm from the floor with plywood sheets or boards. In the room, be sure to cut a window and insert a double frame with a window.
The room for indo-ducks should be well insulated
When building a premises with your own hands, the owner must take into account the breeding of how many individuals he plans to breed. The area of the building is determined as follows: every 3 birds must have 2 m² of living space. The height of the house is approximately 1.8 to 2 m.
Possible problems
Beginning poultry farmers are advised to familiarize themselves with the difficulties that arise when setting up brooding areas in order to be prepared for them:
- Ducks refuse to lay eggs in specially equipped houses. You can place a false egg or move your favorite container into the poultry house.
- When placing several birds in one nest at once, the problem is solved as follows: the egg clutch is placed in equal numbers in different houses, and one of the birds is placed in another room. Indian women independently find a way out of this situation.
- Sometimes confusion of nests occurs (if the houses are located nearby). Here the owner can independently seat the females in their places.
Nest chosen by a duck
Successful breeding of Muscovy ducks is impossible without proper organization of places for incubation of eggs. If everything is done correctly, the birds will hatch their offspring perfectly and will delight the owner with numerous offspring.
We invite you to join our Zen channel and group on VKontakte or Odnoklassniki, where new articles are published, as well as news for gardeners and livestock breeders.
Similar articles:
- Raising musk ducklings, how to get a healthy and strong bird?
- Breeding Indian ducks naturally, what problems may arise?
- How to incubate turkey eggs?