Icer
13492 0 0
Icer September 6, 2016Specialization: master in the construction of plasterboard structures, finishing work and laying floor coverings. Installation of door and window units, finishing of facades, installation of electrical, plumbing and heating - I can give detailed advice on all types of work.
In this article I will tell you how to insulate a shed from boards with minimal cost. This technique has been used for hundreds of years and has proven its effectiveness even in harsh regions. I am sure that this option is available to anyone, and to implement it, you need a minimum set of materials and devices, which is important, because no one wants to spend significant money on a shed.
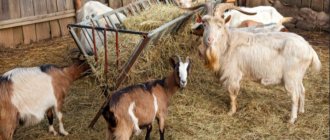
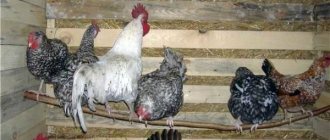
In the photo: a barn for animals and poultry must be insulated
Insulation inside
It is advisable to carry out internal work on insulating the shed in advance, in the summer.
Otherwise, you will have to come up with a place to temporarily house the animals while repair work is being carried out in the barn. Like external insulation, internal insulation is carried out in several stages. Each of them has its own characteristics, so it is worth considering them in more detail.
Walls and floor
It is better to start interior work from the floor. It is through it that a lot of cold air penetrates inside (Figure 2).
A budget option for floor insulation is as follows:
- The surface is leveled and compacted. Next, pour and compact a layer of soil. It should be 10 cm above the surface of the soil outside.
- Wet clay is mixed with straw and left for 2 days. The result is an organic insulation material – adobe.
- It is laid out on the floor in a layer of up to 10 cm and allowed to dry. This usually takes several weeks, but the result is a warm floor that does not absorb moisture and feces.
Figure 2. Floor insulation options
The disadvantage of such an adobe floor is that debris and dirt accumulate on it, so you will have to clean up after the animals more often.
But there is another insulation option:
- The floor in the barn is deepened by 15-20 cm and leveled. If the surface is uneven, add a small layer of expanded clay.
- 25-30 cm of expanded clay is poured onto the leveled surface. This material perfectly resists cold, so the barn will be warm even in severe frost.
- Next, the beacons are placed, boards or metal profiles are laid and a screed is made. Its layer should be at least 5 cm.
After completing the floor work, they move on to insulating the walls. This process is simple, but requires care and attention, since even small cracks can cause drafts (Figure 3).
Step-by-step instructions for insulating walls:
- The cracks are sealed with polyurethane foam, tow or dry moss.
- Next, make a frame from timber or boards. The distance from the inner edge of the frame to the wall should be 30 cm.
- Insulation is poured into the resulting space. The most budget option is to use sawdust. They are mixed with lime in a ratio of 1:15 to protect the wood material from moisture and pests.
Figure 3. Stages of wall insulation
If desired, the surface of the frame is further processed. To make it easier to maintain the barn in the future, the walls are plastered and then whitewashed with lime.
Ceiling
Most barns have a gable roof. The attic is usually used to store hay or other feed. Dry grass is an excellent heat insulator, but to additionally retain heat, you will have to insulate the ceiling inside the room (Figure 4).
In sheds with a pitched roof, insulation is carried out inside. To do this, a metal or wooden frame is stuffed over the entire surface of the ceiling, insulation (mineral wool or polystyrene foam) is placed inside, and then the frame is sewn up with sheets of plasterboard or wooden boards.
Figure 4. Thermal insulation of the ceiling is carried out from the attic side
Finishing is carried out in the same way as for walls.
Thermal insulation of doors
Even in a well-insulated building there will be drafts if you do not take care of insulating the doors (Figure 5).
To prevent drafts from coming through the door, do the following:
- The structure is hung on reliable hinges. After insulation, the door will become much heavier, and the hinges must support its weight.
- A strip is nailed from the outside around the entire perimeter. Several jumpers are installed inside. Insulation is placed in the resulting cells. You can use mineral wool, but it will make the door very heavy, so many people prefer polystyrene foam.
- To prevent the structure from becoming saturated with moisture, the outside is covered with film or a sheet of corrugated sheeting.
Figure 5. The door also needs insulation, since cold air penetrates through it
From the inside, the cracks in the door are closed by nailing boards or sheets of thin plywood onto them.
DIY barn insulation technology
How to insulate a shed? The technological process is not complicated. It does not require highly qualified workers or the use of expensive equipment. To carry out the work, general construction skills are quite enough; the owner of the barn can do it with his own hands. He will be required to be careful and strictly follow technological recommendations and safety regulations.
Materials and accessories
To insulate a shed using mineral wool or penoplex you will need:
- insulation;
- wooden slats or metal profiles for guides;
- waterproofing film;
- vapor barrier membrane;
- Double-sided tape;
- polyurethane foam;
- mounting knife;
- screwdriver;
- jigsaw or circular saw;
- self-tapping screws;
- measuring tools: tape measure, ruler, square, level.
To insulate the shed, you may need a waterproofing film.
You should also equip a work place for cutting material indoors or under a canopy. It should be spacious and level and well lit.
Wall insulation
The method of insulating walls depends on the selected material. If you decide to work with bulk insulation, such as sawdust or expanded clay, you will need to build a second wall connected to the main one with wooden vertical logs at a distance of 10-15 cm from the main wall of the barn. The boards of the second wall are laid horizontally, nailing them starting from the bottom. Every half meter of height you need to stop, fill in the insulation flush with the top board and tamp it down.
If sheet material, mineral wool or penoplex is selected, proceed as follows:
- a waterproofing film is attached to the outer wall from the inside;
- then wooden planks or a metal profile of the guides are vertically fixed to the wall;
- sheets of insulation are laid between them;
- cracks and gaps are tightly clogged with scraps or blown with foam;
- A vapor barrier membrane is attached on top of the insulation along the guides.
Now you can attach the internal cladding from thin boards, plywood, OSB or moisture-resistant gypsum board.
Floor insulation
A budget method for floor insulation is as follows:
- mix chopped straw with clay;
- Apply clay to the floor in a layer of 10-15 cm, level and tamp.
The top of this floor is sprinkled with sawdust or straw, which is changed periodically. For goats and sheep, it is recommended to make beds 20-30 cm high from the floor level; the animals willingly spend the night on them and do not freeze.
Straw with clay - a way to insulate the floor in a barn
A serious method of floor insulation involves removing soil to a depth of 30-40 cm, filling it with expanded clay, and making a clay or cement screed. Wooden floors are used less frequently in animal housing buildings. They are insulated using polystyrene foam or penoplex. Mineral wool is not used because it will inevitably get wet from urine and water spilled from drinking bowls.
Ceiling insulation
Up to half of all heat loss passes through the ceiling.
To properly insulate the ceiling, you need to proceed as follows:
- A vapor barrier is spread over the rough ceiling; for this you can use polyethylene film, roofing felt or a special vapor barrier membrane.
- Insulation is laid on top of the vapor barrier on the rough ceiling: sawdust, straw with lime or expanded clay;
- it is covered with a waterproofing layer on top.
If there is no rough ceiling in the barn, sheets of foam insulation are attached directly to the roof sheathing using disc dowels and adhesive.
Spraying polyurethane foam onto the roof from the inside is very effective.
We insulate the doors
If the door is an uneven opening in the wall, somehow closed with a cracked shield made of slabs on rope loops, there is no point in insulating such a “door”.
You will need to install a normal door frame, seal the gap between it and the doorway with foam, and hang a solid wood door.
The door leaf can be upholstered with foam insulation 6-8 mm thick. This will double the door's ability to resist cold. The porch is insulated by gluing strips of foam rubber or a sealing rubber profile around the perimeter of the frame.
Windows are also insulated in the same way. To preserve heat, old windows are covered with polyethylene, pressing it against the wall with a glazing bead.
The first method is cladding with boards.
The outside of the barn can be covered with boards according to the principle of brickwork, closing the gap between two boards with a third. The walls are covered with slate in the same way as when covering the roof. In addition, the shed can be sheathed with boards from below. Sheets of slate are placed higher, and then timber is stuffed.
During the work process, insulation is poured between the walls, which needs to be compacted with something. Pine needles, fallen leaves, and sawdust can be used as insulation. These materials are mixed with lime in a combination of one to twenty-five. This avoids problems such as rodents between the walls. The ceiling also needs to be hemmed, and the same composition must be poured on top. Boards are placed above the rafters and covered with roofing felt in several layers, which must be nailed down with wooden slats at a distance of half a meter. The lower part of the barn can be lined with slate on both sides, which will protect the room from rodents and predatory animals.
The bottom of the barn is insulated by filling the floor with soil, 10 cm below the main floor, and then laying and compacting the clay mortar.
The door is made of boards knocked down diagonally, with a layer of roofing felt placed between them so as not to let out heat.
We insulate the floor
As you know, the coldest air is always from below (in this case we will not consider the principle of operation of a heated floor). If the barn is not permanent, then at best it is installed on a shallow, uninsulated strip foundation, and often this is not even visible. One can only guess how frozen the ground is. A blind area with insulation will seriously help, but not every person will consider it advisable to do it. Some people sprinkle manure, reeds or leaves around it and cover it with clay, and in the spring this structure is removed so that the walls do not rot. The method is peculiar, but when there is frost on the walls and floor inside the building, then at least something is better than nothing.
To insulate the floor, you can add soil along the entire perimeter of the building to raise the level by 10-15 cm, and then pour clay on top and compact it all. This floor can be sprinkled with sawdust, which must be changed periodically.
Making a clay floor
You can also knead clay with straw and make a clay floor.
More serious thermal insulation is performed in permanent premises made of stone, blocks or bricks. In this case, the foundation is insulated with penoplex, a thorough blind area is made, and from the inside (if there is a need) the floor is insulated, and then a concrete screed is poured.
The situation is somewhat different with a barn built on stilts.
Insulating the roof of a chicken coop
When planning a construction, it is recommended to think about the attic and make a structure with a reliable black ceiling. Subsequently, bedding and feed material can be stored there.
In relation to the finished structure, almost the same materials are used (to insulate the roof, additional waterproofing and vapor barrier are used), only the fastening methods change:
- Vapor barrier (vapor barrier films, membranes) is the protection of insulation from moisture that is produced inside the building.
- Waterproofing (roofing felt) serves the same purposes, but is laid outside to protect the insulation from precipitation and condensation formed due to temperature changes.
Step-by-step instructions for insulating a chicken coop
Based on cost, the most convenient type of insulation is polystyrene foam and mineral wool. Before starting insulation, the following tools are required:
- electric drill;
- roulette;
- screwdriver;
- level;
- assembly knife for cutting foam plastic;
- construction stapler;
- hacksaw.
Next, the material is calculated for the entire room. List of materials:
- timber for making a frame (4/4cm);
- sheets of polystyrene foam or polystyrene foam;
- self-tapping screws (for installation in wooden walls), dowels (for hard surfaces);
- mineral or basalt wool;
- vapor barrier film;
- any available panel material (plasterboard, plywood, reinforcing mesh).
The walls are insulated first. The procedure is as follows:
- Along the entire surface of the walls, timber is vertically reinforced at a distance of 60 cm (the width of the insulation). To do this, a beam of the required length is mounted with fasteners (screws, dowels) to the wall, thereby creating a frame for laying insulating material.
- The vapor barrier is fixed with the rough side to the wall. The film is secured with double-sided tape or a construction stapler.
- The next thing to install is insulation. This can be a sheet of foam plastic, mineral wool, or both, depending on the thickness of the walls and climatic conditions. The material is installed on top of the film and tightly joined to the beam. The foam is fastened using umbrella dowels (large diameter cap).
- The final stage is to cover the foam sheet with panels or attach a reinforced mesh. Next, the walls are plastered with cement mortar.
To insulate the roof from the inside, use the same sequence of actions as for the walls. Before the cold weather begins, it is necessary to check the condition of the roof to prevent it from leaking. After the work has been done to insulate the room, the outside walls can be insulated in the same way, but plastered fairly well.
Insulation quality control
It is impossible to visually assess the quality of insulation, because possible imperfections are located inside. Usually for these purposes they resort to a thermal imager, but in the case of a chicken coop this is not advisable. Therefore, quality control is carried out at the stages of material selection and proper installation. Possible errors may lead to the following:
- if the material is chosen incorrectly, cracks appear due to shrinkage;
- If the installation rules are not followed, the vapor barrier seal is damaged, and the lack of ventilation leads to the walls getting wet and freezing.
To be sure of the quality of the purchased material, you need to pay attention to the following points:
- proven, well-known brand of the manufacturer;
- selection of material with suitable characteristics;
- product integrity.
High-quality installation of insulation will guarantee their long-lasting service and preservation of heat in the room throughout the winter.
What symptoms indicate that a chicken cannot lay an egg? More details about this, as well as what to do in this case, are written here.
How to properly raise Linda geese at home? We talked about this in our article.
Cost of insulation
Depending on the size and manufacturer, the price of packaging varies:
- Foam plastic - from 2000-2500 rub.
- Mineral wool from 400-1000 rub.
- Basalt wool from 400-1200 rub.
- Foil penofol - from 300-1700 rub.
- Waterproofing – from 250–400 rub.
- Penoplex - from 100-400 rub.
- Vapor barrier - from 200-2000 rub.
Insulating a chicken coop is a necessary measure for wintering chickens, which guarantees the preservation of livestock and egg production for the entire period. Properly organized insulation allows you to create optimal conditions for birds at different times of the year.
Heating system installation
Most modern poultry farmers prefer electric heaters as the safest and most affordable. You can install them yourself without any special skills. They can heat a room of any size.
Infrared lamp
Infrared lamps (IR lamps) are highly efficient, converting energy into heat. They do not pollute the air in the chicken coop; after switching on, they quickly warm up the area they are aimed at.
The disadvantages of lamps include their high cost and short operating period.
For additional heating of a thoroughly insulated chicken coop with an area of 30 square meters. m and a ceiling height of 200–240 cm, it is enough to install 2 IR lamps, each with a power of 250 W. Lamps are suspended from the ceiling, placing them in those areas of the house where maximum heat is required (for example, above nests, perches or a cage with chickens).
IR lamps should be equipped with a thermostat or dimmer (power regulator) in order to avoid overheating of the room.
Important! When installing an IR lamp, you must remember that it itself gets very hot. It is hung from the wooden ceiling not close, but at a distance of 30–50 cm
Or they protect the attachment point with asbestos plate. It is better to take ceramic lamp sockets.
Heater
An IR heater is mounted like an IR lamp (Cozy Warmth, Good Warmth). Its heating area is larger than that of a lamp. It is more reliably protected from overheating. Only ceiling models should be installed in the poultry house so that chickens do not have the opportunity to come into contact with the unit. The cost of an IR heater starts from 2700 rubles.
A popular way to heat a chicken coop is to install a household fan heater or heat gun inside. Not the most economical option, spending up to 1 kW of electricity per hour, but suitable for quickly warming up a room. The fan built into the heater quickly moves air around the room, mixing cold and warm layers. The fan heater has the ability to dry the air.
The unit is installed on the floor or attached to the wall so as to prevent birds from accessing the heater. It is necessary to regularly clean it from dust and feathers, which often accumulate inside the unit.
Heating is a radical way to make the barn warm
If winter has caught you suddenly, and the barns with animals turned out to be poorly insulated, a radical way to increase the temperature inside the premises is to provide heating for the winter. Heating can be electric or wood-burning. In the first case, heaters are used, in the second, a stove is built. Heaters are a temporary solution to the problem, but the stove should be installed even in insulated rooms.
The fact is that thermal insulation does not warm, but only prevents heat from leaving the barn. The stove will allow you to quickly and at no extra cost heat the air for a comfortable life for your pets. What to make the stove from is up to you. Just keep in mind that brick structures take a long time to heat up, but then take a long time to cool down. Metal stoves heat up almost instantly, but then cool down just as quickly.
Insulated doors will help conserve heat inside the barn. It is best if the door leaf consists of two independent halves. To let animals out into the yard or into an enclosure for walking, all you need to do is open the bottom door. Warm air accumulated from above will not be able to leave the room. And in the summer, the upper half will make it easier for you to clean the barn - through it you can throw fresh manure outside.
If you live in a private house, then you have some opportunities that residents of government apartments do not have. You can grow your own vegetables and fruits, have your own livestock and treat yourself to fresh, organic products. True, the cattle still need to be kept somewhere. And here they go to great lengths - they drive the poor cattle anywhere, even into premises that are completely unsuitable for that purpose.
In this article we will try to give recommendations on how to insulate a shed yourself.
Nests
In the process of arranging a bird’s home, it is extremely important to make nests and fix them on the wall. During this work, it is necessary to adhere to certain recommendations:
the number of nests directly depends on how many laying hens will be housed in the house
There should be at least one such structure for every five laying hens; The nest should be about 30 cm wide, 40 cm deep, and 35 cm high; it is allowed to combine nests along one line, but they must be fixed exclusively in the dark part of the room at a height of only 0.5 m; It is extremely important that the entrance to the nest is wide (at least 25 cm in width and height). It should be raised from the bottom of the nest by at least 5 cm
Thanks to such a small threshold, the eggs will not roll out onto the floor; You need to fix a shelf next to the nest, from which it will be convenient for the birds to take off; The slope of the roof on the nest should be about 45 degrees. Thanks to this special design, laying hens will not be able to sit on it, and accordingly the nest will not be contaminated with bird excrement; Be sure to put hay or straw in the nest.
In order to attract laying hens to the nest, it is recommended to place a dummy egg in it. Experienced poultry farmers have noted that in the presence of this simple element, birds begin to lay eggs much more willingly.
It often happens that chickens begin to shit in the nests and stay overnight in them. To avoid this, they should not be placed on the floor, but rather placed on the farthest wall. Closer to nightfall, the nests can also be covered, since chickens do not lay eggs at night.
You also need to make sure that the birds have containers in the barn for drinking, eating and taking ash and sand baths. There are many variations of such designs that can be made with your own hands without much effort. For those poultry farmers who were able to build a barn on their own, manufacturing these necessary elements will clearly no longer be a problem. Having equipped the bird's home with everything necessary, it will be possible to immediately move birds into it.
How to insulate a shed from the outside with your own hands - step-by-step diagram
Step 1: Create a frame for the walls
The back wall of the frame will be the existing wall surface, and we will put together the front wall from boards. Even those that are not quite even will come in handy. What about the cracks? There is one proven technique - the boards are nailed with an overlap! First, two boards are nailed to the bars, leaving space between them for the third. The middle one is inserted so that the upper part fits under the first board, and the lower part covers the second board on top. You will get a “Christmas tree” through which no wind will break through. The advantage of this design is that it is protected from drying out, because if we simply nailed the boards together, sooner or later large gaps would form between them.
Step 2: Fill the frame with insulation
The space between parallel walls can be insulated with your own hands in different ways. If funds allow, buy mineral wool or fill the voids with polyurethane foam. However, initially we agreed to save money, which means it’s time to remember the methods of insulation for the winter that our grandparents used. What could be simpler than sawdust! The material is almost free - at the nearest sawmill there is at least heaps of this stuff, you can bargain with the watchman for a bottle of something stronger.
It is advisable to take sawdust that is dry and small. To prevent rodents from infesting them, it is enough to mix the wood with fluff lime - 1 part of lime is enough for 25 parts of sawdust. When insulating with sawdust, the space between parallel walls should be at least 25 cm. The prepared material is covered in layers, constantly tamping. Over the next two weeks, the insulation will still shrink - do not forget to add more sawdust after some time.
Heating
There are times when thermal insulation alone is not enough to maintain a comfortable temperature, especially when there is bitter frost outside. As a rule, in such situations, suitable materials are purchased for the purpose of additional insulation of the building. They can be installed on walls, floors and ceilings
In addition, it is very important to remember to insulate the window structures and the entrance to the chicken coop. Otherwise, cold air will penetrate into the building through the remaining cracks.
For windows, it is best to use special masking tape. As for door cracks, you can get by using polyurethane foam, as well as insulating the door leaf itself.
In addition, for the purpose of additional heating, fairly powerful incandescent lamps are often installed in chicken coops. It is permissible to install special heat fans. Such products can be programmable, and they are what experts recommend for purchase because they are very easy to use. They may have time and temperature adjustments.
A good solution for heating a chicken coop is infrared lamps. Such products do not affect the surrounding air, but rather objects that fall within the range of their rays. Infrared lamps must be installed correctly, for example, above perches, as well as above the floor. But you need to take into account that if you turn them on and off frequently, these bulbs burn out quite quickly and require replacement.
Generalization
Building a barn for keeping poultry is the most important point. The dimensions of the building will depend on the number and breed of birds. For example, to keep broilers even in the countryside, it is necessary to allocate a fairly large area for them, because the birds have a large build and already weigh about 3 kg at 2-3 months. For such representatives, the recommended stocking density is no more than one bird per 1 square meter. m. In a summer cottage, you can use an old barn that was left over from other animals, properly converting it to meet the needs of poultry. To set up a winter poultry house, you need to take care of insulation. The shed needs to be insulated on all sides:
- the walls are covered with metal sheets with foam panels laid in them;
- the floor can be insulated using corrugated sheeting;
- the ceiling is insulated with felt.
The inside of poultry houses should be equipped with a simple ventilation system, access to the walking area, perches where the birds have sweet dreams, as well as feeders and drinkers. For feeding, it is better to prefer automatic designs
They allow you to save maximum time and ensure constant access to feed, which is very important when keeping broilers that must eat to their heart's content
After birth, chickens are kept in separate warm rooms or a brooder is built - a special warm container with an infrared lamp for heating and round-the-clock illumination; details can be found in many photos on the Internet. Some novice poultry farmers try to replace the structure with a cardboard box, but it is better when the chickens and chicks are in the barn. This method is only suitable as a temporary brooder; if you plan to raise poultry in the future, you will have to build a real house for chickens.
Floor insulation
Thermal insulation work on arranging a chicken coop begins from the floor. Any material can be chosen from insulation materials. This could be peat moss, straw or sawdust shavings.
To create a temperature of +26… +28 °C, deep bedding is required. If you lay a thin layer of insulation, the thermal insulation properties will be low.
Due to its low thermal conductivity, peat moss is often used as a thermal insulation material.
Moss peat for insulating the floor of a chicken coop
Peat moss is a universal material with absorbent properties. It efficiently absorbs moisture and chicken droppings.
Thanks to this, there are no unpleasant odors in the room, which makes the material an ideal insulation material. Birds do not suffer from dermatitis and various skin diseases, since their paws always remain dry.
In spring, the litter is removed and the beds are fertilized with it.
Straw as insulation for a chicken coop
The use of straw is the most popular option for floor insulation, since it has the ability to accumulate heat and retain it for a long time.
The material is laid more than 20 cm thick. During operation, the straw cakes and its layer becomes smaller. Because of this, the temperature in the room decreases.
To prevent this, 10 cm of straw is regularly added on top. To make the bedding soft, dry grass is laid on top of the straw. The material to be laid must be of high quality, free from mold. Otherwise, the mold will spread throughout the deck and expose the birds to serious illness.
Wood shavings and sawdust for heating the chicken coop
Tree shavings make good bedding for a chicken coop. It is poured in a thin layer onto the main flooring to add softness.
Coniferous sawdust is considered the best because it contains essential oils. The floor surface is covered with pine sawdust and small shavings in a ratio of 1:3. The litter tends to cake, so it is regularly loosened.
How to insulate a chicken coop for the winter with your own hands
For the proper development of birds, it is very important to observe not only feeding conditions. But also the temperature! For example, it is necessary to maintain certain thermometer readings at each stage of chicken growth
When the chicks are just born, they need a stable ambient temperature of 29 - 30°C Celsius. Such indicators can be achieved with the help of brooders - special devices for raising young animals.
As the birds grow, the temperature is lowered to +18 - 20 degrees Celsius. And the birds are transplanted into a chicken coop.
If you want to raise chickens in the cold season or in northern regions, you need to take care not only about the presence of brooders. An important aspect of farming is the insulation of poultry housing.
Every farm owner should know how to insulate a chicken coop for the winter with his own hands. To achieve the required temperature in the room, you need to study the work procedure in detail. It is necessary to insulate the floors, walls, ceilings and roofs. Don't forget window and door openings too.
Note! Chicken coops must be equipped with a ventilation system. Because ammonia accumulates in the air
Therefore, the ventilation system will provide access to fresh air.
How to insulate a shed for almost nothing - a description of the simplest way to carry out the work
In this article I will tell you how to insulate a shed from boards with minimal cost. This technique has been used for hundreds of years and has proven its effectiveness even in harsh regions. I am sure that this option is available to anyone, and to implement it, you need a minimum set of materials and devices, which is important, because no one wants to spend significant money on a shed.
In the photo: a barn for animals and poultry must be insulated
How to insulate doors and windows
Most heat leaves the room through doors and windows
Based on this, door and window openings need to be given the greatest attention. How to properly insulate a chicken coop? Thermal insulation is very important
If there are windows, it is necessary to install a second glass. Another effective way to insulate window openings is to use plastic film, which is attached to the strips at a distance of 1.5 cm from the glass.
Window insulation film
It is imperative to use a sealant; it is necessary to seal all existing cracks in the frames and windows. Additional insulation will be required on the side of the window hinges. For this purpose, you can use either self-adhesive store-bought insulation or a felt strip that is nailed to the frame.
Insulation of the loop circuit
If the chicken coop is in the design process, make sure in advance that the windows are small in size - the larger the glass area, the more intense the heat loss. One small window on the sunny side is enough - on the east or south wall. For the winter, you can install double frames, and in the summer, replace them with a regular mosquito net or one layer of glass. To insulate a barn for chickens with the onset of cold weather, the windows must be insulated with a special plastic film, which will subsequently prevent them from freezing in the winter. The film does not in any way prevent the penetration of sunlight into the chicken coop.
The window in the chicken coop should not be too large
It is also better to place the door in the south, so even in winter it can be opened slightly to ventilate the chicken coop. The doorway, like the window, should not be too large.
The door to the chicken coop should be small but convenient
However, keep in mind that it should be convenient for you to carry out all the necessary work to care for the birds and maintain the chicken coop in proper condition - changing the bedding on the floor, cleaning, removing manure, etc.
The door must be insulated. In severe frosts, the doorway is additionally covered with a rug or an old carpet. The doorway can be insulated using dense film insulation.
Shingling - an environmentally friendly way
Clay and straw are another budget option for do-it-yourself insulation, which, moreover, is absolutely safe from an environmental point of view. To this day, clay and straw are used to make adobe (lampach, roller, clay block) - clay bricks that combine both insulation and the basis for the walls of a barn. Straw mixed with clay acts as a reinforcing material, so the clay does not crack or crumble.
Under a layer of plaster, adobe can last for many decades. So if you intend to build a shed for the winter from scratch, consider this budget option. In the villages, clay bricks used to be made by all relatives - it would be a reason to get together. If the barn has already been built, the option with clay and straw is still relevant. Do-it-yourself insulation of the barn should be done from the inside - a mixture of materials is applied to pre-prepared shingles.
General points
For a chicken or turkey to lay eggs well, it must be healthy.
That is why it is so important to pay enough attention and effort to building a high-quality, strong and warm poultry shed. Most novice farmers do not dare to have livestock due to the lack of suitable premises for their maintenance, believing that they cannot afford to build from scratch. However, if you carefully study the issue, which is what we will do in this article, it will become clear that building a good-quality chicken coop is not only not difficult, but also not so expensive
However, if you carefully study the issue, which is what we will do in this article, it will become clear that building a high-quality chicken coop is not only not difficult, but also not so expensive.
Choosing a location for a bird shed
First of all, you need to choose the right place for construction. In this case, it is necessary to start not only from considerations of the square footage of the future barn. Keep in mind that poultry waste products emit a rather strong unpleasant odor, so if the barn is located on the leeward side, the odors will constantly be directed towards the residential building. It is best to place sheds for animals and poultry at a sufficient distance from residential buildings next to a toilet or cesspool.
The dimensions of the object being built are directly affected by the free area of the site. The best place to build a shed is on a small hill, then in the cold it will not need to be heated additionally, and in the warm season it will warm up faster. In addition to the space for the barn, it is necessary to allocate an area for walking poultry - this is a prerequisite for the comfortable and healthy well-being of pets. Its area should exceed the area of the barn itself by 2-3 times.
You can build a chicken coop using existing plans developed by professional builders and experienced farmers, or you can take one of them as a basis and create your own unique poultry shed design, ideal specifically for your site. At the end of the article you will find several examples of chicken coop designs.
Bird shed dimensions
Poultry is quite unpretentious in keeping, but this does not mean that it does not need care and attention at all. Remember, the more comfortable your chickens and turkeys live, the better they will lay eggs. In this part of the article you will learn how to arrange a poultry barn according to all the rules.
The chicken coop must be durable, warm and safe. This is a kind of smaller copy of a residential building, the residents of which should feel safe and comfortable in it. It must have ventilation and lighting. It is not at all necessary to conduct electricity there - you can install several windows for natural light.
Birds are social animals, but they still require personal space. Otherwise, strong individuals will begin to dominate the weak, peck at them and fight. To avoid this, it is better to think in advance about how many chickens will permanently live in the barn and, based on this, calculate the area of the room. No more than 4 chickens or 3 turkeys can be placed per 1 m².
Inside the barn you need to install nests, perches, feeders and drinkers. It is best to place the perch as far as possible from the front door, since the bird will rest there, and therefore it is better not to disturb it again. In this case, the perches should be slightly inclined, but just enough so that the chickens can move freely along them. Usually, to make a perch, wooden beams with a diameter of up to 5 cm are used, the upper part of which is rounded so that it is convenient for the bird to clasp the pole with its paws. The beams are installed parallel and in several tiers, maintaining a distance of at least 25 cm (up to 40 cm), between the floor and the lower beam there should be 40-50 cm. Experienced farmers advise making a perch in 4 tiers, attaching the beams to the walls using hinges.
As for the equipment of nests where birds will hatch eggs, you can use wooden boxes (for vegetables and fruits) or baskets to make them. Use hay or straw as soft, warm bedding, which is periodically replaced with fresh one. One nest can accommodate 3-5 laying hens.
At the bottom of the barn door you need to make a closable hole (miniature hole) approximately 30 cm high. It is necessary for the birds to freely exit to the walking area.
So, based on the above information, you can calculate the exact dimensions of the future chicken coop and walking area. A barn for 10-20 chickens will occupy an area of 2x3 m, and the walking area should be several times larger.